Edit the Project Hierarchy
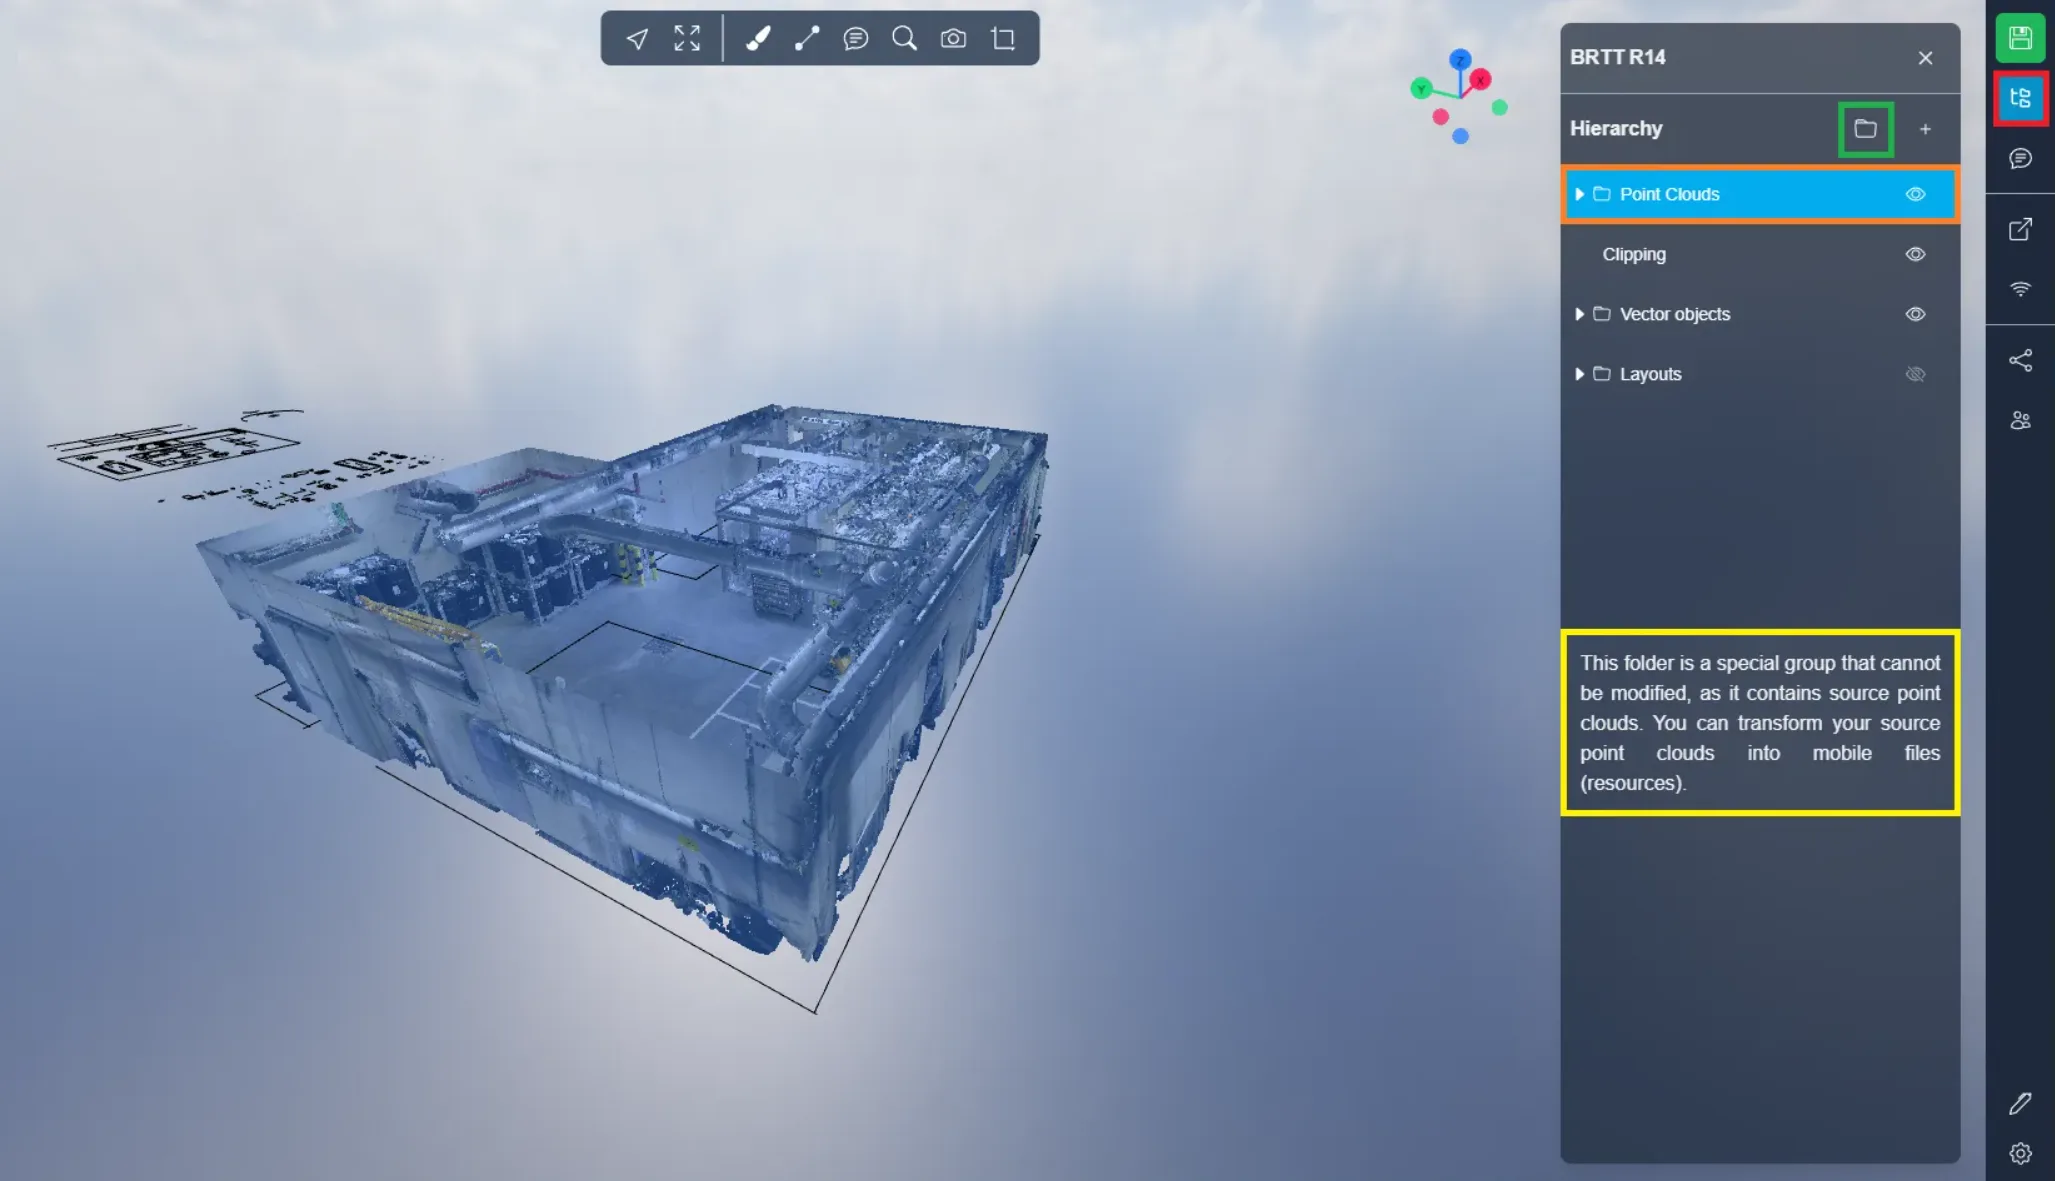
You can open the project menu by clicking on the 2nd button in the right menu.
By default, you will see the “ Point Clouds ” folder, containing your point cloud(s). This folder is fixed and cannot be moved, we will see that the other folders can be moved.
You can create a new folder, with any name you want, by clicking on the folder icon.
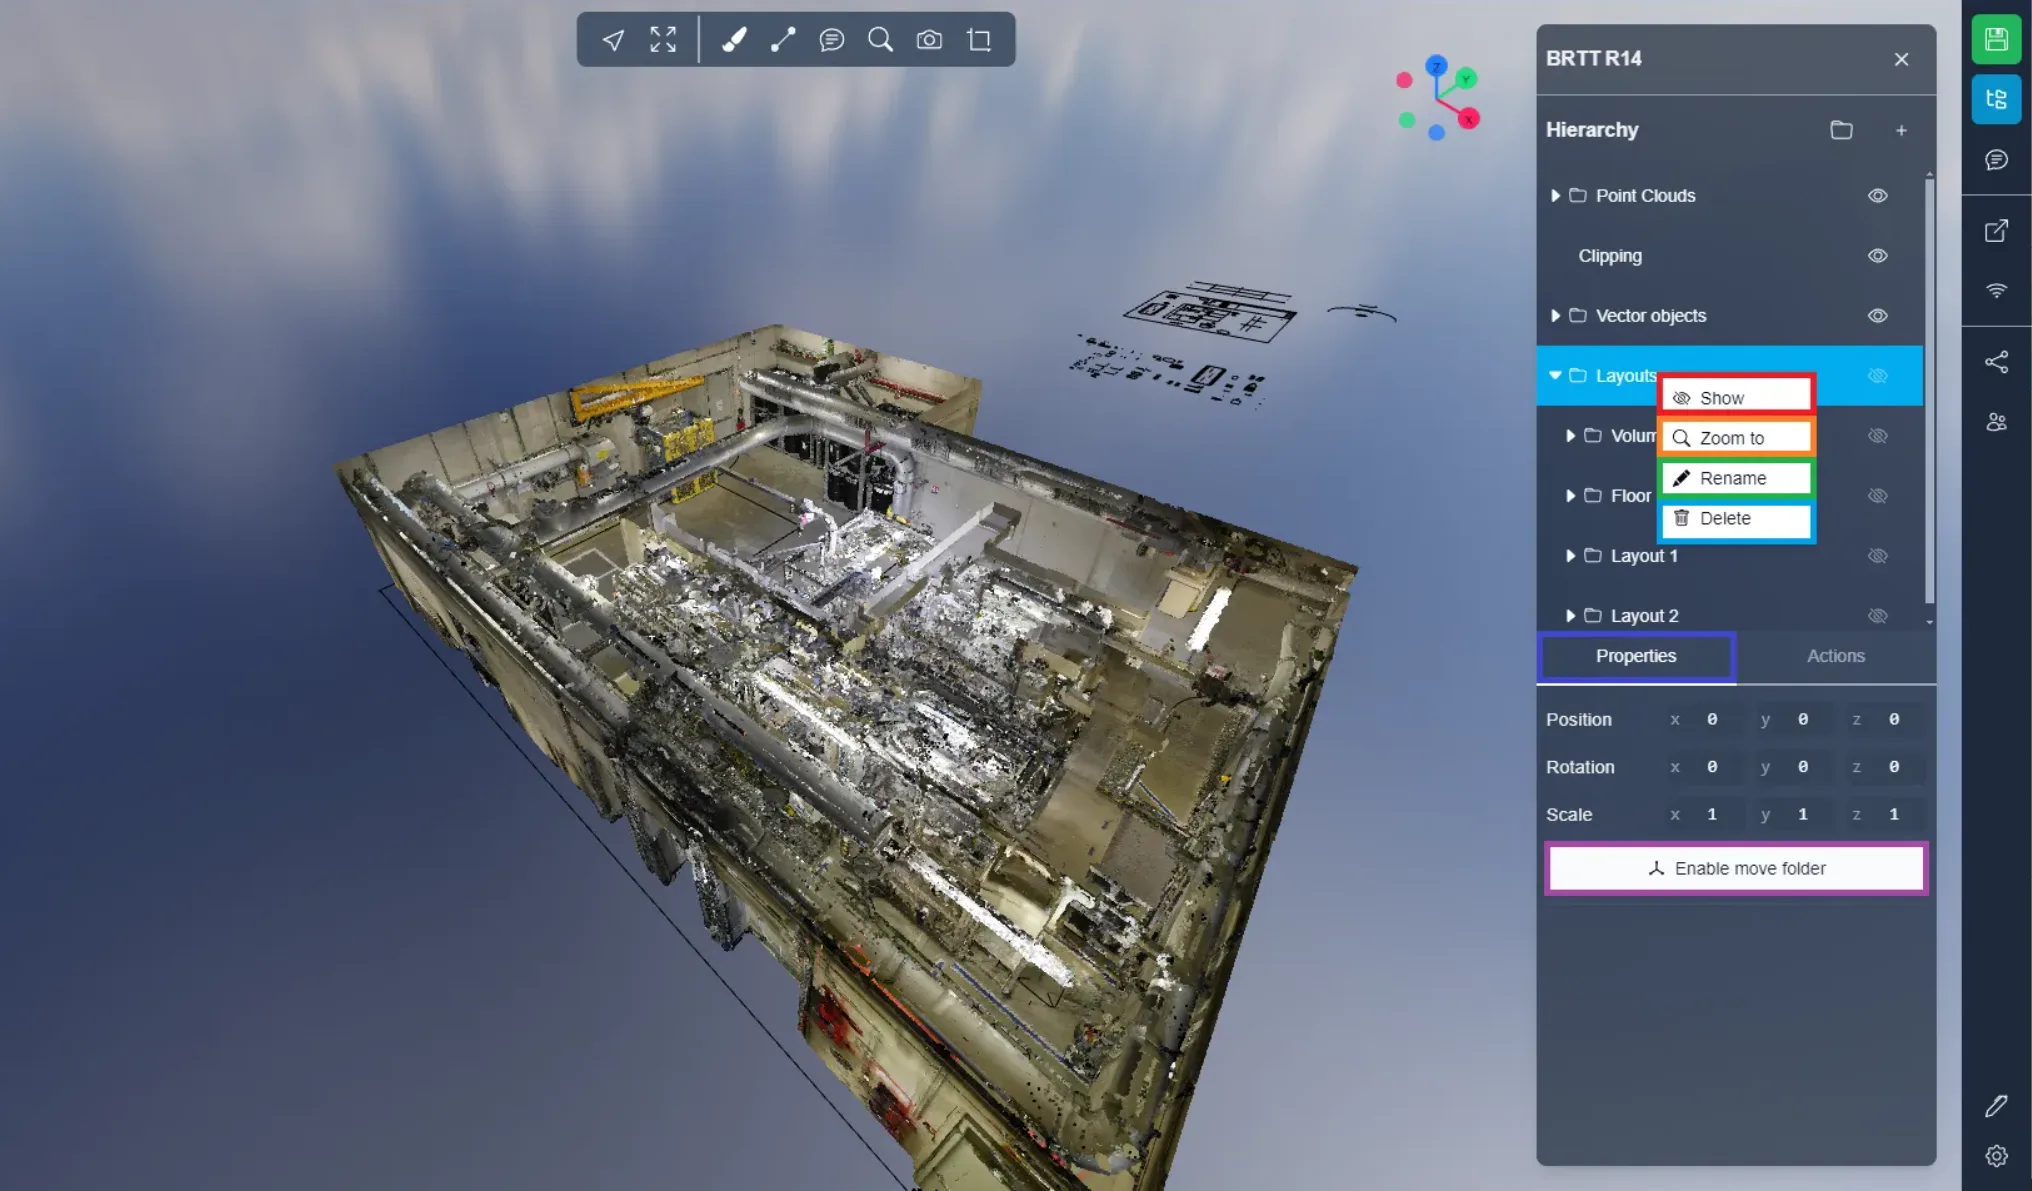
An already created folder can be modified, simply right click on it. The same goes for all elements of the 3D Application, point cloud, model, measurement, etc.
The possible actions are:
- Show : Shows the item or folder and all its children.
- Zoom to : Zoom in on the selected object, same as a double click.
- Rename : Allows you to change the name of an item or folder.
- Delete : Deletes the item, be careful, deleting a folder will also delete all the children.
As said previously, it is possible to activate folder movement, this allows you to move all the elements contained in a folder, in a single block. You will find this option in the settings of each folder. Please note, a folder with a point cloud as a source cannot be moved, it is necessary to transform the point cloud into a resource first.
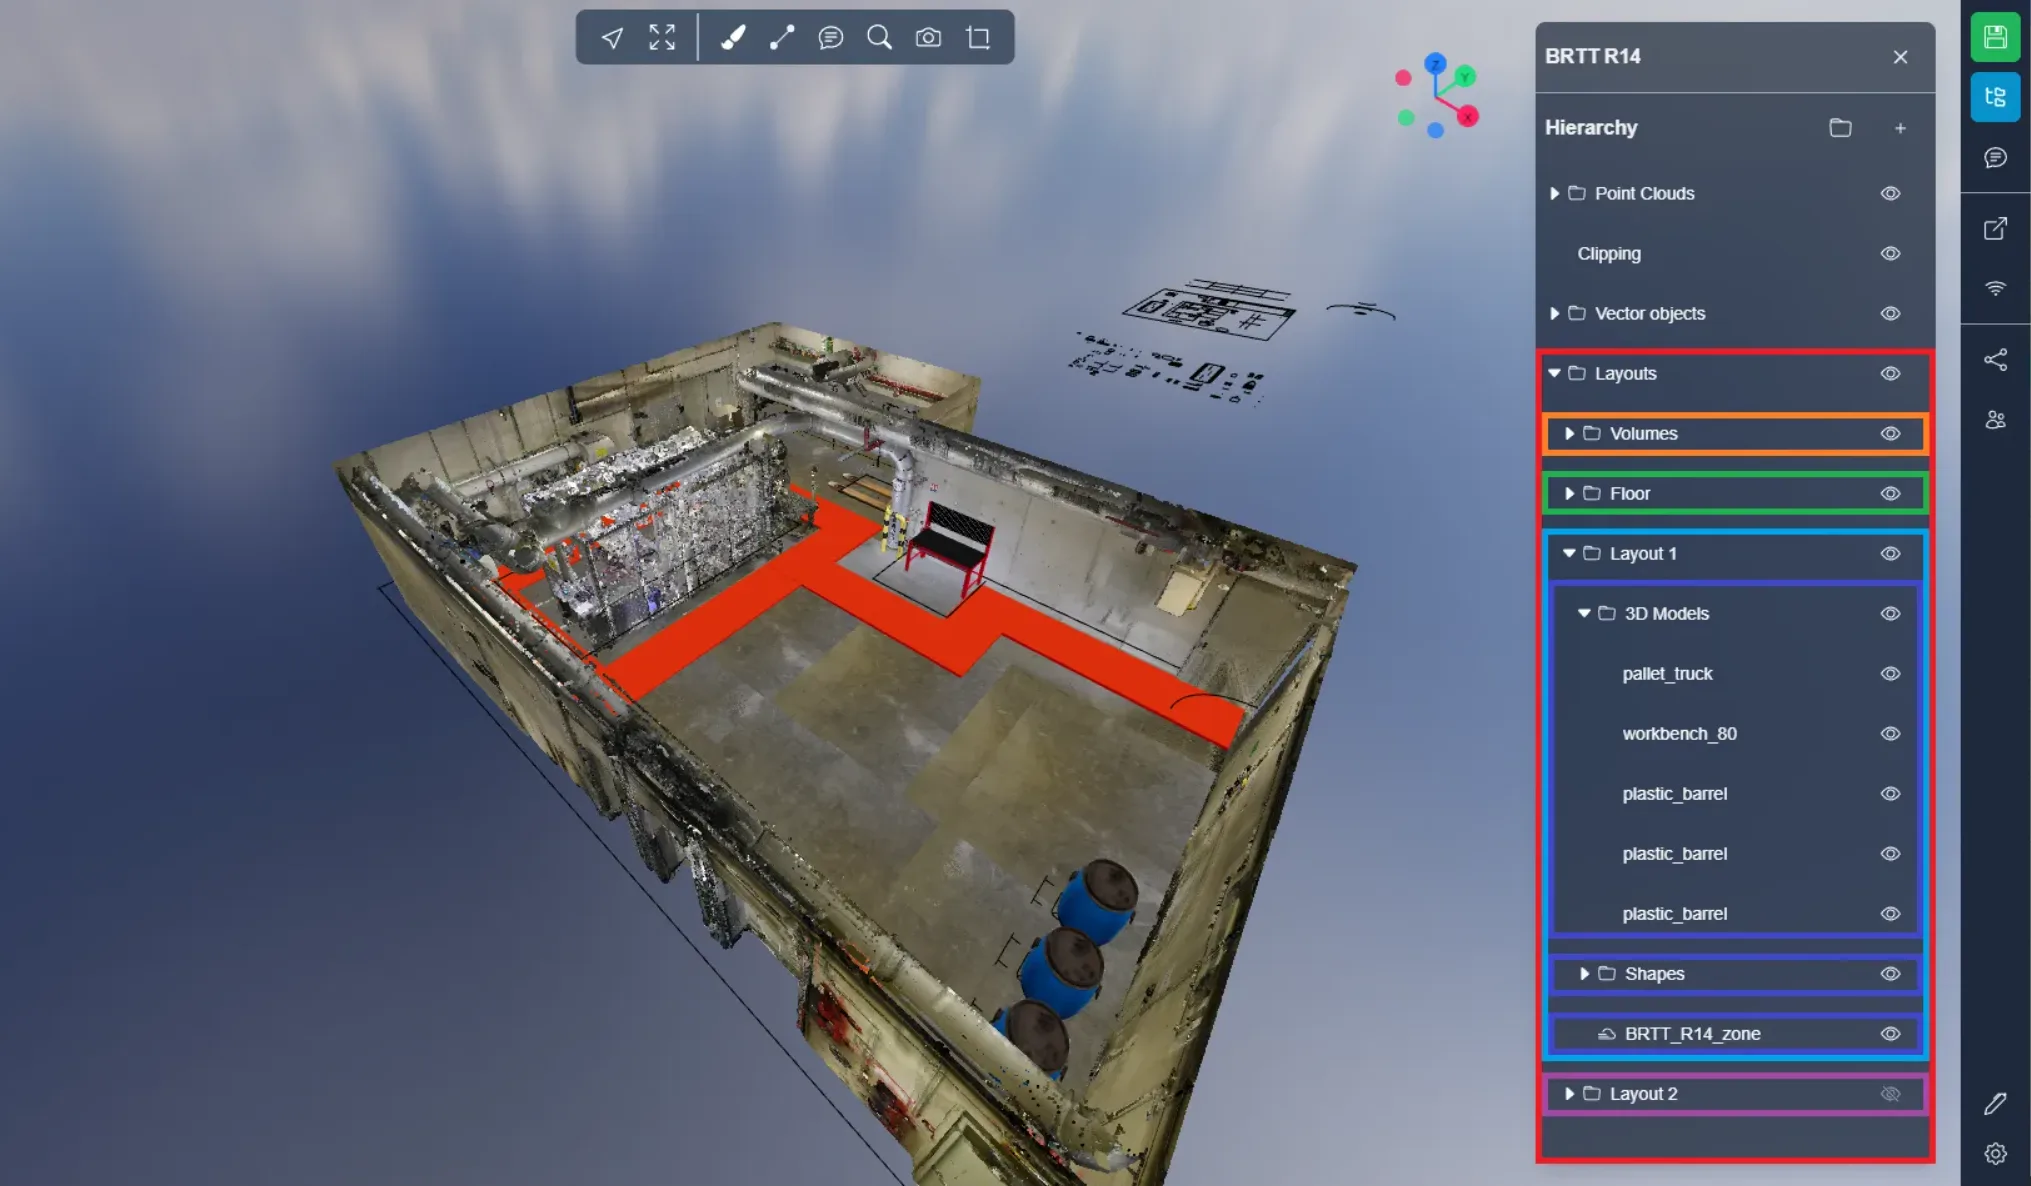
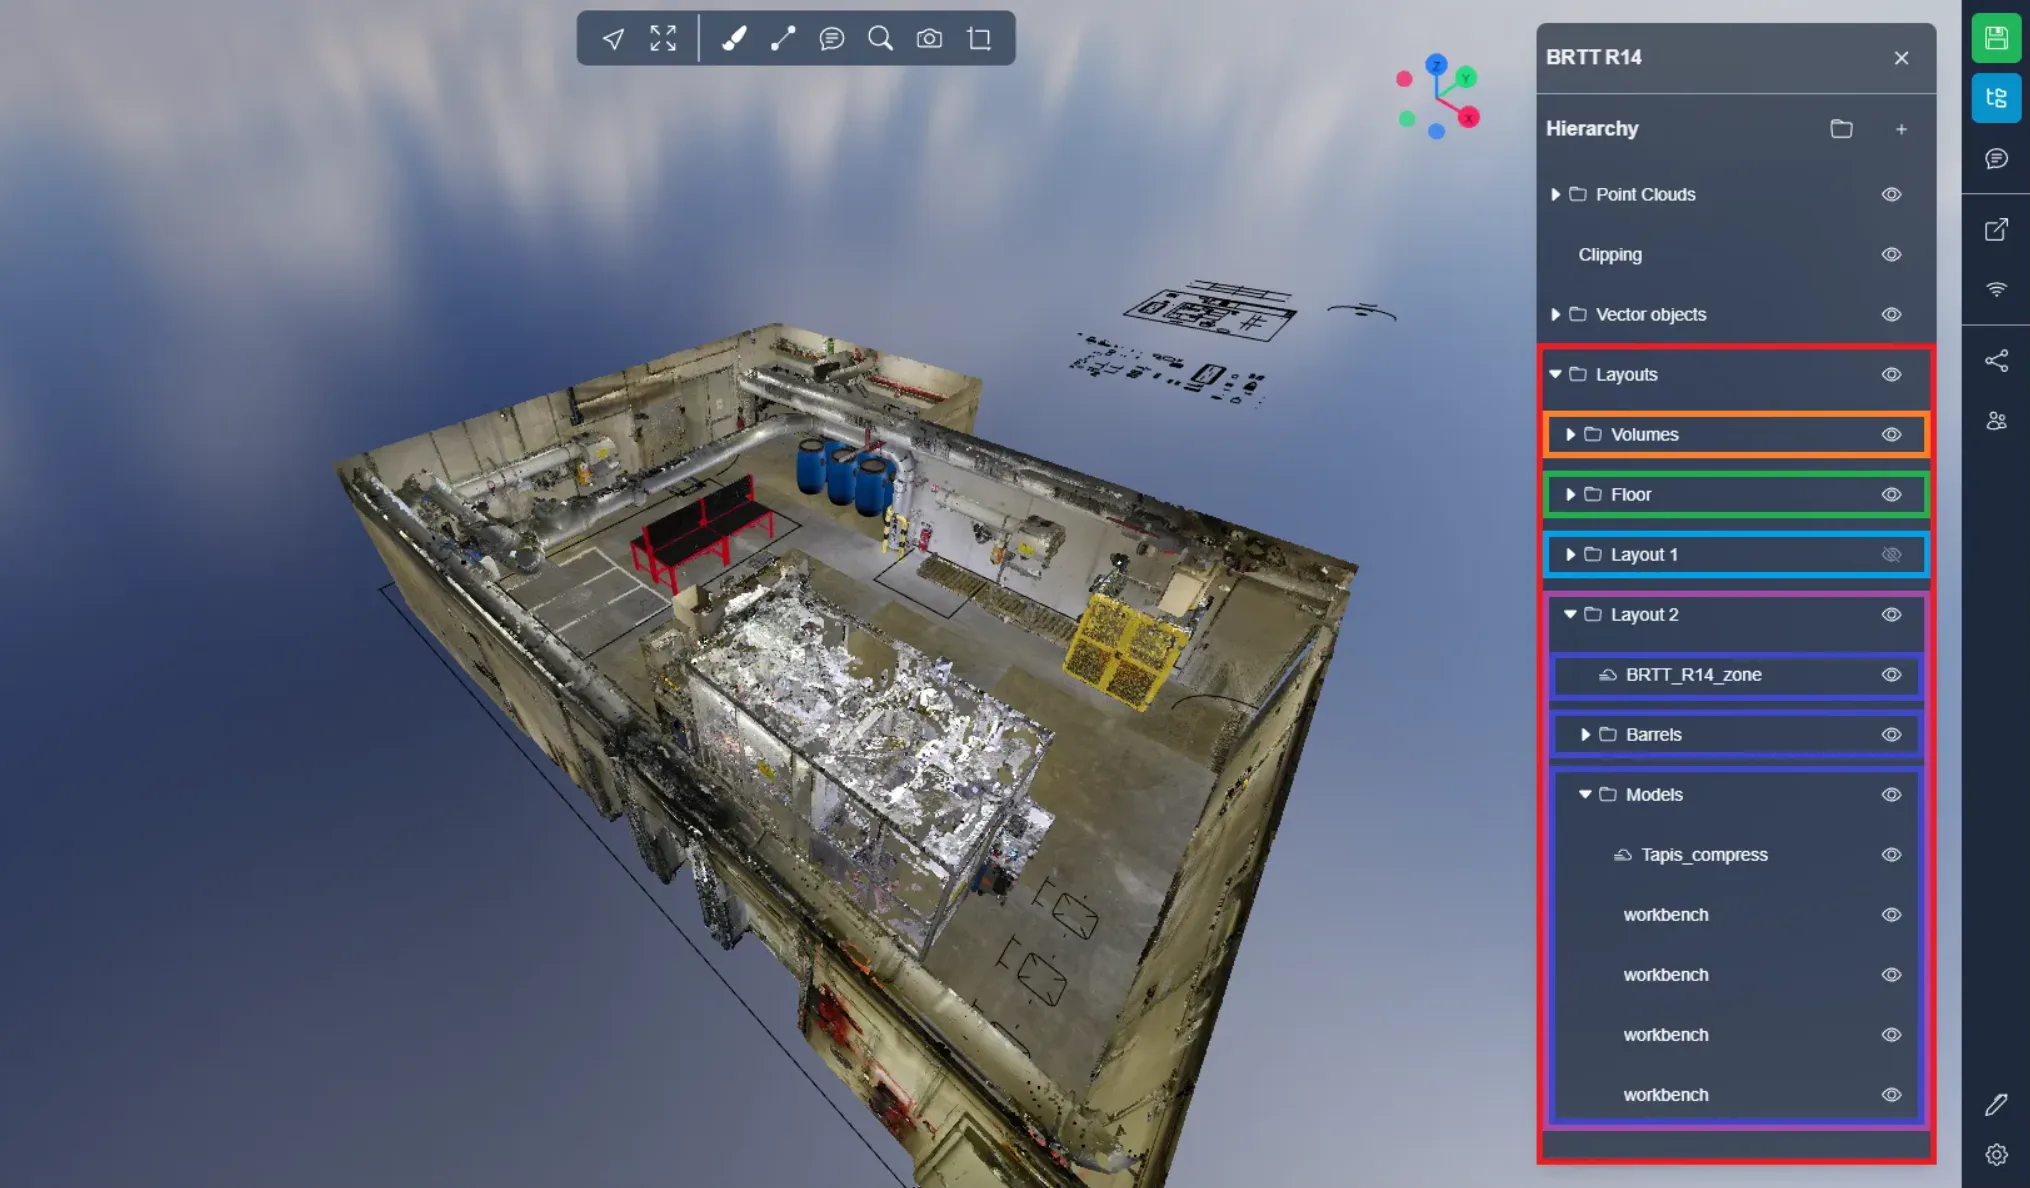
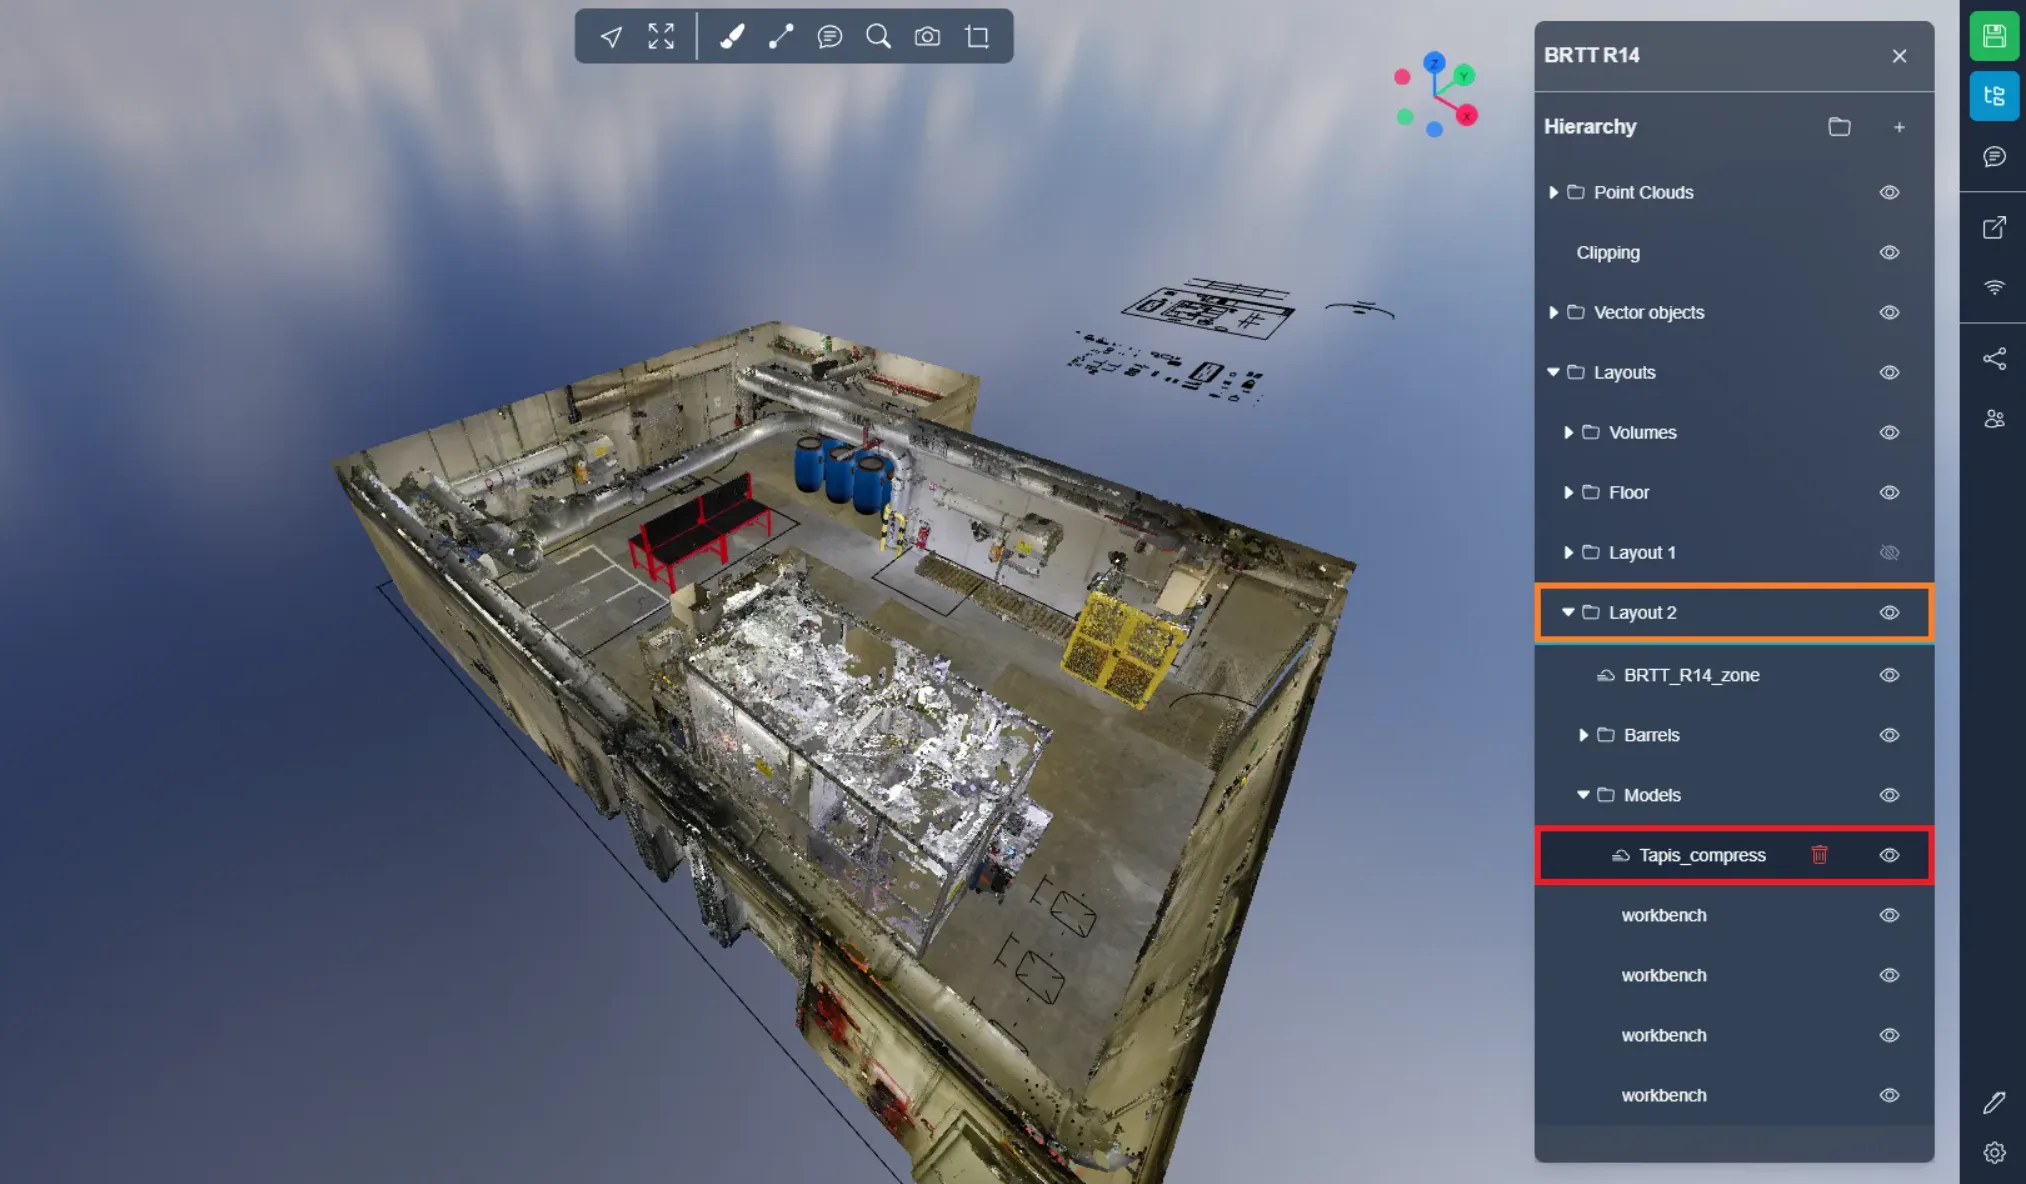
In the two images below you can clearly see the benefit of being able to create your own folders. In the images above you can see the original point cloud. Below, you will find a “ Layouts ” folder, once activated, it displays the “ Volumes ” folder, containing cropping boxes, allowing you to hide the internal elements of the original point cloud. But also the “ Floor ” folder, in which we put pieces of floor to fill the holes left by the trimming boxes. Then, the two layout proposals were stored in 2 different folders, so it is possible in 2 clicks to move from one layout to another. In each layout folder there are also sub-folders for organizing elements by type. Obviously this is just an example, we invite you to use the folders in the way you wish.
To move an element in a folder, simply click on it and move to a folder, release to validate the move. You will see, under the folder in question, a blue line, indicating where the item will be deposited.
If you run into any issues, our support team is here to help. Happy exploring!