Exporting Zones
Depending on what you are trying to do, you might want to check out how to export an orthoimage.
To begin, start creating a clipping box by clicking on the last button in the top menu.
Next, opt for the first option, giving you a clear view of the specific area you're focusing on. Use the different handles to position it how you want, note that you will be exporting everything inside the box. If you want more details on placing a clipping box, refer to this article.
After successfully positioning your box, go to the project menu and click on your clipping box to continue.
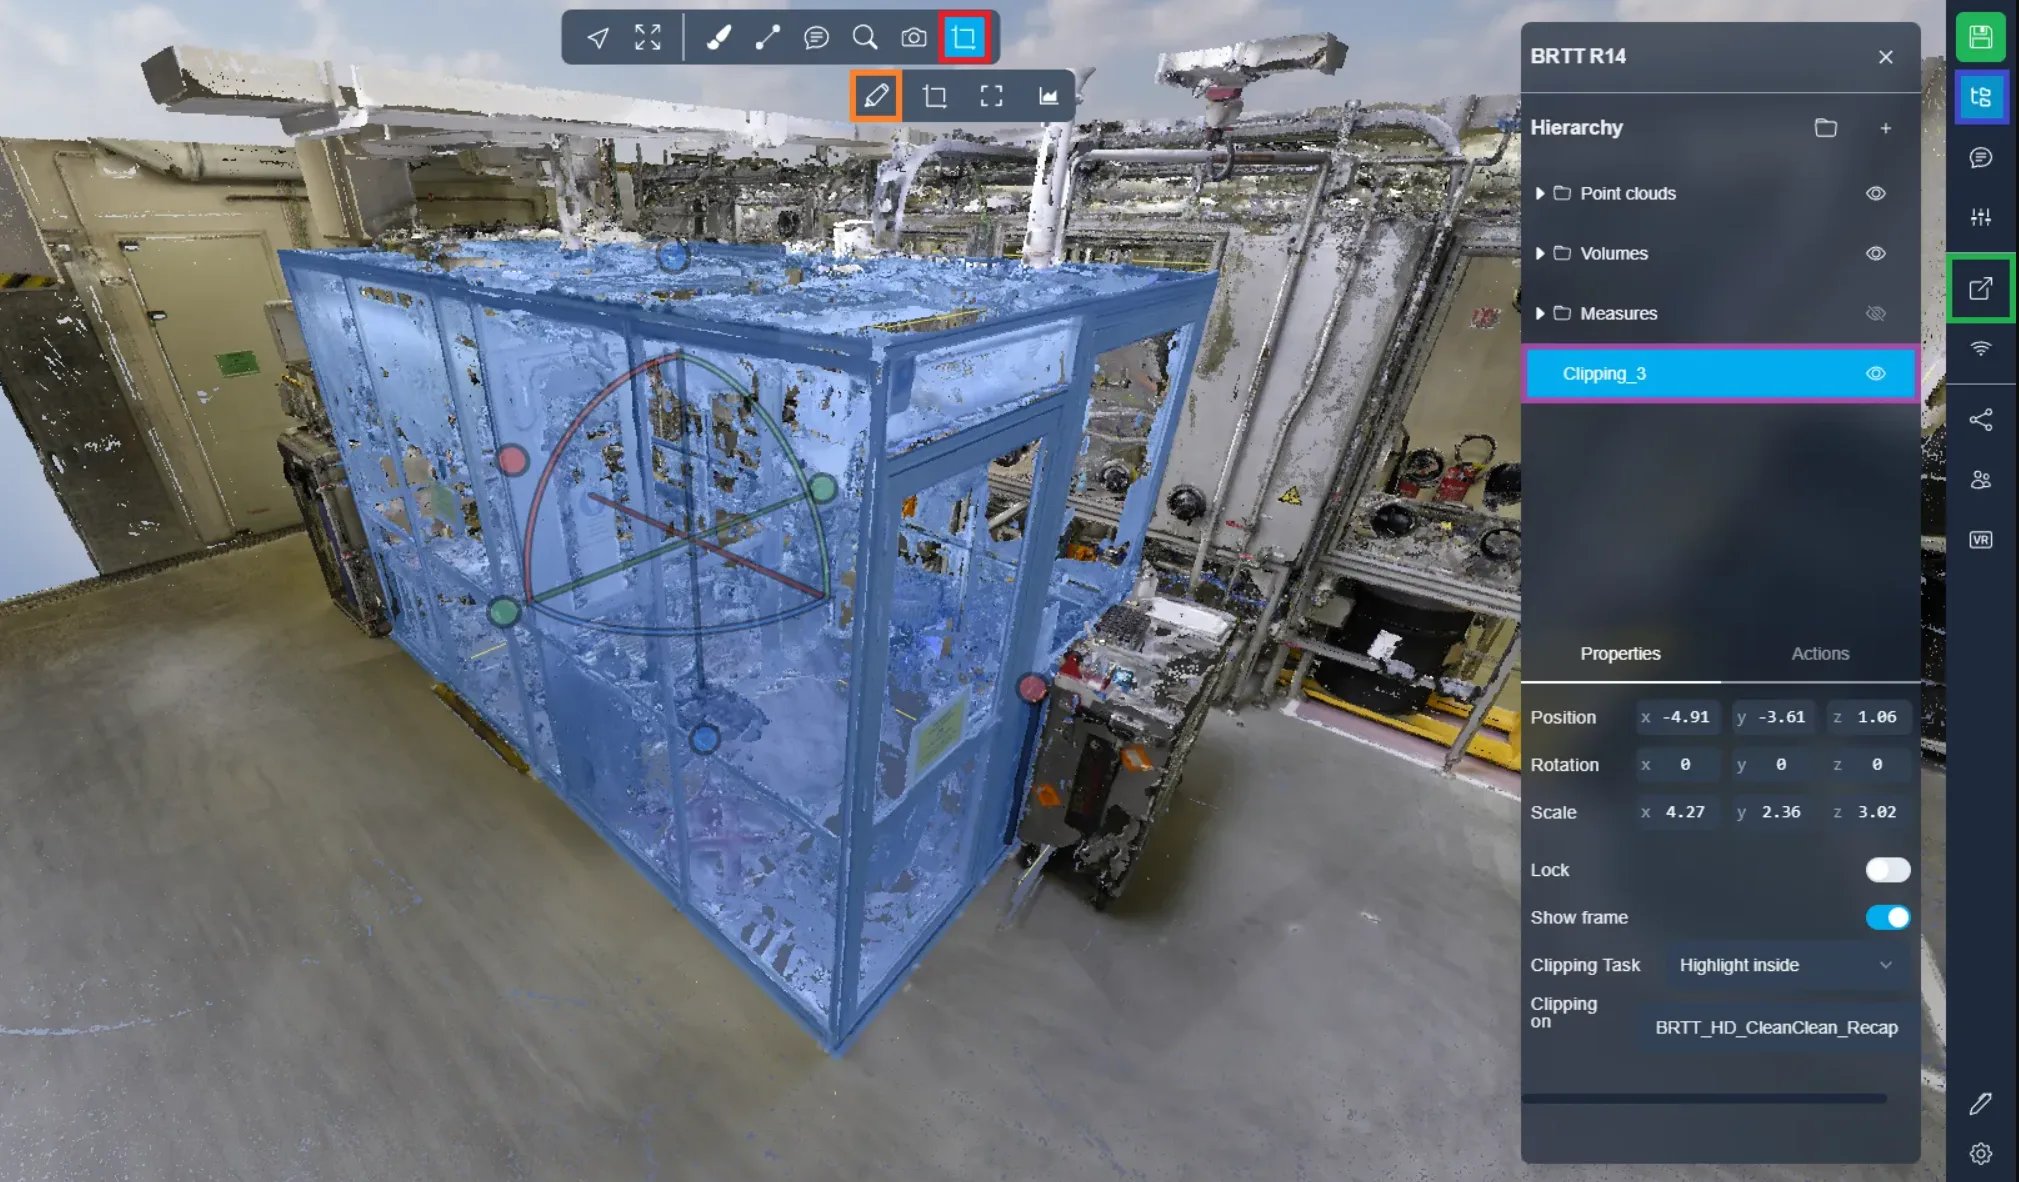
Now go to the “ Actions ” tab and choose “ Export Point Cloud ”. This action will open the export menu.
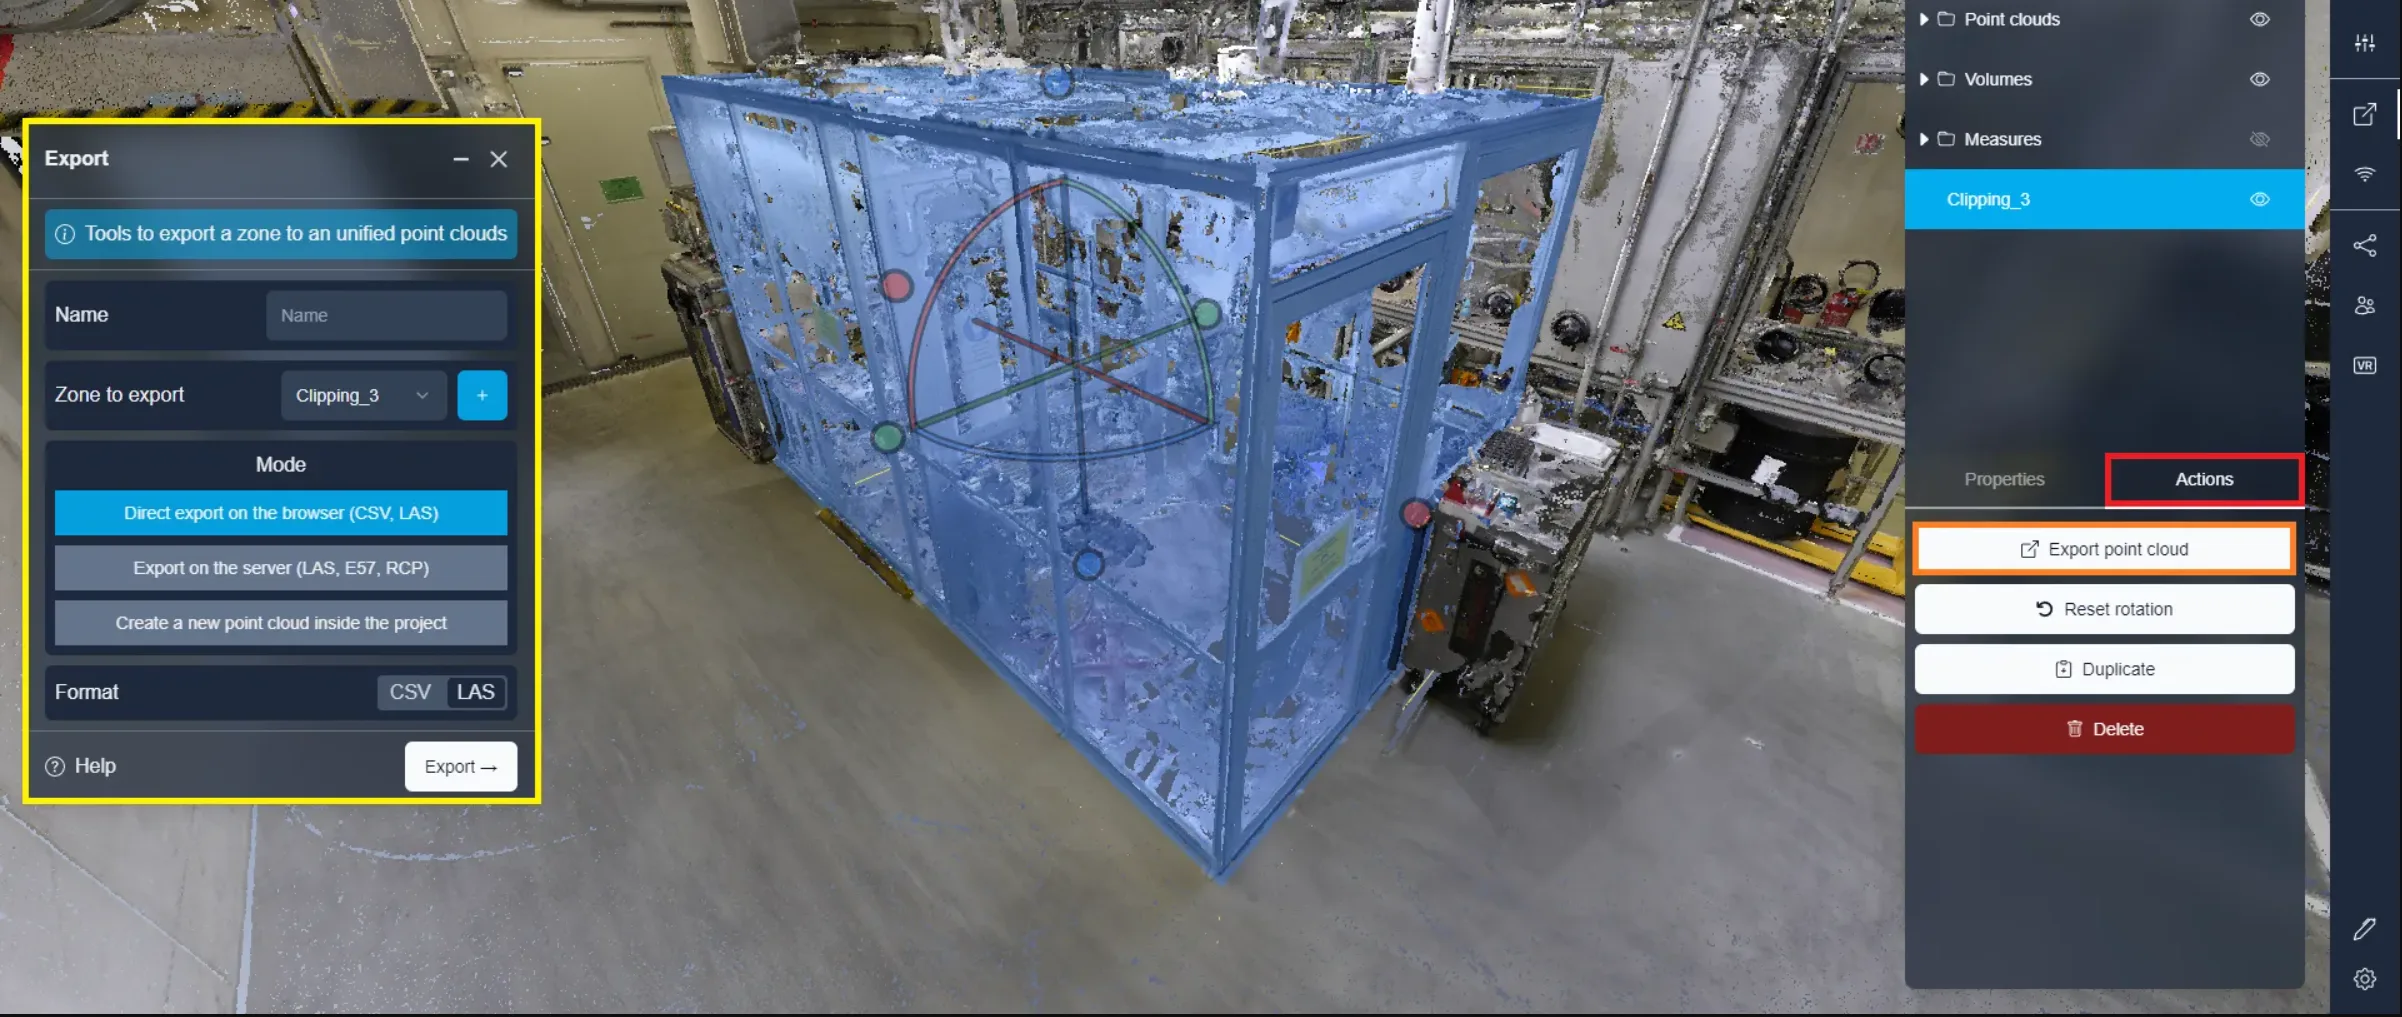
We will now discover two ways to export the portion we have selected.
1ʳᵉ method: Browser export
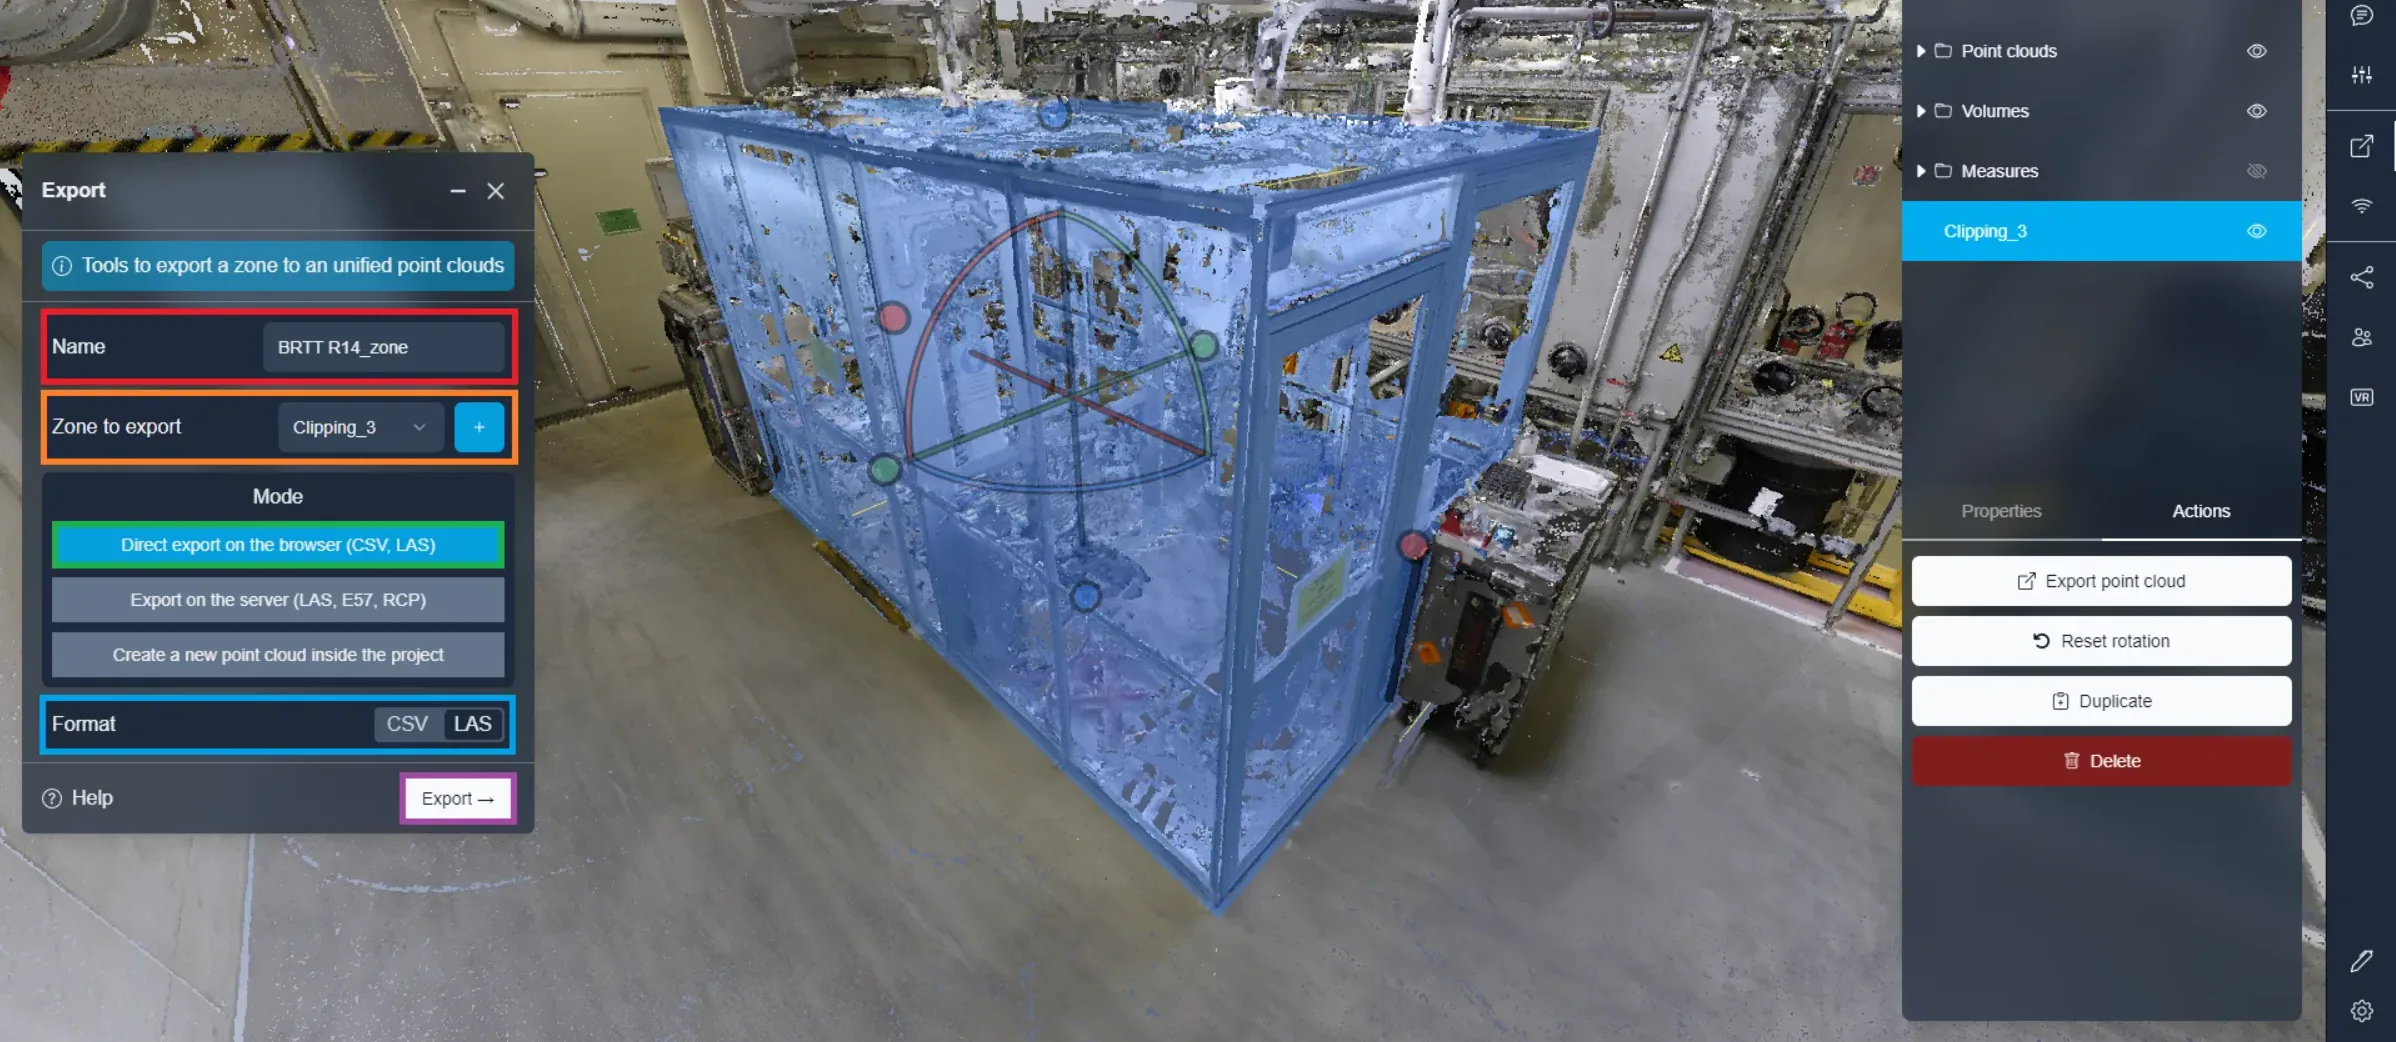
Browser export uses your device's performance for exporting zones. Make sure the project remains open until the export is complete. This method offers faster export times than exports to the server (method 2). Additionally, you have the option to stop the export process and recover your file at any time.
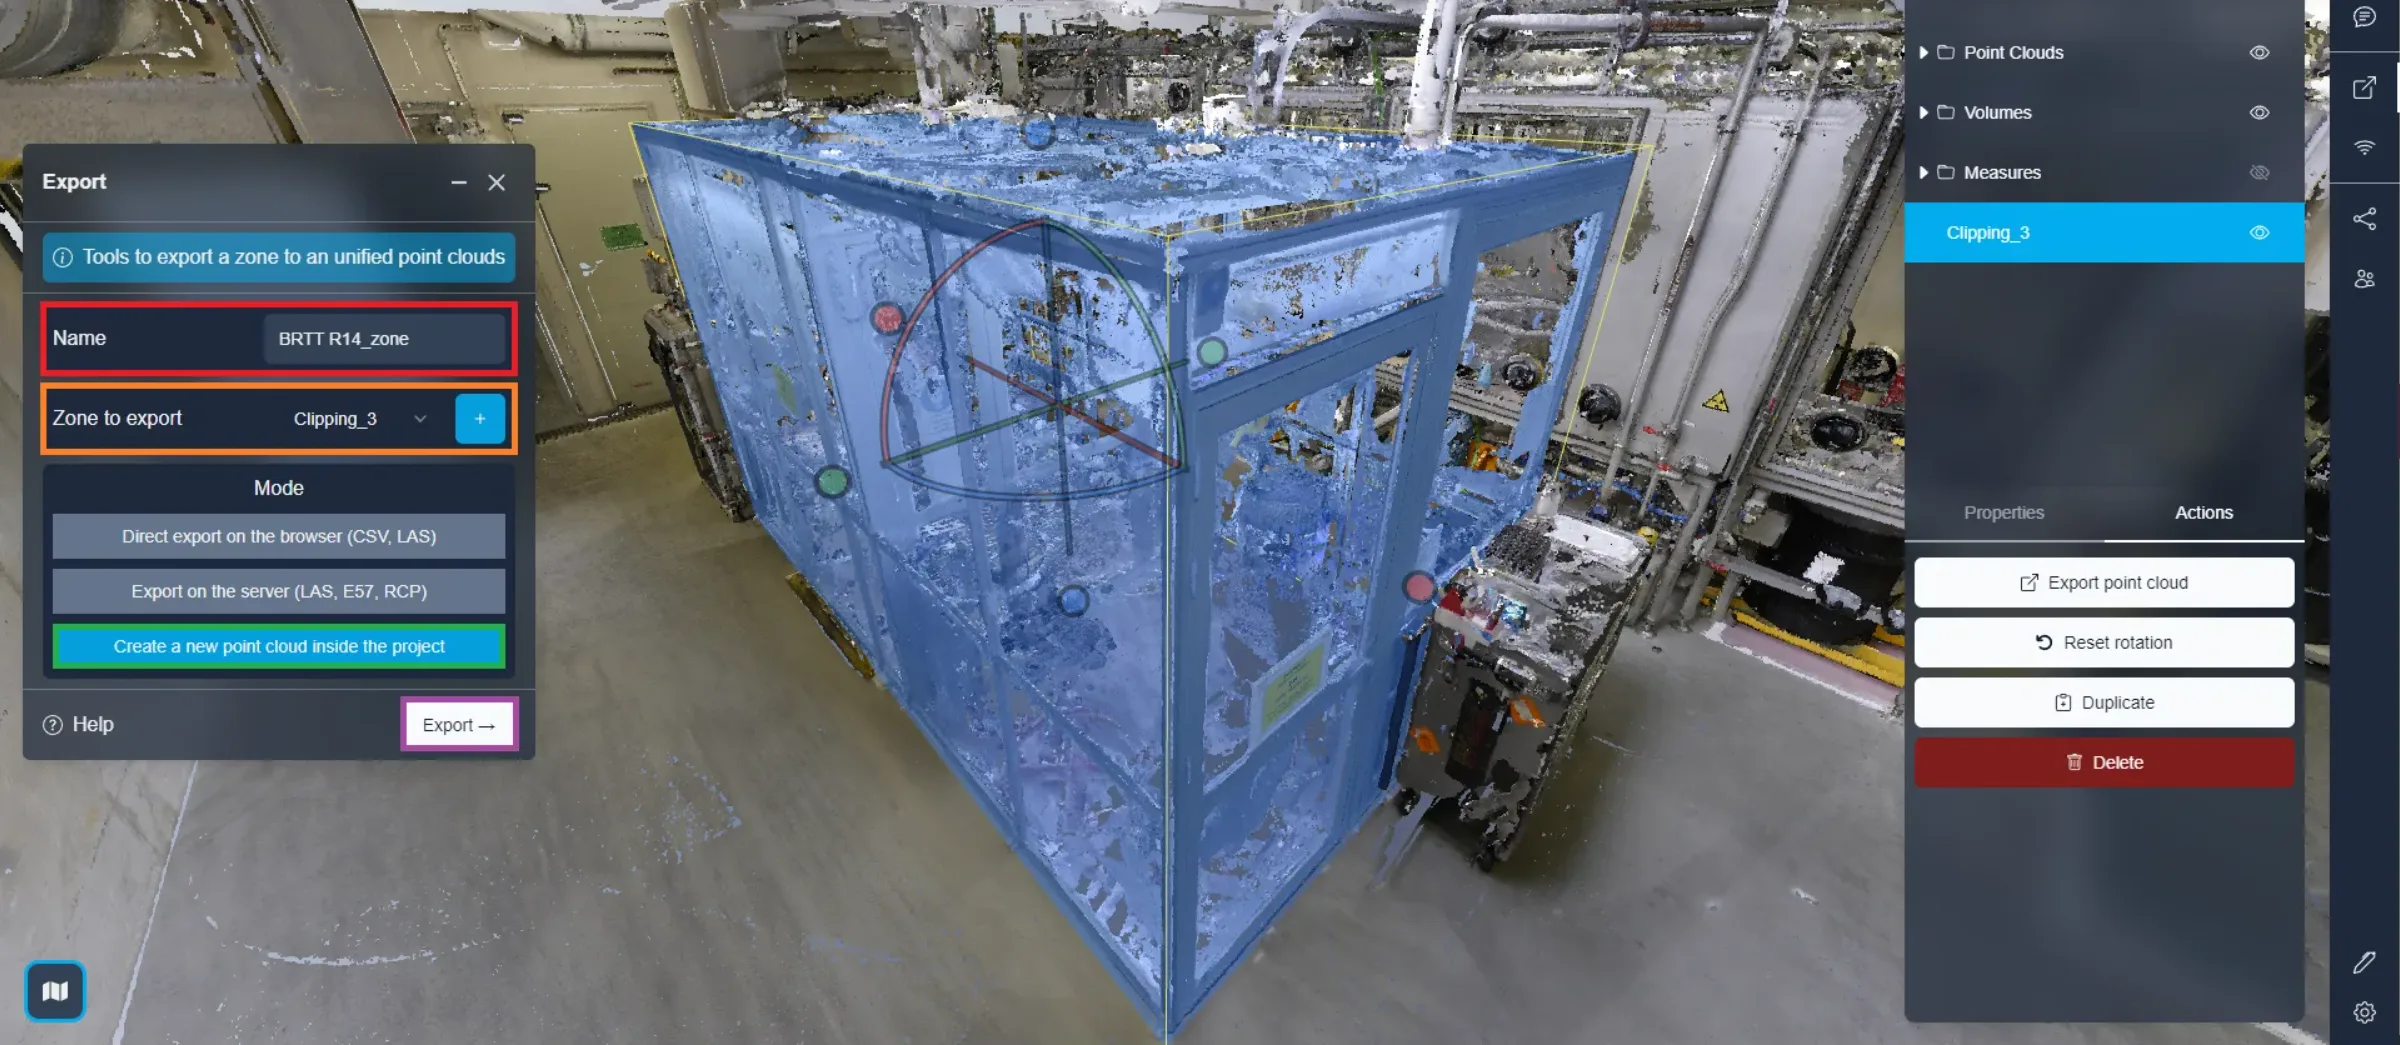
Start by giving your export a file name. Confirm that the correct clipping area is selected for export and ensure that Browser Export is chosen. Finally, decide whether you prefer a CSV or LAS export. A CSV provides a table with the position of all points, while LAS is a standard point cloud file. Click “ Export ” to start the process.
During the export process, you will be informed of the number of points recovered, indicating what will be included in your final export. If you let it load until it finishes automatically, you will have 100% of the points in the designated area. However, if you find that you do not need all the points, you have the option to stop the export in its current state and export the points already retrieved. Rest assured, you won't miss any part of the section, as the point recovery method ensures coverage on all selected areas.

2nd method: Server export
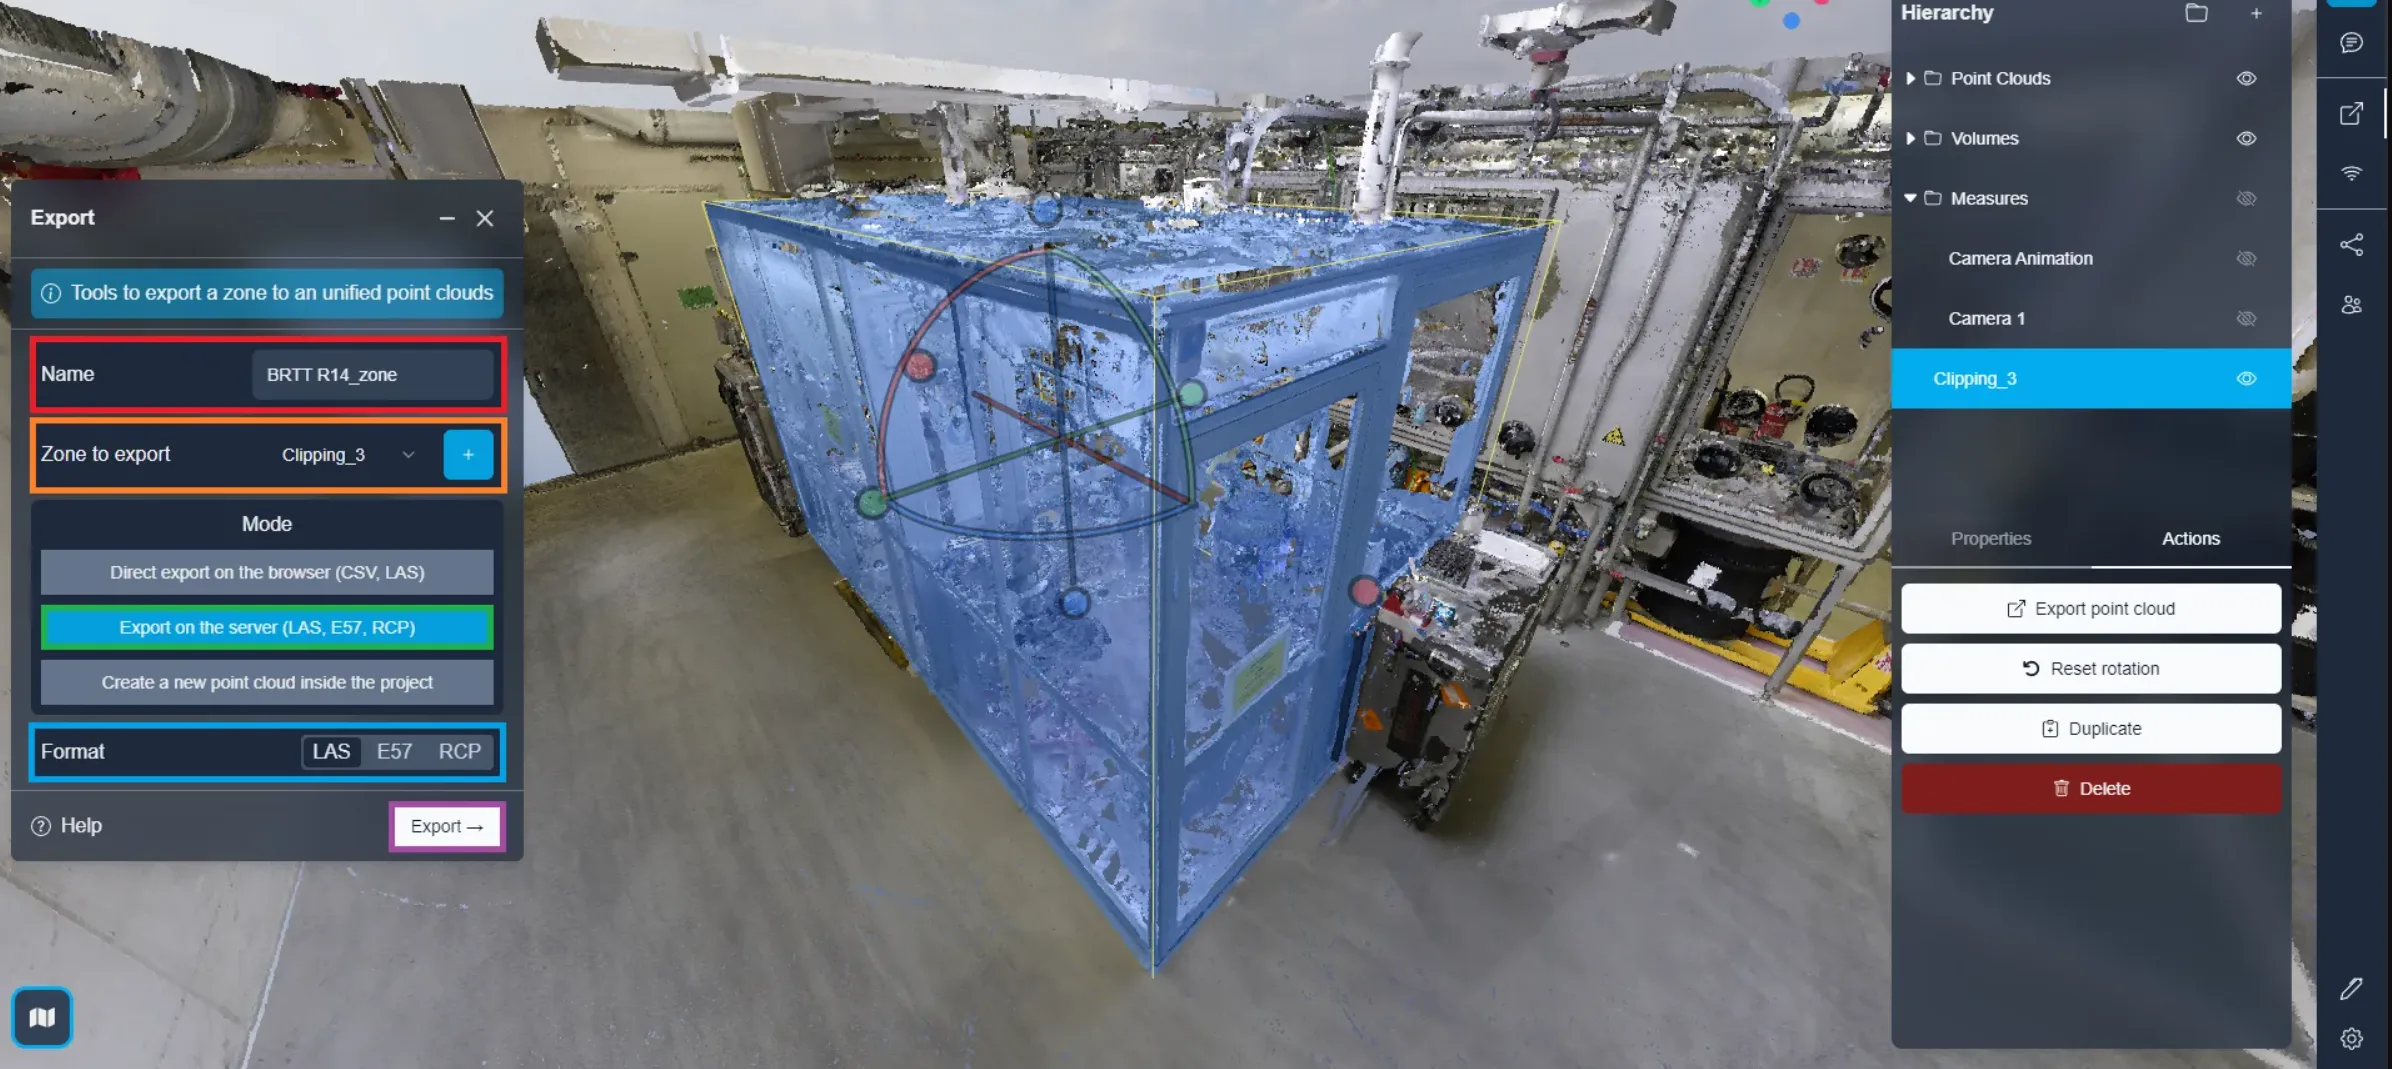
Opting to export to the server provides the convenience of being able to exit the project or even turn off your computer while the process is in progress. Additionally, you have the option to choose from different file types. However, this usually requires more time than browser export. Another important advantage of exporting to the server is that once an area is exported, it becomes available for download to anyone with the necessary permissions to access the project files. This eliminates the need for each person to create their own export or share the file through other means.
As for exporting from the browser, start by entering a file name and checking the clipping area used. Make sure Server Export is selected. Choose your desired file format, whether LAS, e57 or RCP.
Click “ Export ” to start the process.
Once the export is complete, you will receive a notification email indicating that your file is ready to download.
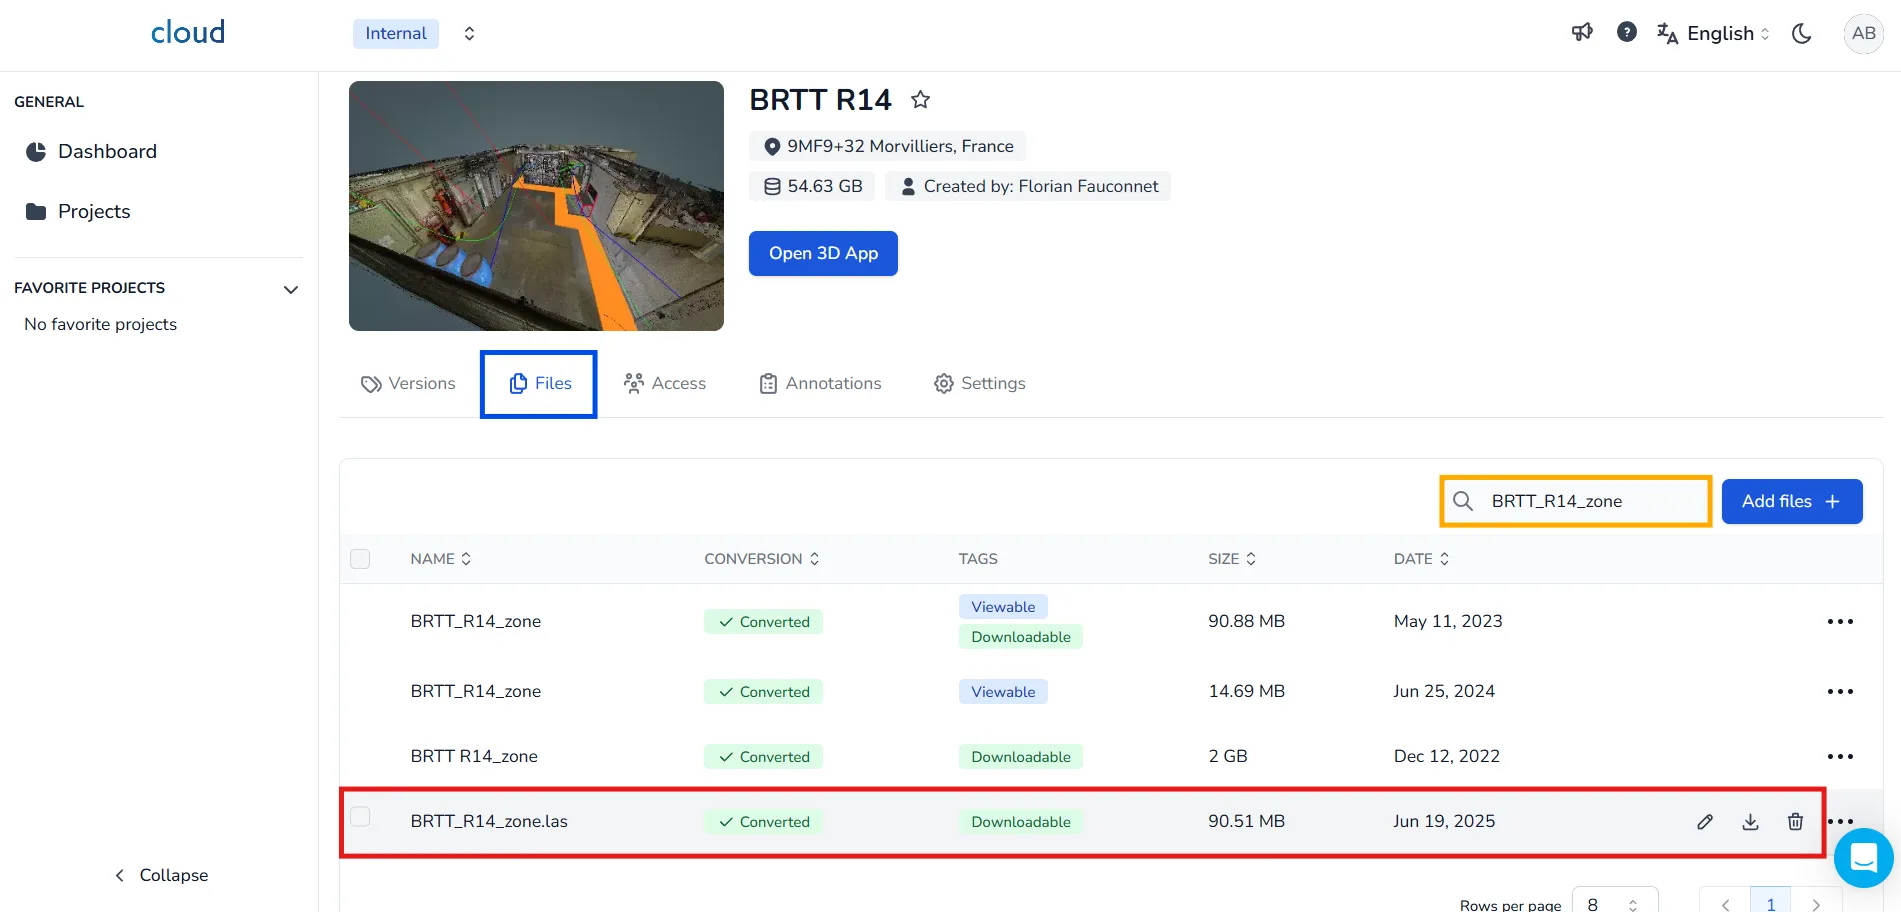
To access it:
- Go to the project edit page.
- Click on the Files tab.
- Use the search bar to type the name of the zone you exported.
- Once located, click the download icon to retrieve your exported file.
3rd method: Duplication
You have the option to duplicate the points contained in the area, directly in the same project. This new point cloud will be movable at your convenience, allowing you to test new layout configurations.
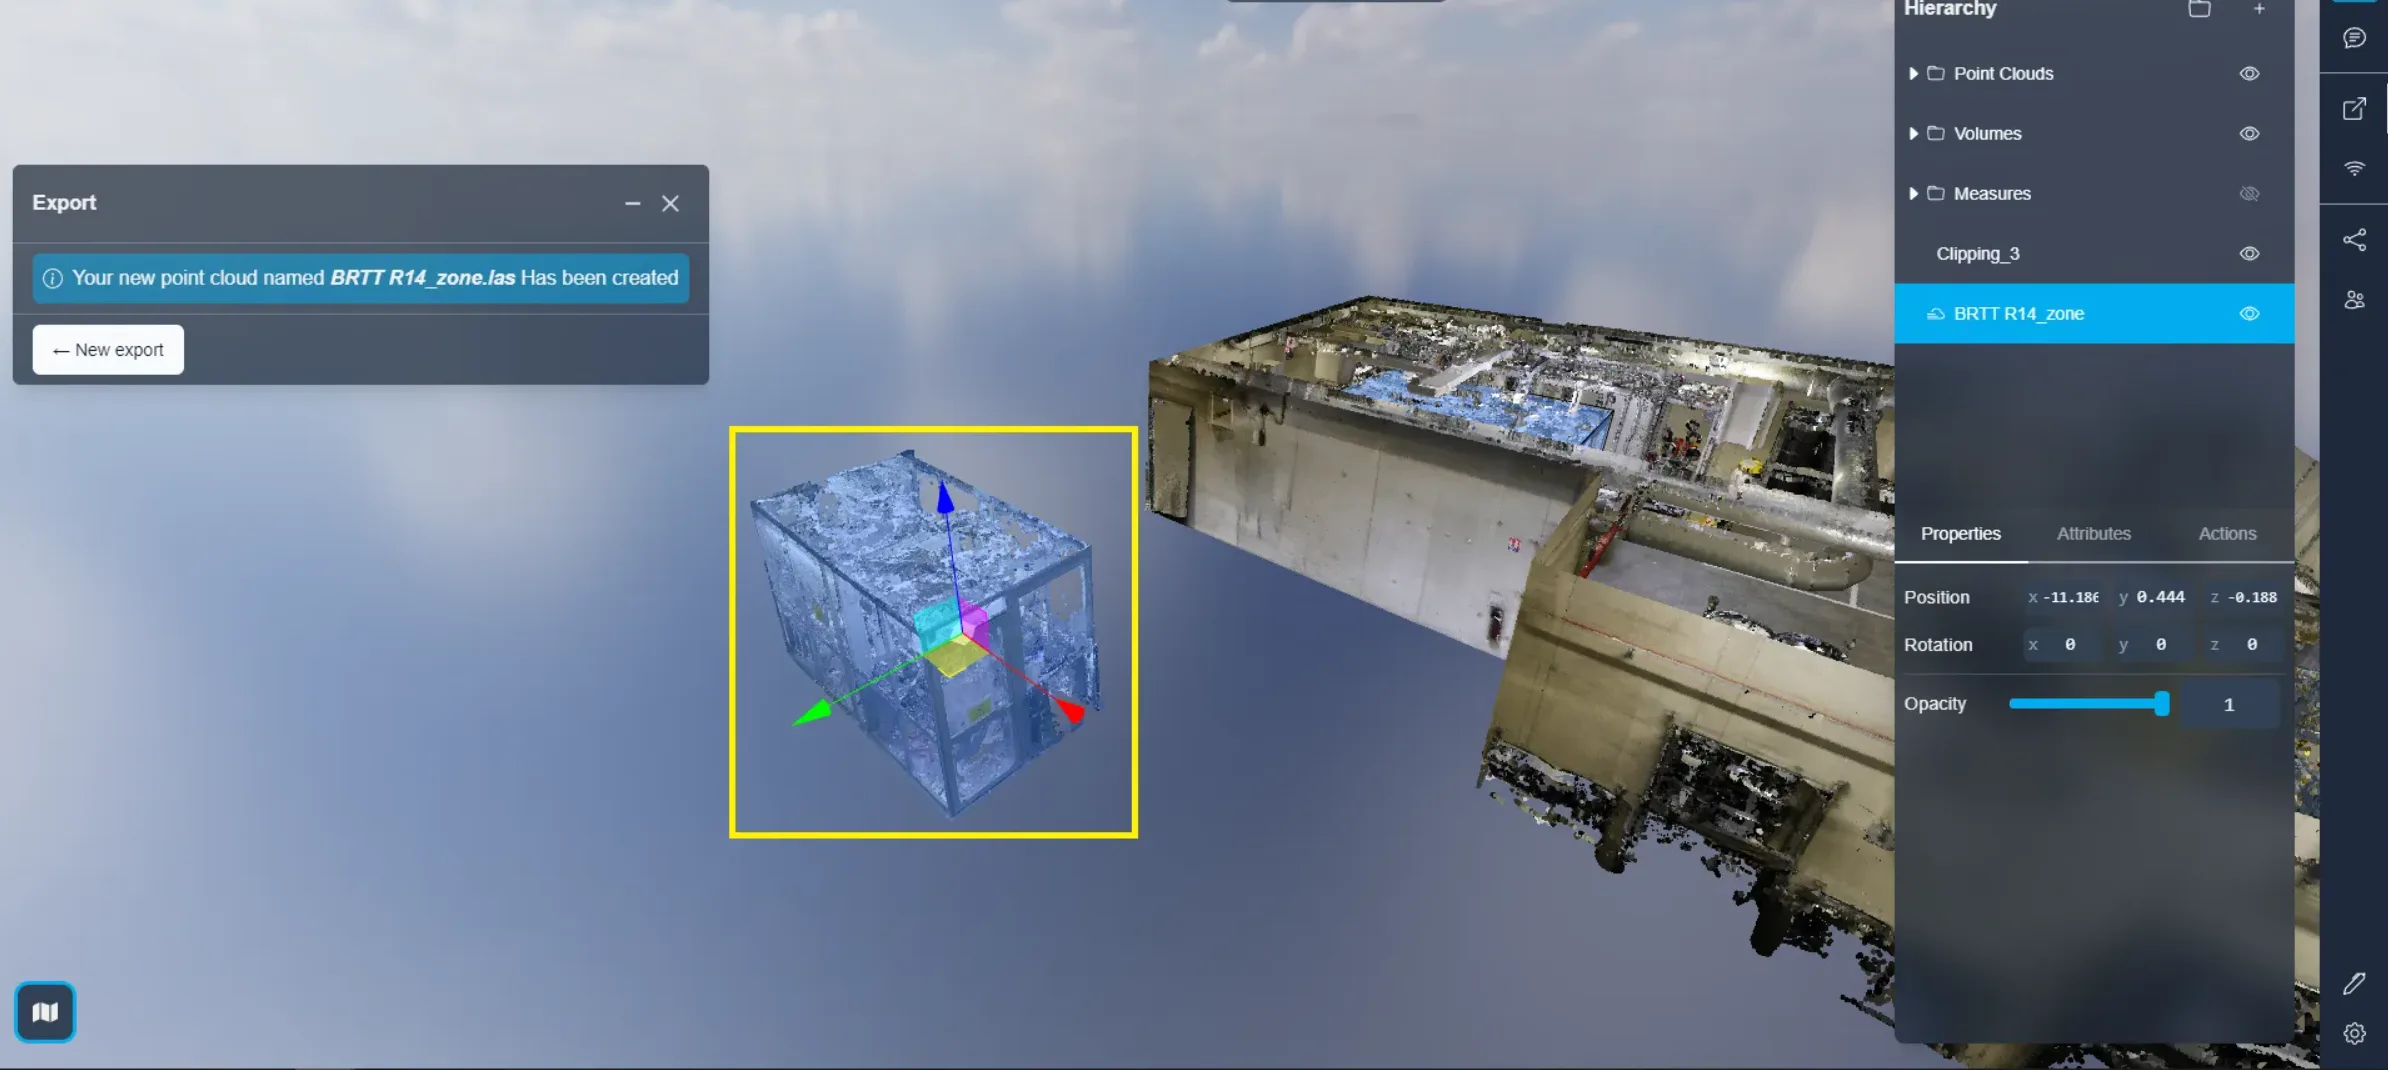
As for other exports, you must first choose the name of the new point cloud, then validate the area to use for the duplication. Finally, just select “ Create new point cloud in project ” and export.
After the duplication is started you will see the process happening live, after a few moments, a low quality version of the exported zone will be ready for you to work with. you can move it around and place it wherever you want. A high quality version of that zone export will replace the low quality version once it is ready. The high quality will take in account every modification you will have done to the low quality one, position, rotation, applied clipping boxes...
You will see that the clipping box that was used for the export will be switched to "outside mode", see the original object is hidden, you can always change that mode later on if you wish. Feel free to check out the clipping box article to learn more about this feature.
You can learn more about resource interaction here.
If you run into any issues, our support team is here to help. Happy exploring!