Managing Annotations in the 3D Application
Annotations are a big part of a project, in our case they can be used to manage tasks, identify important points and facilitate the transfer of data to other users. To learn more about the BCF format, you can check out this article.
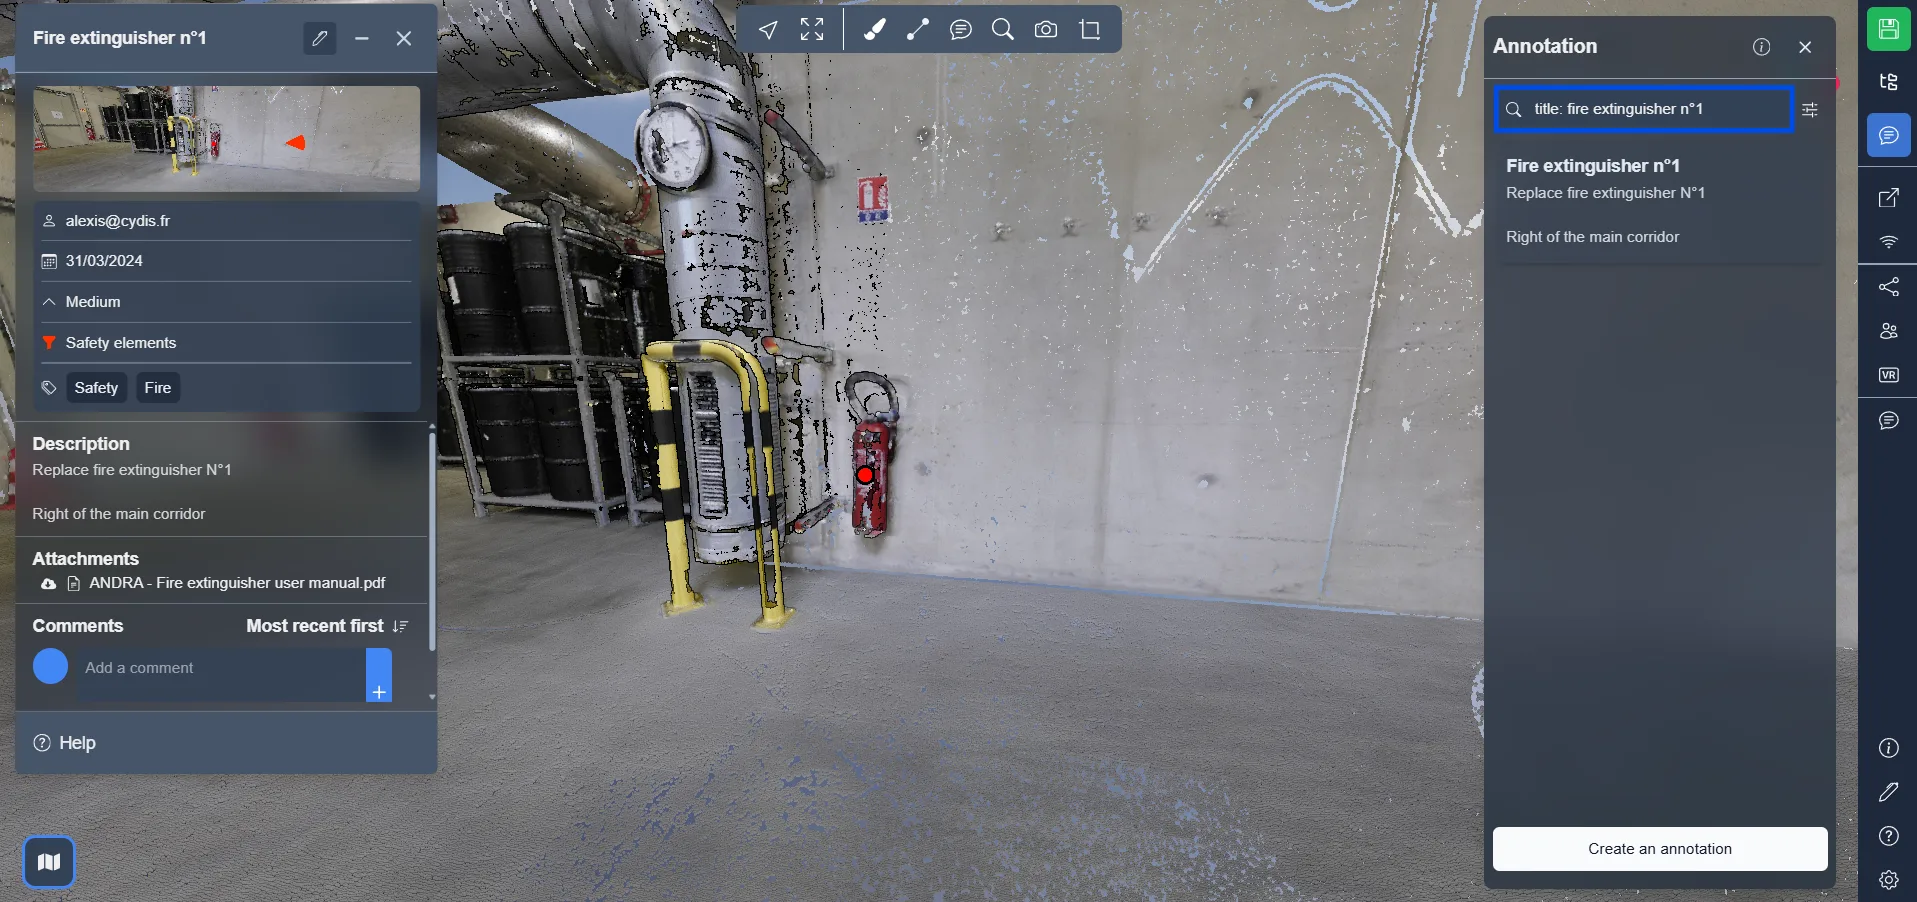
To create an annotation, click on the text bubble icon in the top menu. This will open the annotation window that you can see on the left.
At the top, you will find an image with 4 icons. The image is a screenshot that has been automatically taken when creating the annotation. You can view it in full size by clicking on the eye. By using the pin icon, you can reset the annotation position to your current one, you will see later that the annotation position is represented by a small cone in the 3D Application. The camera allows you to replace the current screenshot with another one, taken from your position, automatically. And finally the pen will allow you to upload your own image to replace the screenshot, it can be a screen capture, a real life image a drawing, you decide.
Under the image, you will find the Point of interest, you can see on the fire extinguisher, a red dot. This dot can be moved by dragging it around, it represents the position of the element you are trying to show, if you don't want that dot to be shown, but to only have the cone, you can press the cross to remove it.
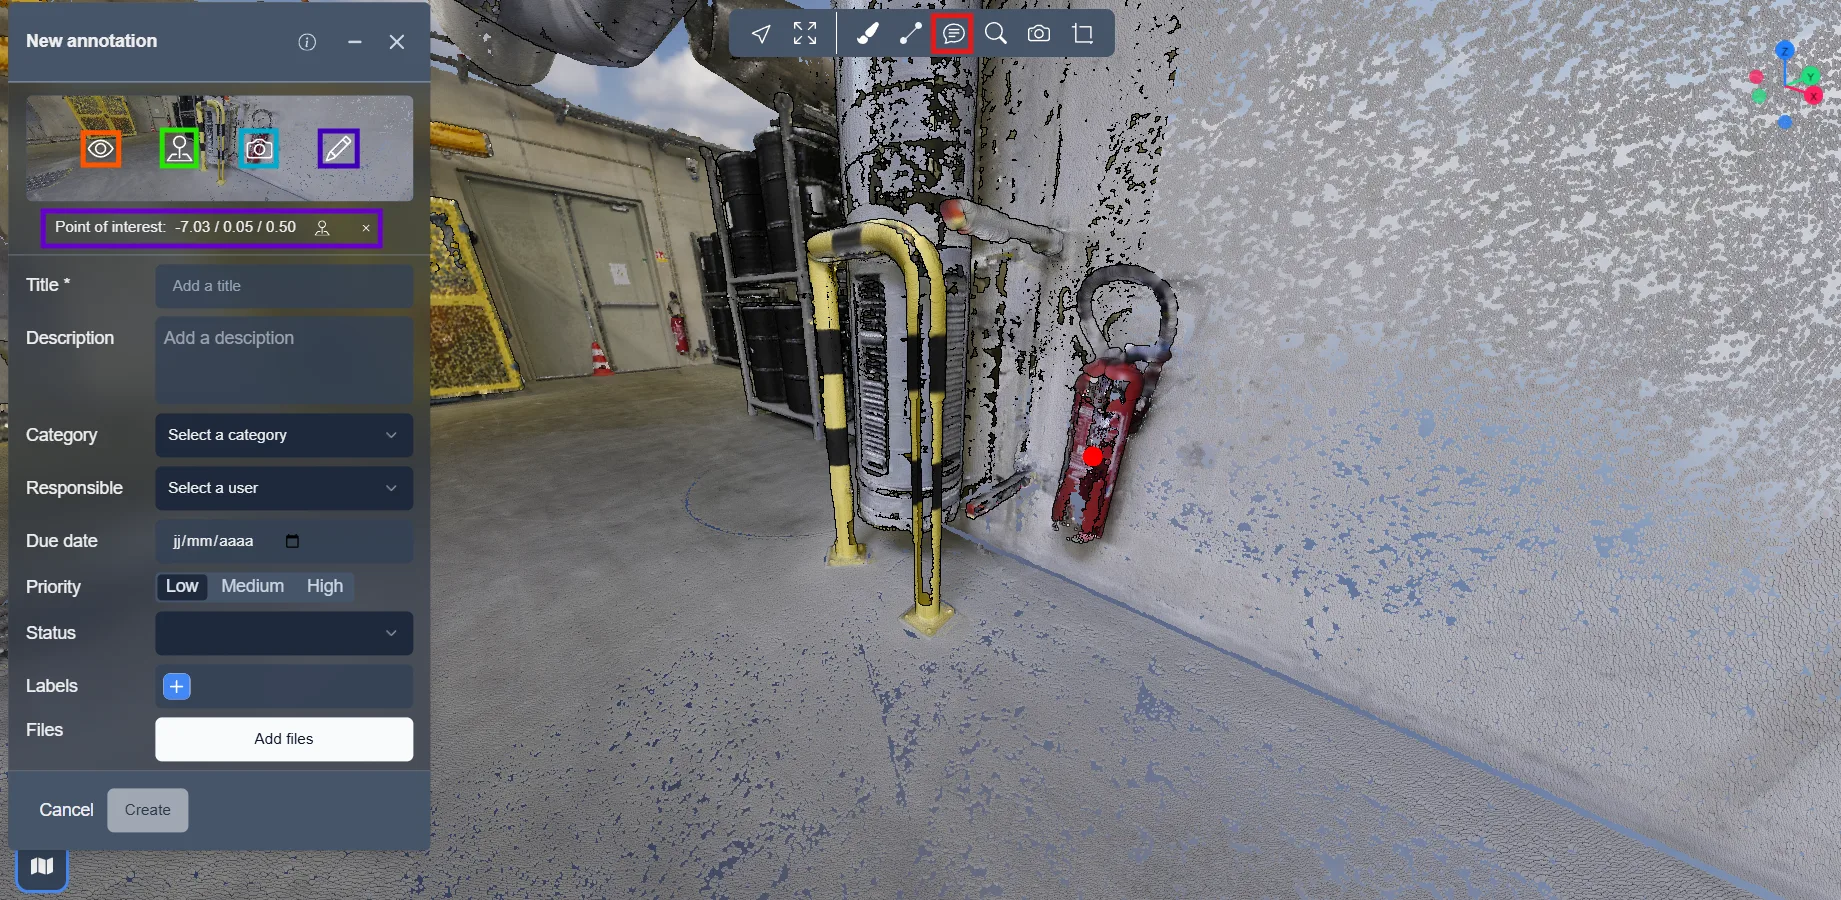
Once the placement and image are correct, we can head onto the main part of the annotation, its information.
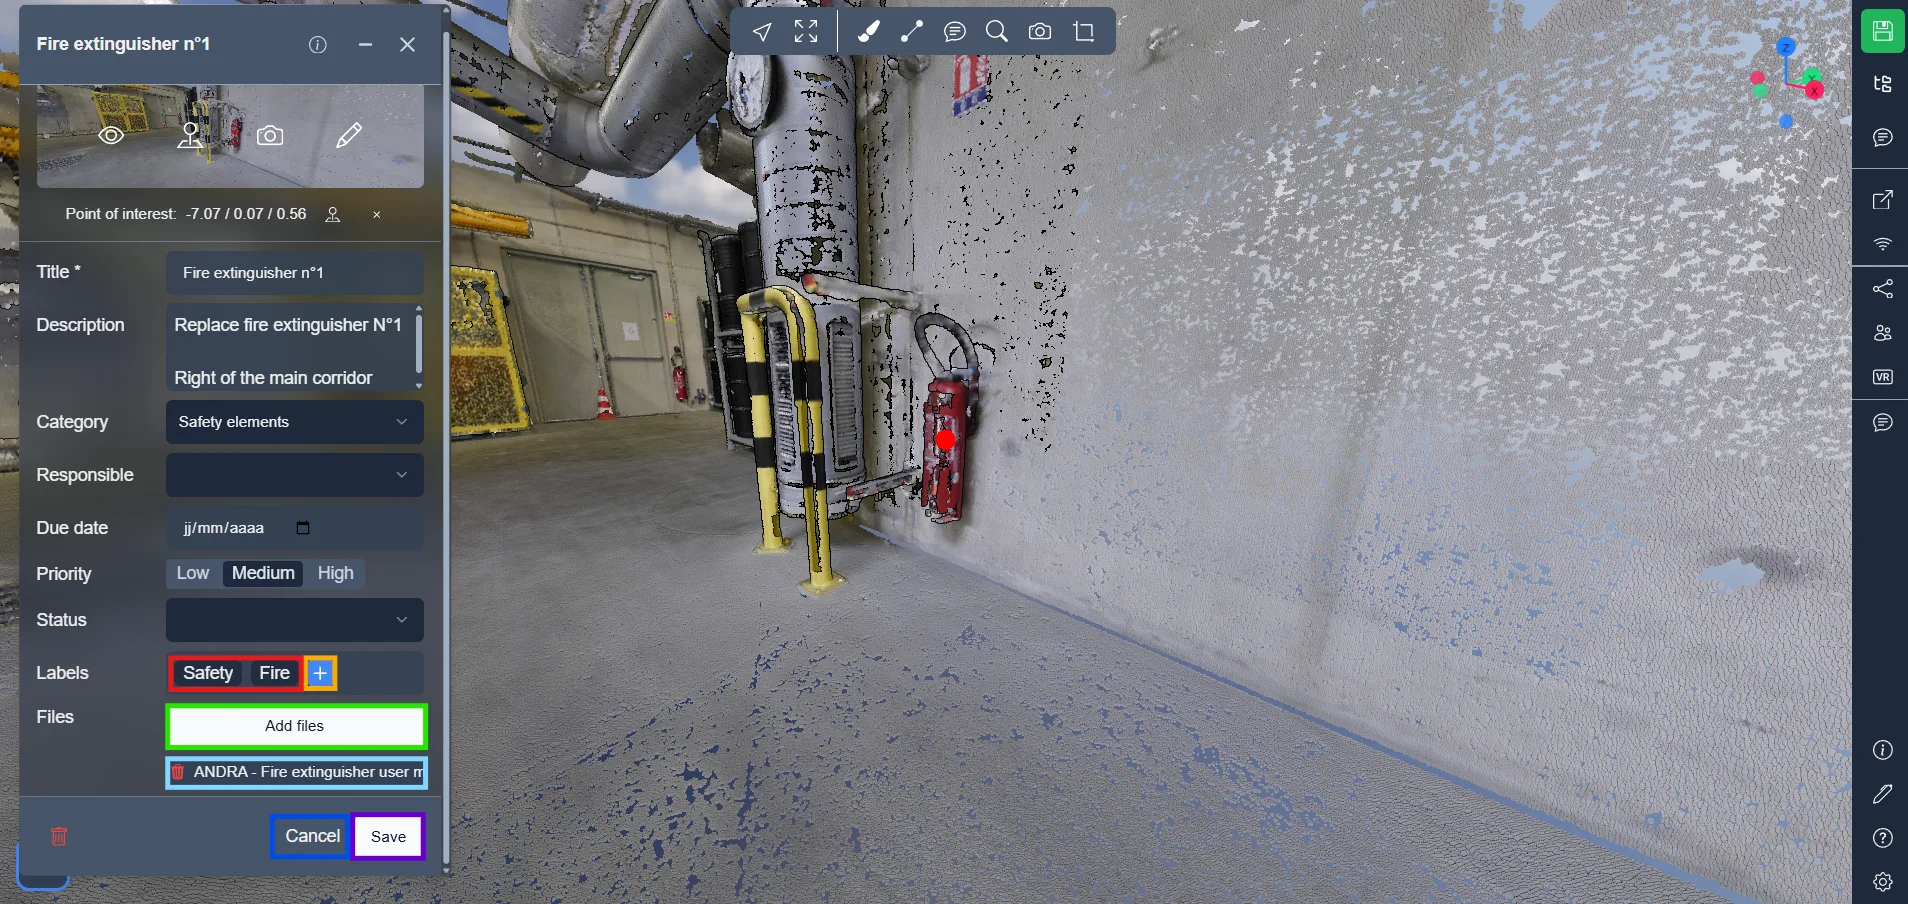
You can enter a title and a description, select a category, the category will determine the color of the cone and dot in the 3D Application, allowing you to find related annotations quicker.
In the description, you can add a clickable link, and have 2 options to do so :
<a href="https://url-example.com">Link text</a>
[Link text](https://url-example.com)
If the annotation corresponds to something that requires attention from someone, you can assign it to a user to have an email automatically sent to them. You can also set a date to have a time limit before the annotation has to be dealt with. It is even possible to give the annotation a priority, from low to high, allowing everyone to know how important the matter is. Finally, if the annotation is a task, you can follow its status by using the related option.

To identify annotations, you can use the labels, allowing you to use the filters when searching for annotation. To add a label, click on the plus icon.
Finally, you can add related files to annotations, these files will be visible and downloadable by anyone who has access to the 3D Application. To add files, click on the dedicated button, below you will find a list of the uploaded files, click on the trash icon to remove them.
Once you are all set, click Create to validate your annotation, you can also click Cancel at anytime to reset and close the window.
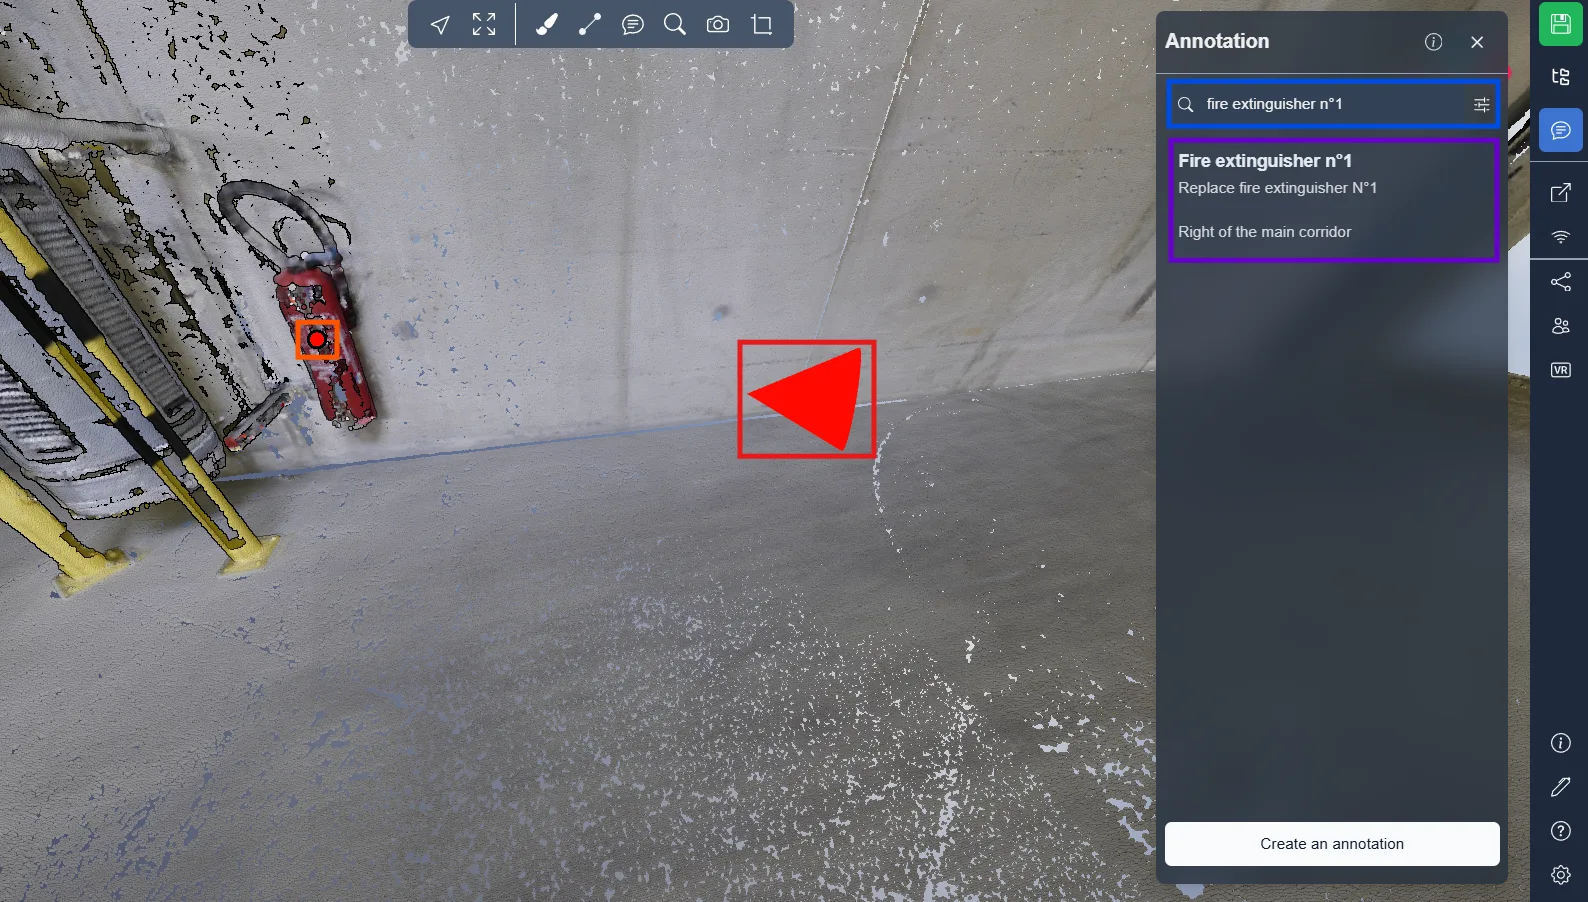
In the annotation menu on the right, you can find a list of every annotation present in the 3D Application, and you can use the search system to find the one you are looking for.
As we discussed earlier, in the 3D Application you will find 2 elements for each annotation, a cone, representing the annotation position, and usually where the image is taken from, and a dot, if you have selected a point of interest.
You can decide which parts of an annotation should appear in the 3D view. These elements can be individually shown or hidden to better suit your viewing preferences.
To configure this, go to:
-
Settings (via the gear icon)
-
Then navigate to Annotation
-
Under Visible elements, choose:
Cone of capture and point of interestCone onlyFocus point only
Note: The selected visibility option is stored in the project version.
Make sure to create a version if you want this display configuration to persist.
👉 Learn how in this article.

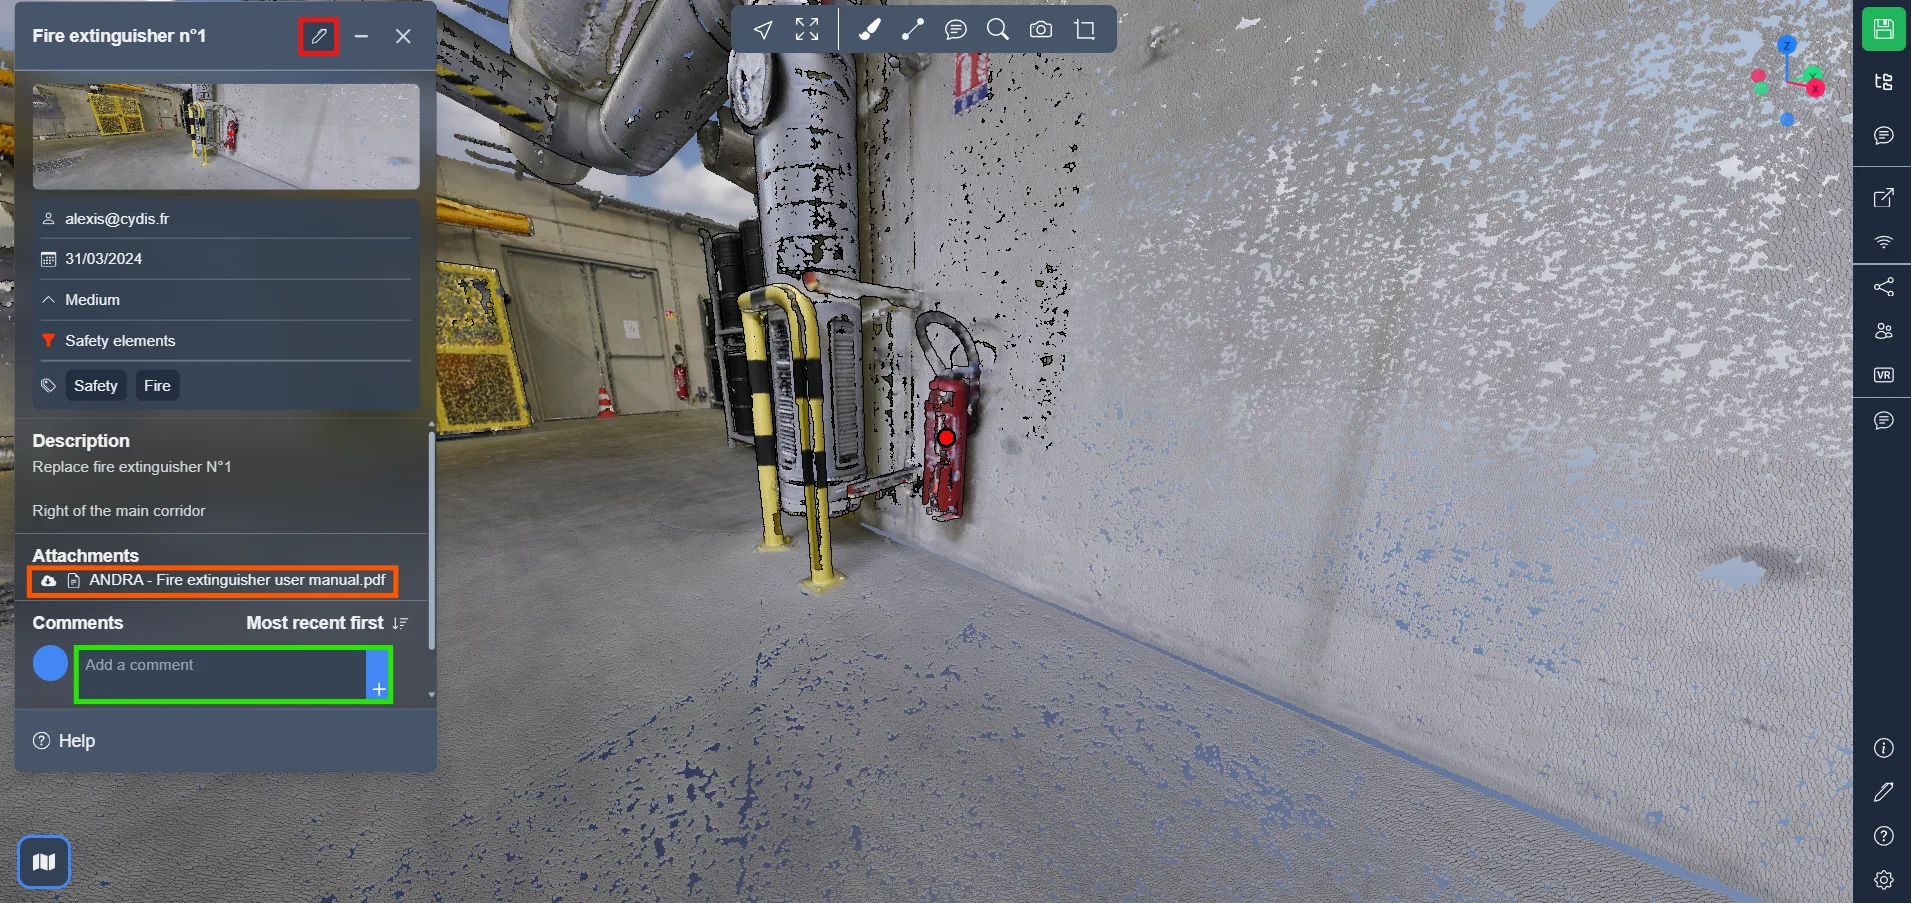
Once you click on the cone or the dot, the annotation information window will show up, at the top, you will find the edition button, allowing you to modify the annotation, if you have the rights to do so.
At the bottom, you will find the related files, which anyone can download, and the comment section, allowing anybody with an account to discuss the annotation.
It is now possible to perform advanced filtering of annotations using specific keywords.
Available filters:
title:→ annotation titledesc:/description:→ annotation descriptioncat:/category:/categories:→ categorylabel:/labels:/tag:/tags:→ labels
Use them directly in the search bar to display only matching annotations.
Below are some examples of advanced search with filters:
-
tag:fire
Displays annotations with at least one tag containing the word fire.
For example, an annotation tagged Safety / Fire will appear. -
tag:fire title:extinguisher
Displays annotations that have the tag fire and the word extinguisher in the title.
Useful to pinpoint specific equipment like in the example: Fire extinguisher n°1 -
tag:fire|safety
Displays annotations that have either the tag fire OR safety. -
tag:=fire
Displays annotations with a tag that is exactly equal to "fire". -
tag:^fir
Displays annotations with a tag that starts with "fir" (e.g., "fire", "first-aid"). -
tag:!fire
Displays annotations that do NOT contain the tag "fire". -
tag:.pdf$
Displays annotations with tags that end with ".pdf". -
tag:!.log$
Displays annotations with tags that do NOT end with ".log".

If you run into any issues, our support team is here to help. Happy exploring!