Adding Primary 3D Elements
There are 2 ways to add primary objects into a project, the first is to use the import menu, the second allows you to create 3D objects from a CSV.
Loading with the import menu
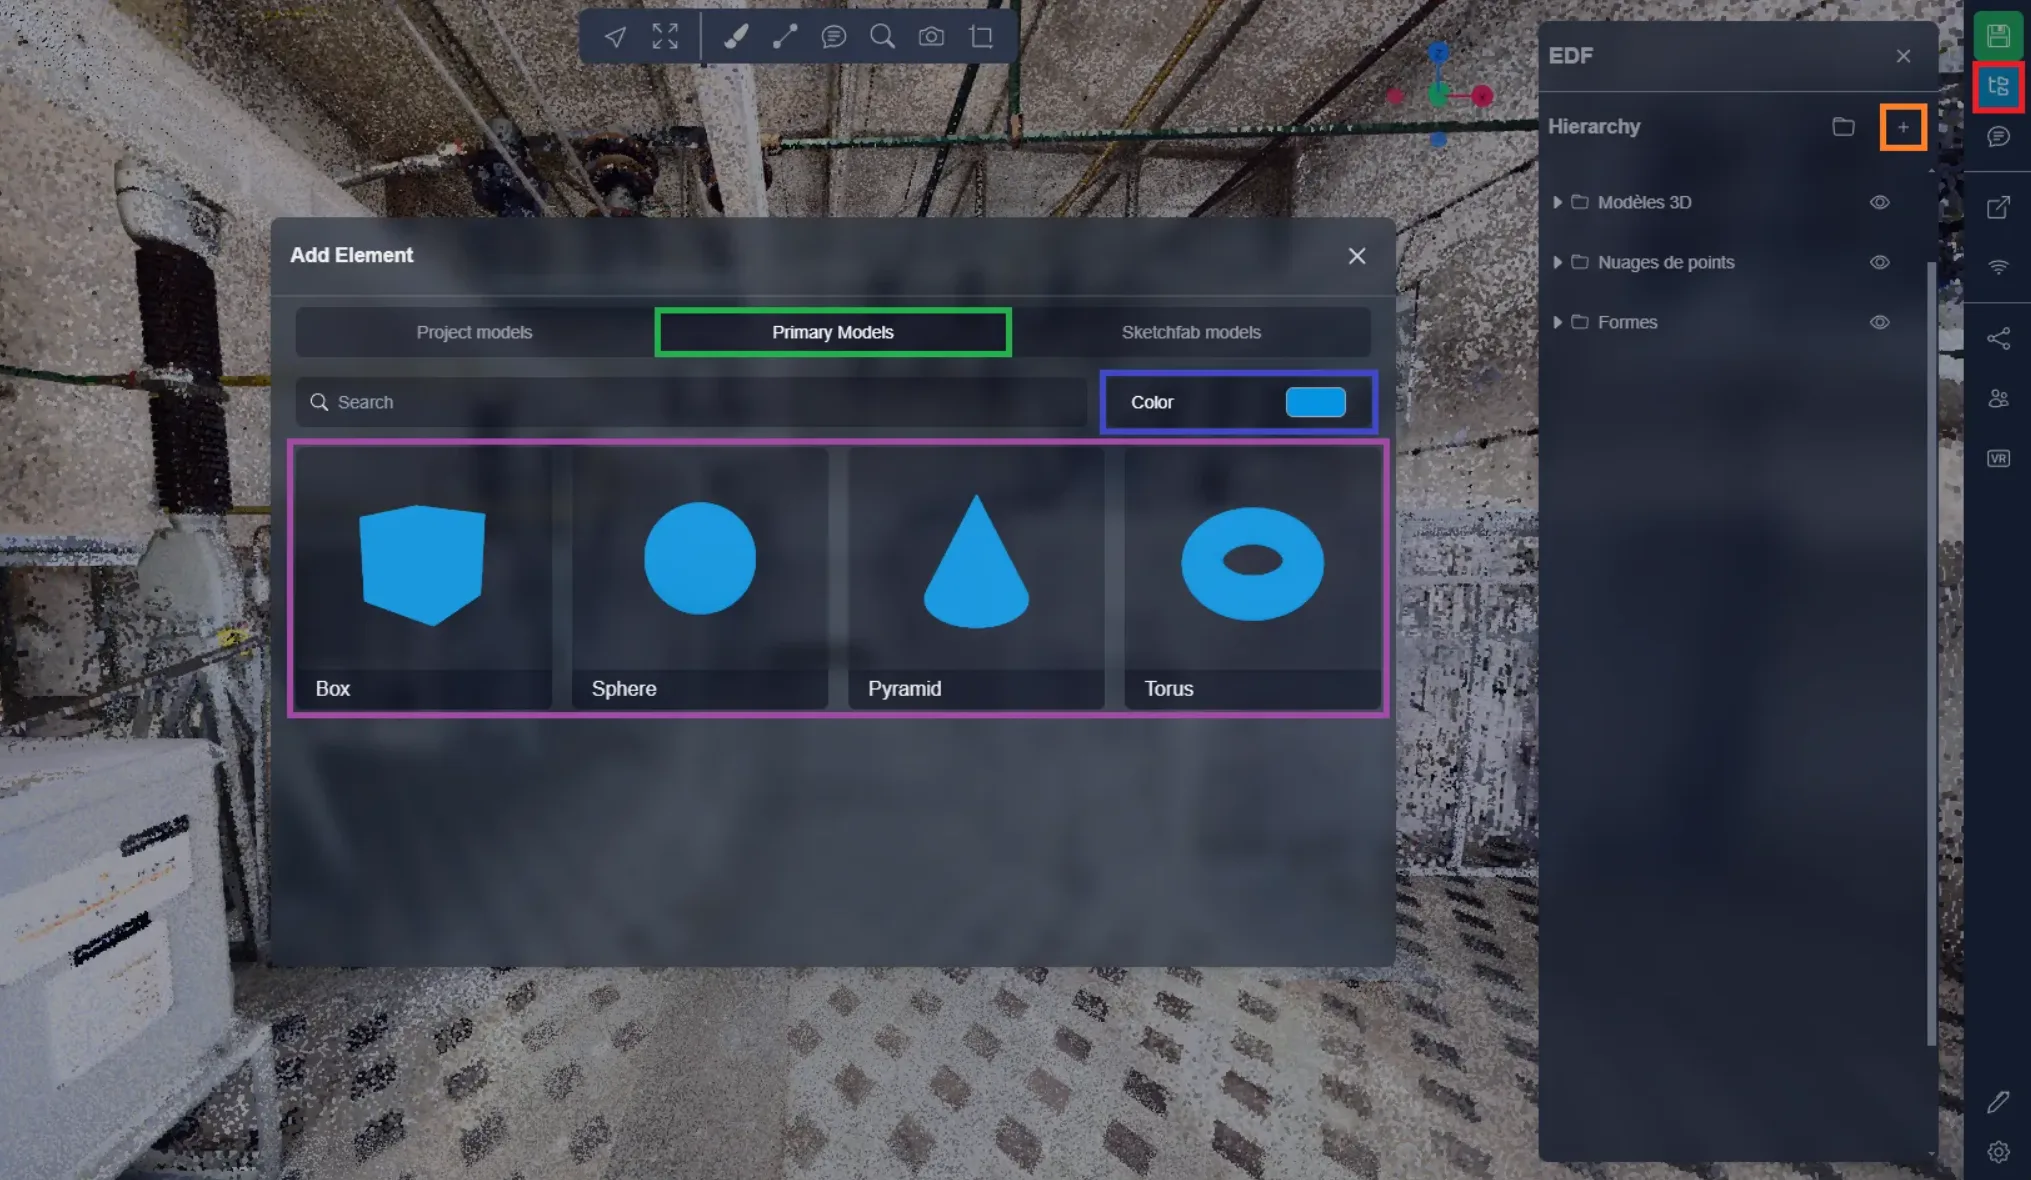
This menu allows you to view the object you are going to import. All you have to do is open the add object menu located in the project menu and select the “Primary models” tab.
Here, you will find the list of all the available objects, all you have to do is choose the color you want then click on the object you want to import.
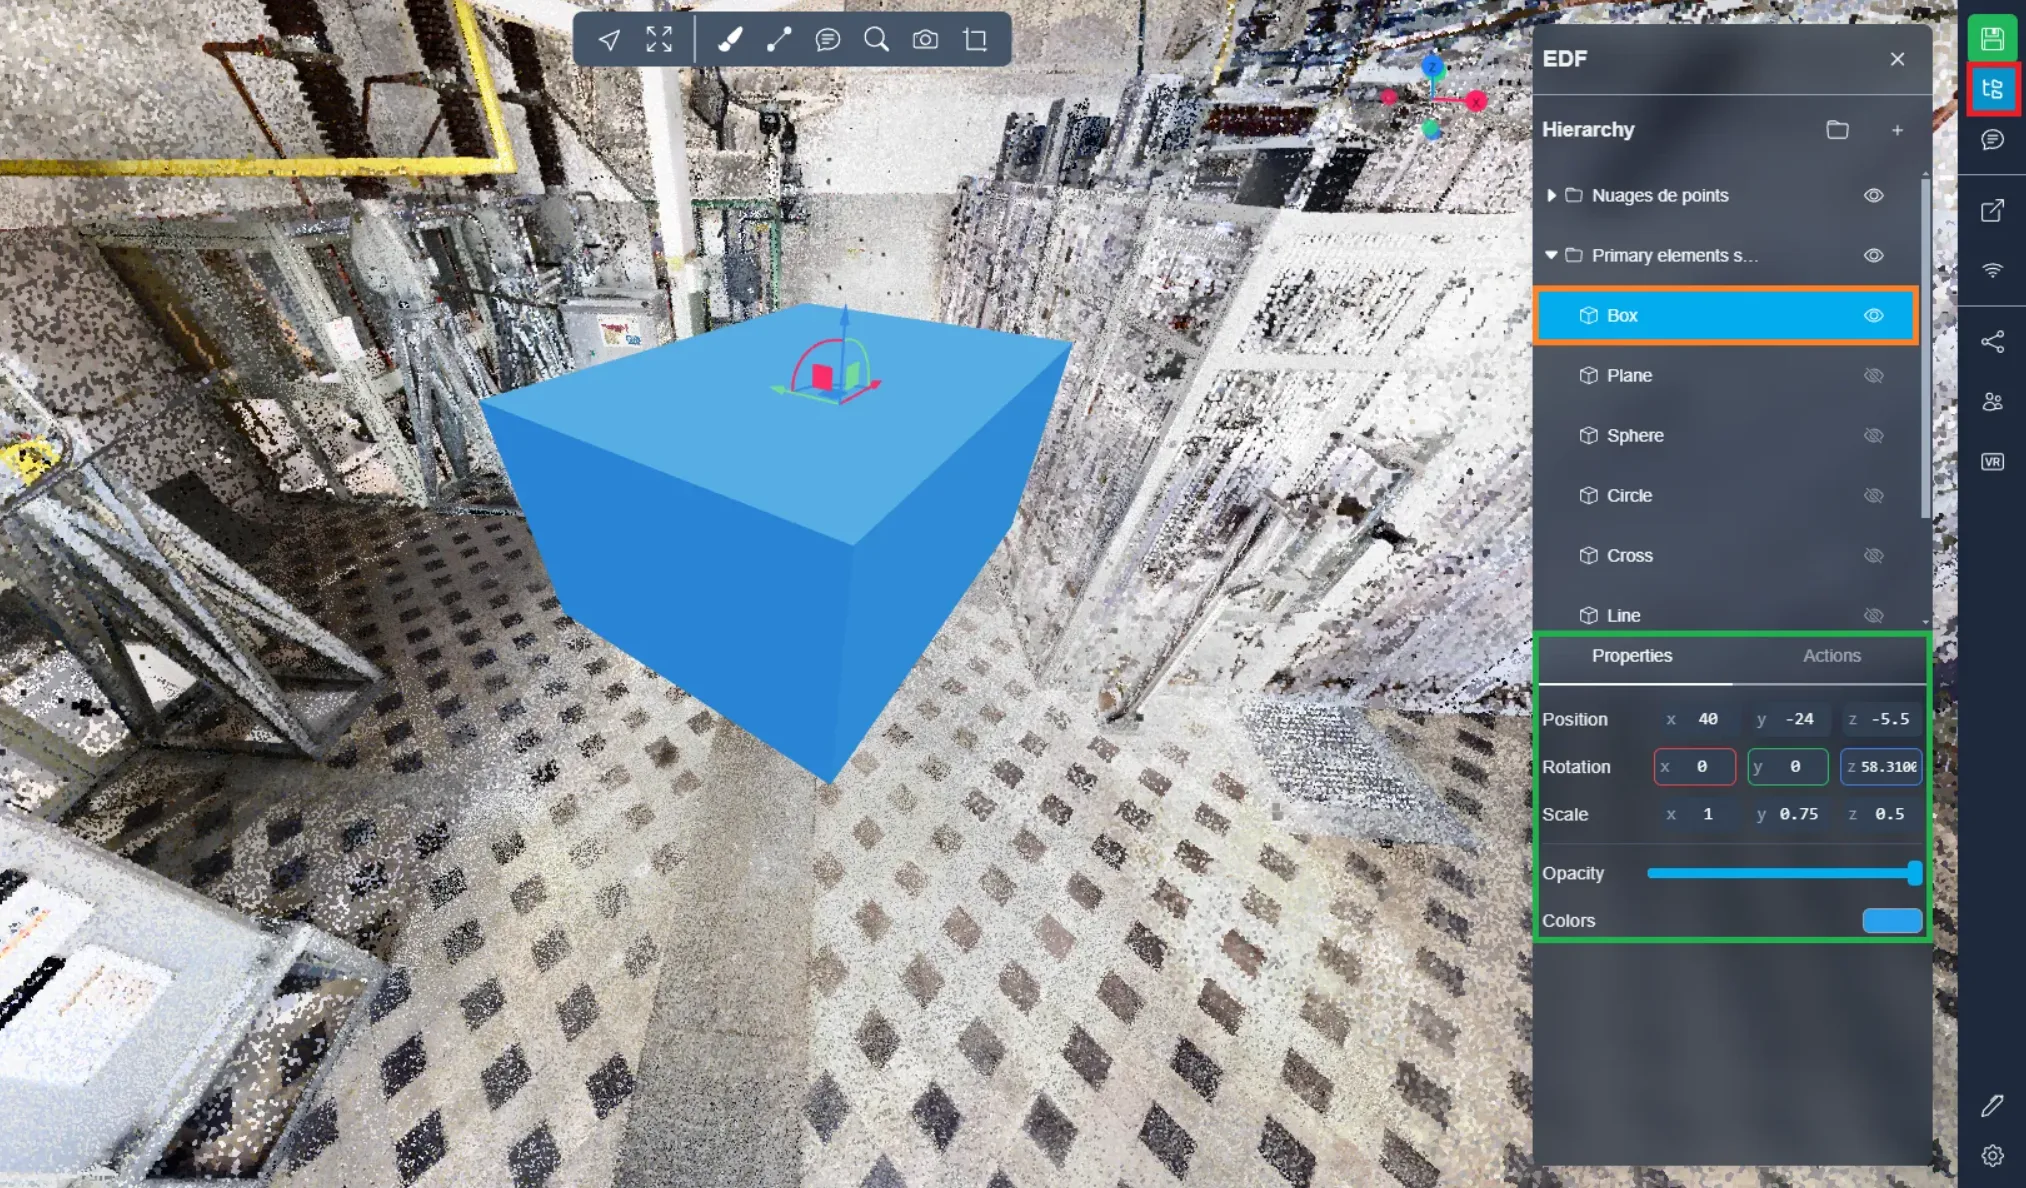
The element will then appear in front of you in the 3D Application, you are free to change its parameters using the object's properties. You will find these options after selecting your model from the Project menu.
To interact with the object, move it, change its shape, size, rotation, you can consult this article.
Loading with a CSV file
It is also possible to do this import using a CSV file. This file is constructed as follows:
- TYPE: this is the type of element to add (You can find the 8 types in the rest of the article, the code is in parentheses for each type)
- NAME: this is the name you want to give to your elements (no restrictions)
- POS\_X, POS\_Y and POS\_Z: these are the insertion coordinates of the element (the center of the element)
- ROT\_X, ROT\_Y and ROT\_Z: these are the rotations of the element expressed in degrees
- SCALE\_X, SCALE\_Y and SCALE\_Z: these 3 values determine the size of the element depending on its type (we will detail it later)
- COLOR: this is the color of the element expressed in hexadecimal (be careful, do not forget the # in front of the code)

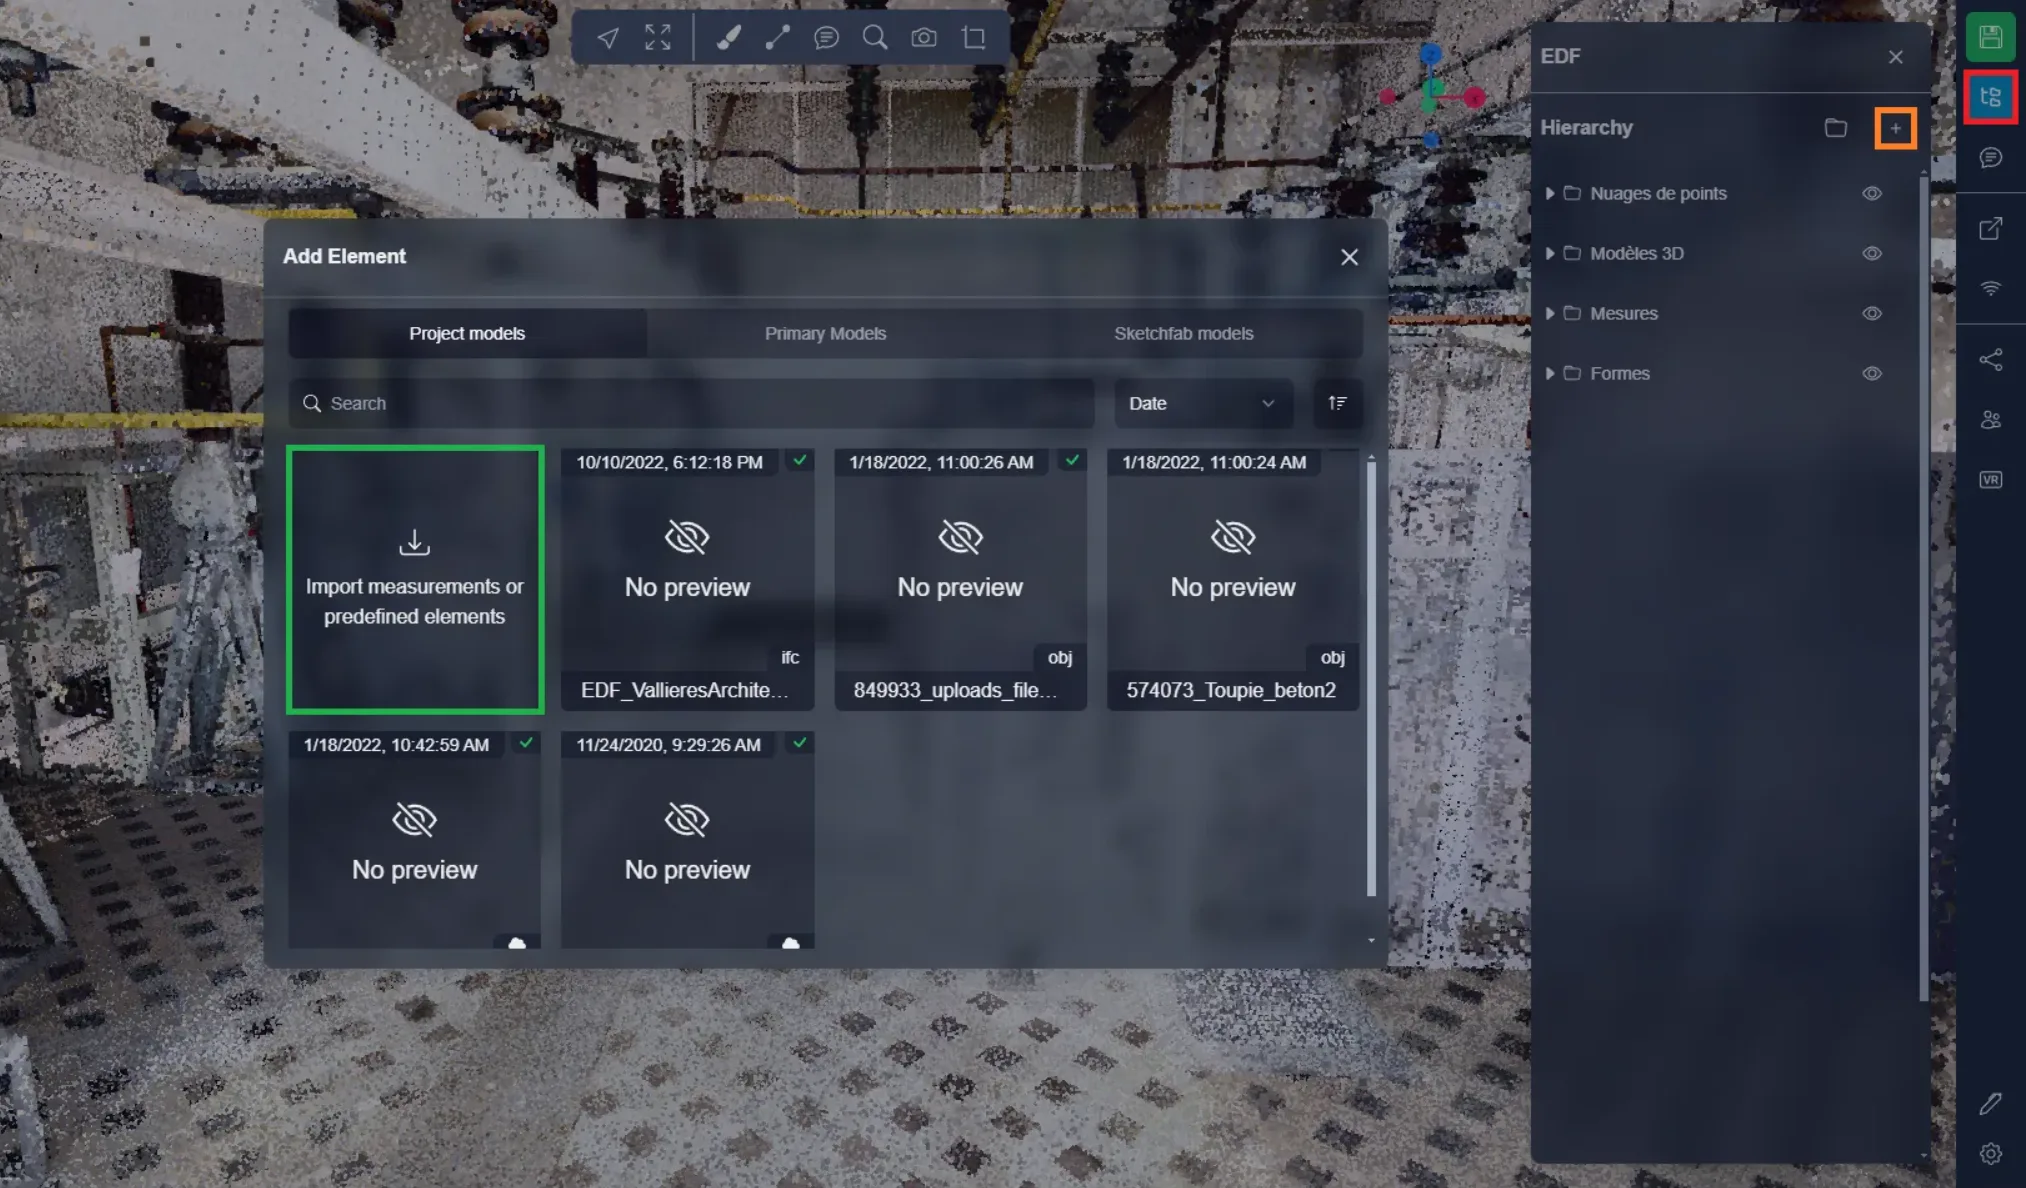
To add the CSV to the platform, it's very simple, just open the project menu and click on the + button to open the import window. Here, you just need to click on the import option to be able to upload your file.
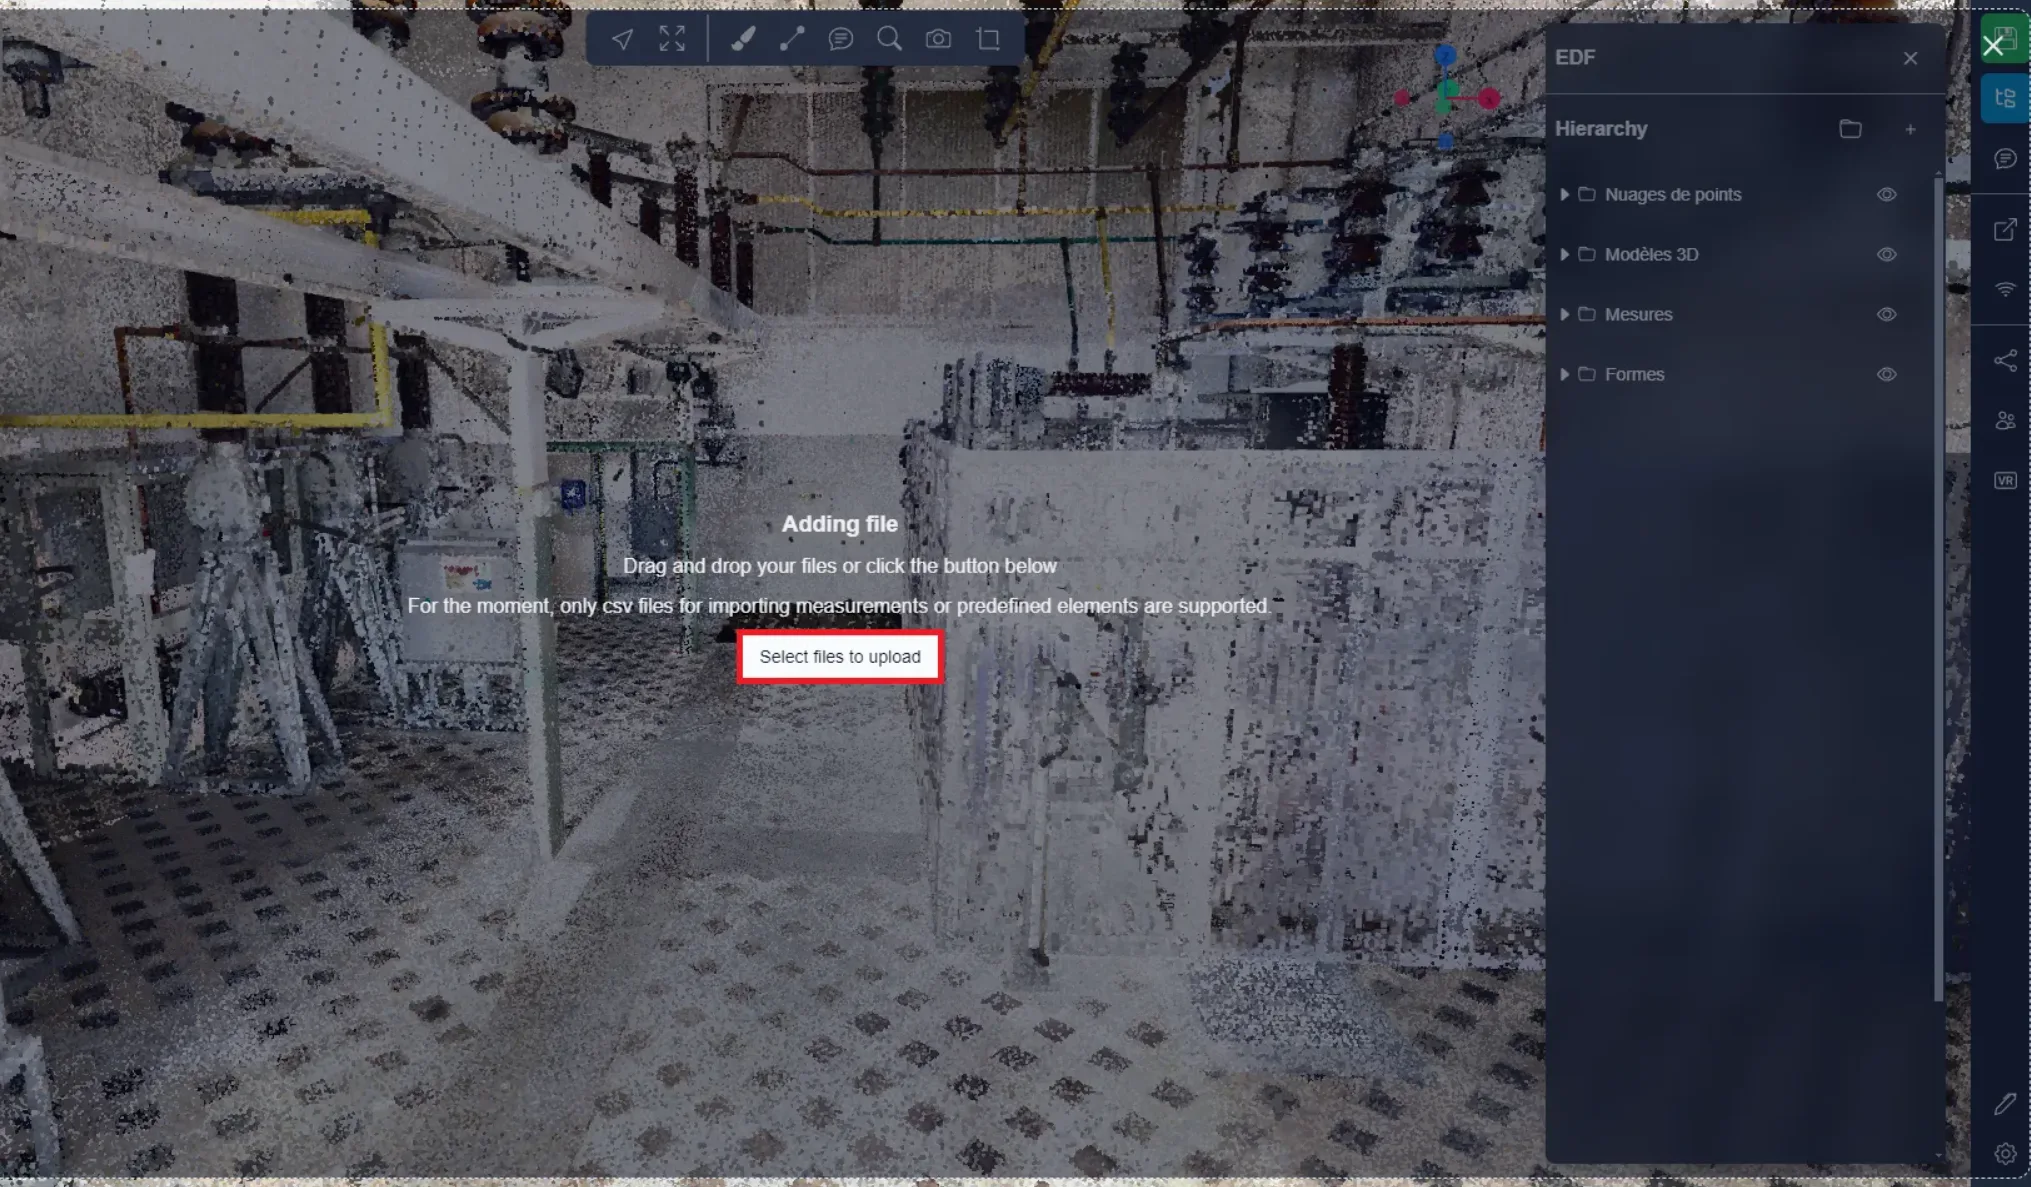
This will open this window, you can then directly select your CSV on your computer. You can also directly drag and drop your file onto the 3D Application, this will have the same effect.
3D objects
Below you will find a list of available primary items. You will see that the different objects do not all use all the fields available in the CSV, 2D objects like the plane or the circle for example, do not have a “SCALE\_Z” since they do not have a 3rd dimension. the line also has a particular system, which will be detailed in its section. So take the time to understand how each type of object works to obtain a qualitative result. Obviously, you can always modify your elements after their import, however, good preparation will definitely save you time.
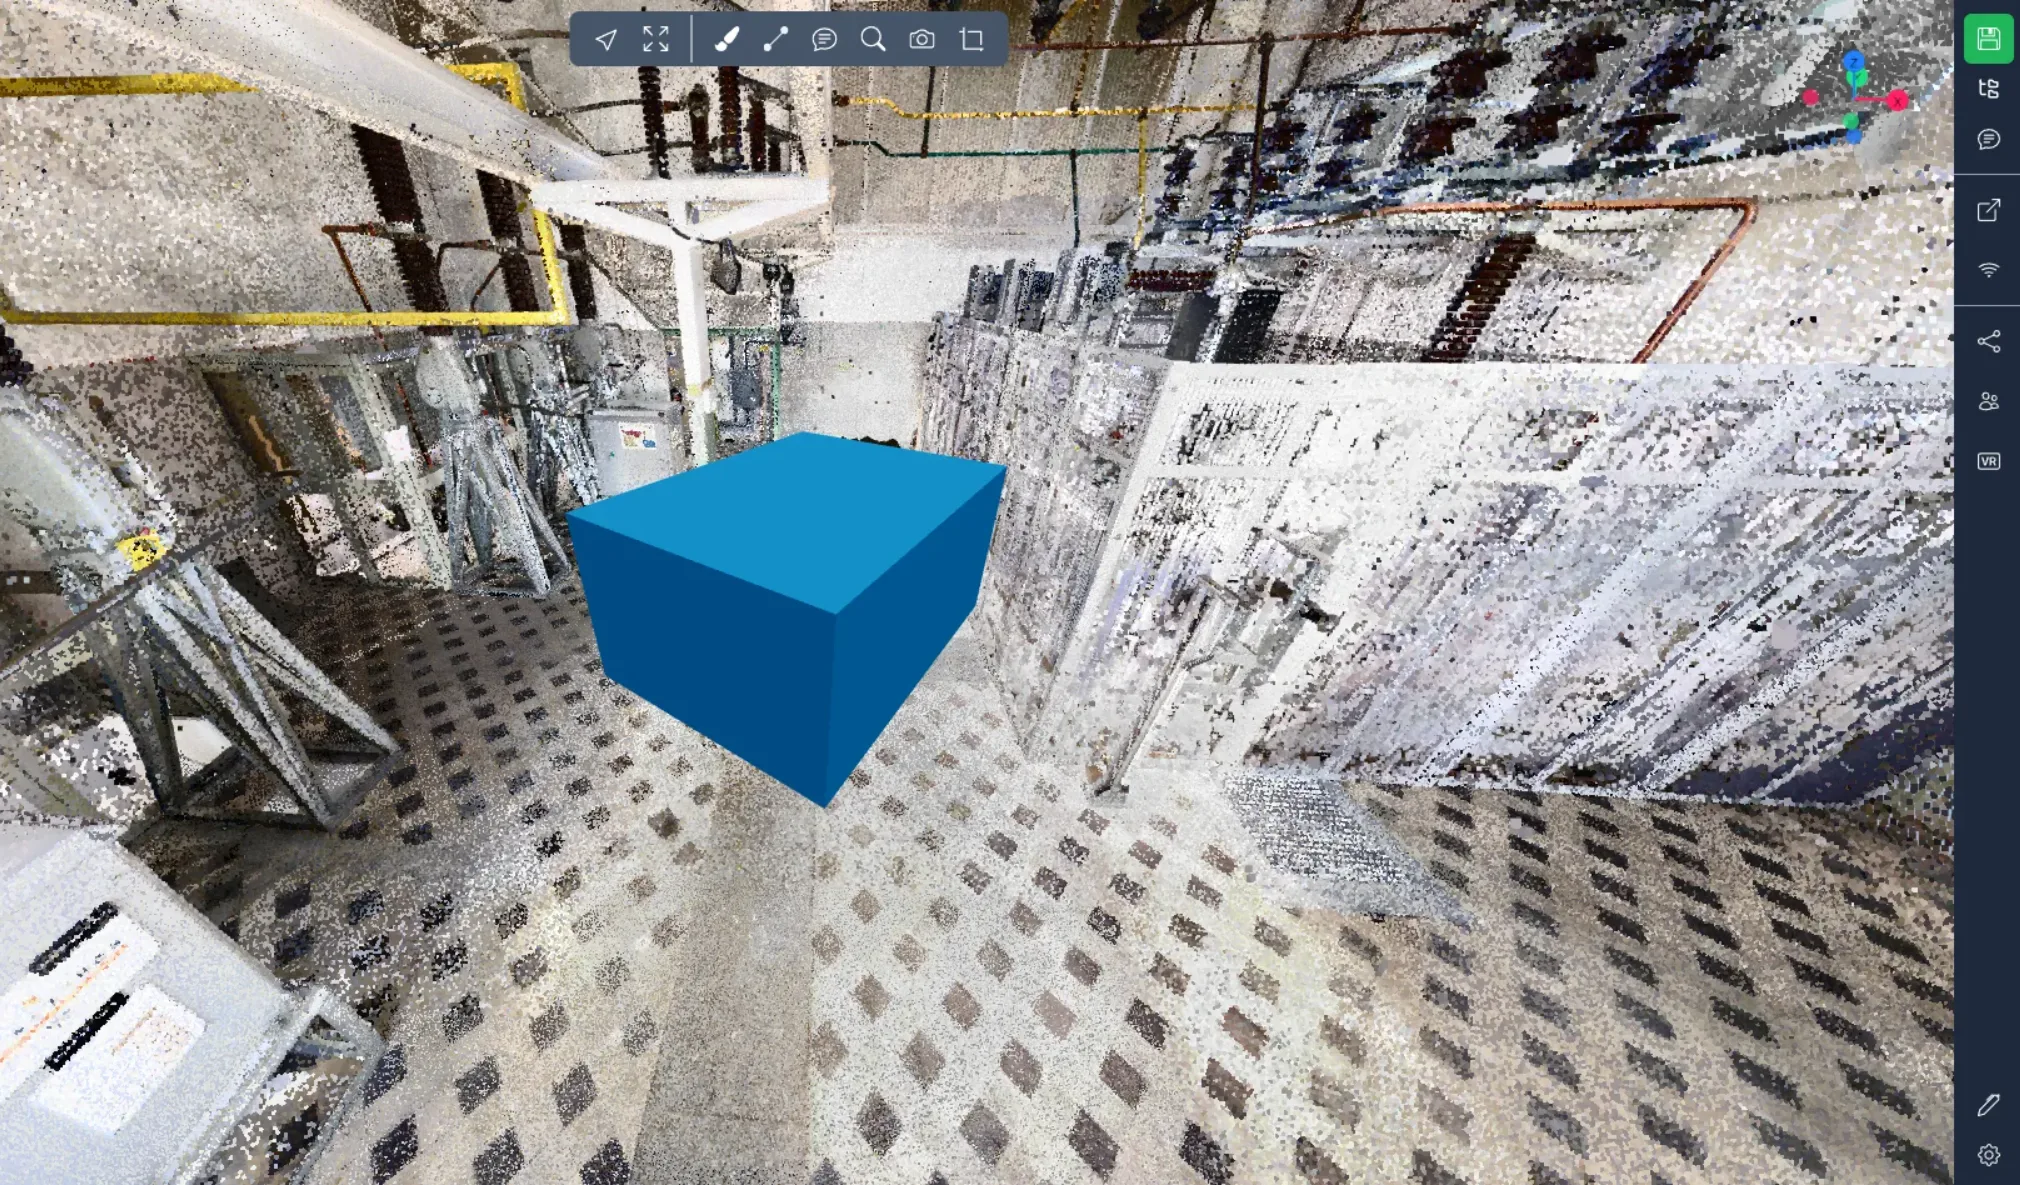
Box: (box)
In the CSV: The SCALE\_X, SCALE\_Y and SCALE\_Z values determine its size according to the different axes expressed in meters.
Plane: (plane)
In the CSV: The SCALE\_X and SCALE\_Y values determine its size according to the different axes expressed in meters, but the SCALE\_Z value is not used.

Sphere: (sphere)
In the CSV: The SCALE\_X value determines its radius expressed in meters. The SCALE\_Y and SCALE\_Z values are not used. Rotation values are 0.

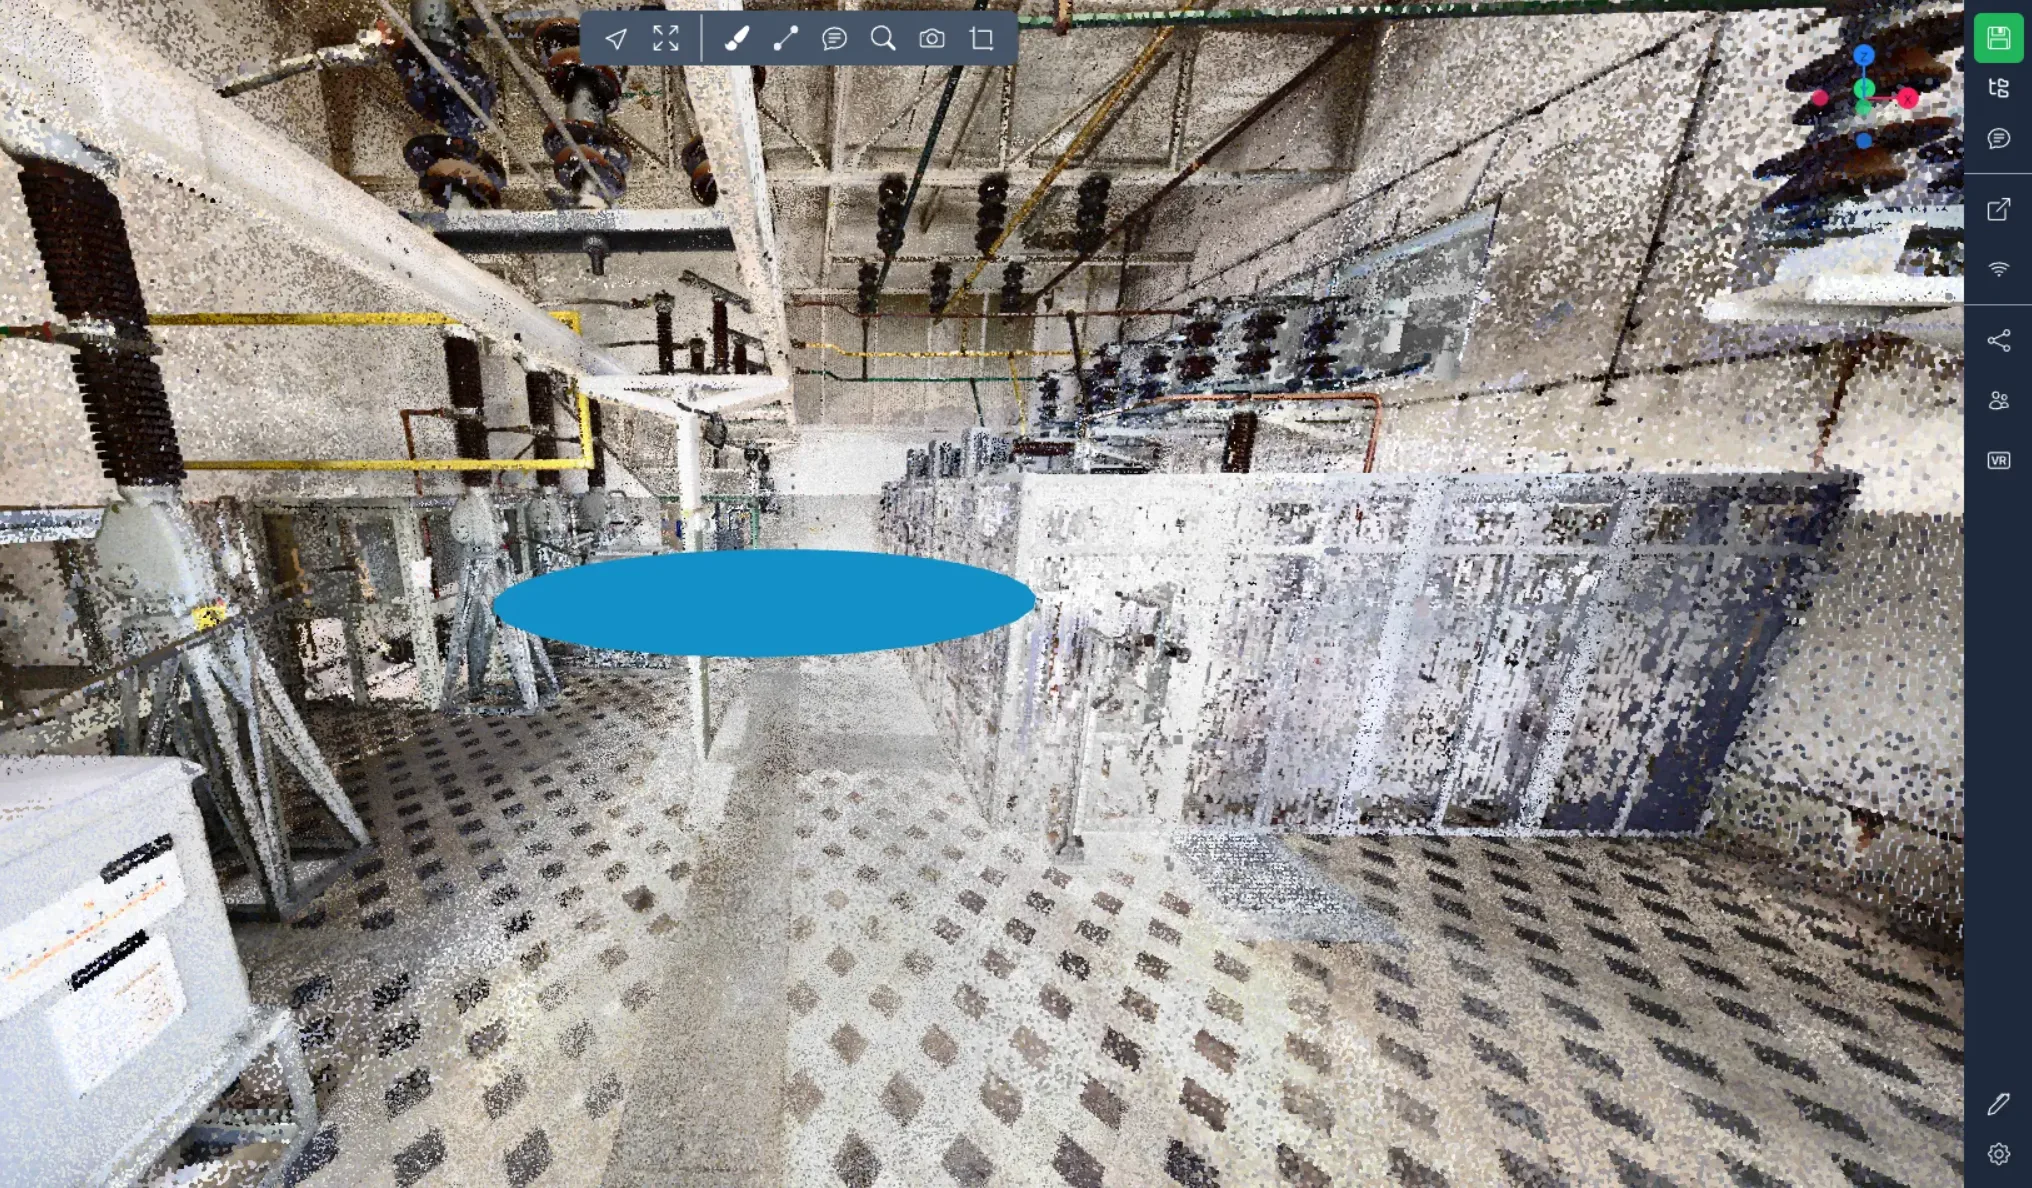
Circle: (circle)
In the CSV: The SCALE\_X value determines its radius expressed in meters. The SCALE\_Y and SCALE\_Z values are not used.
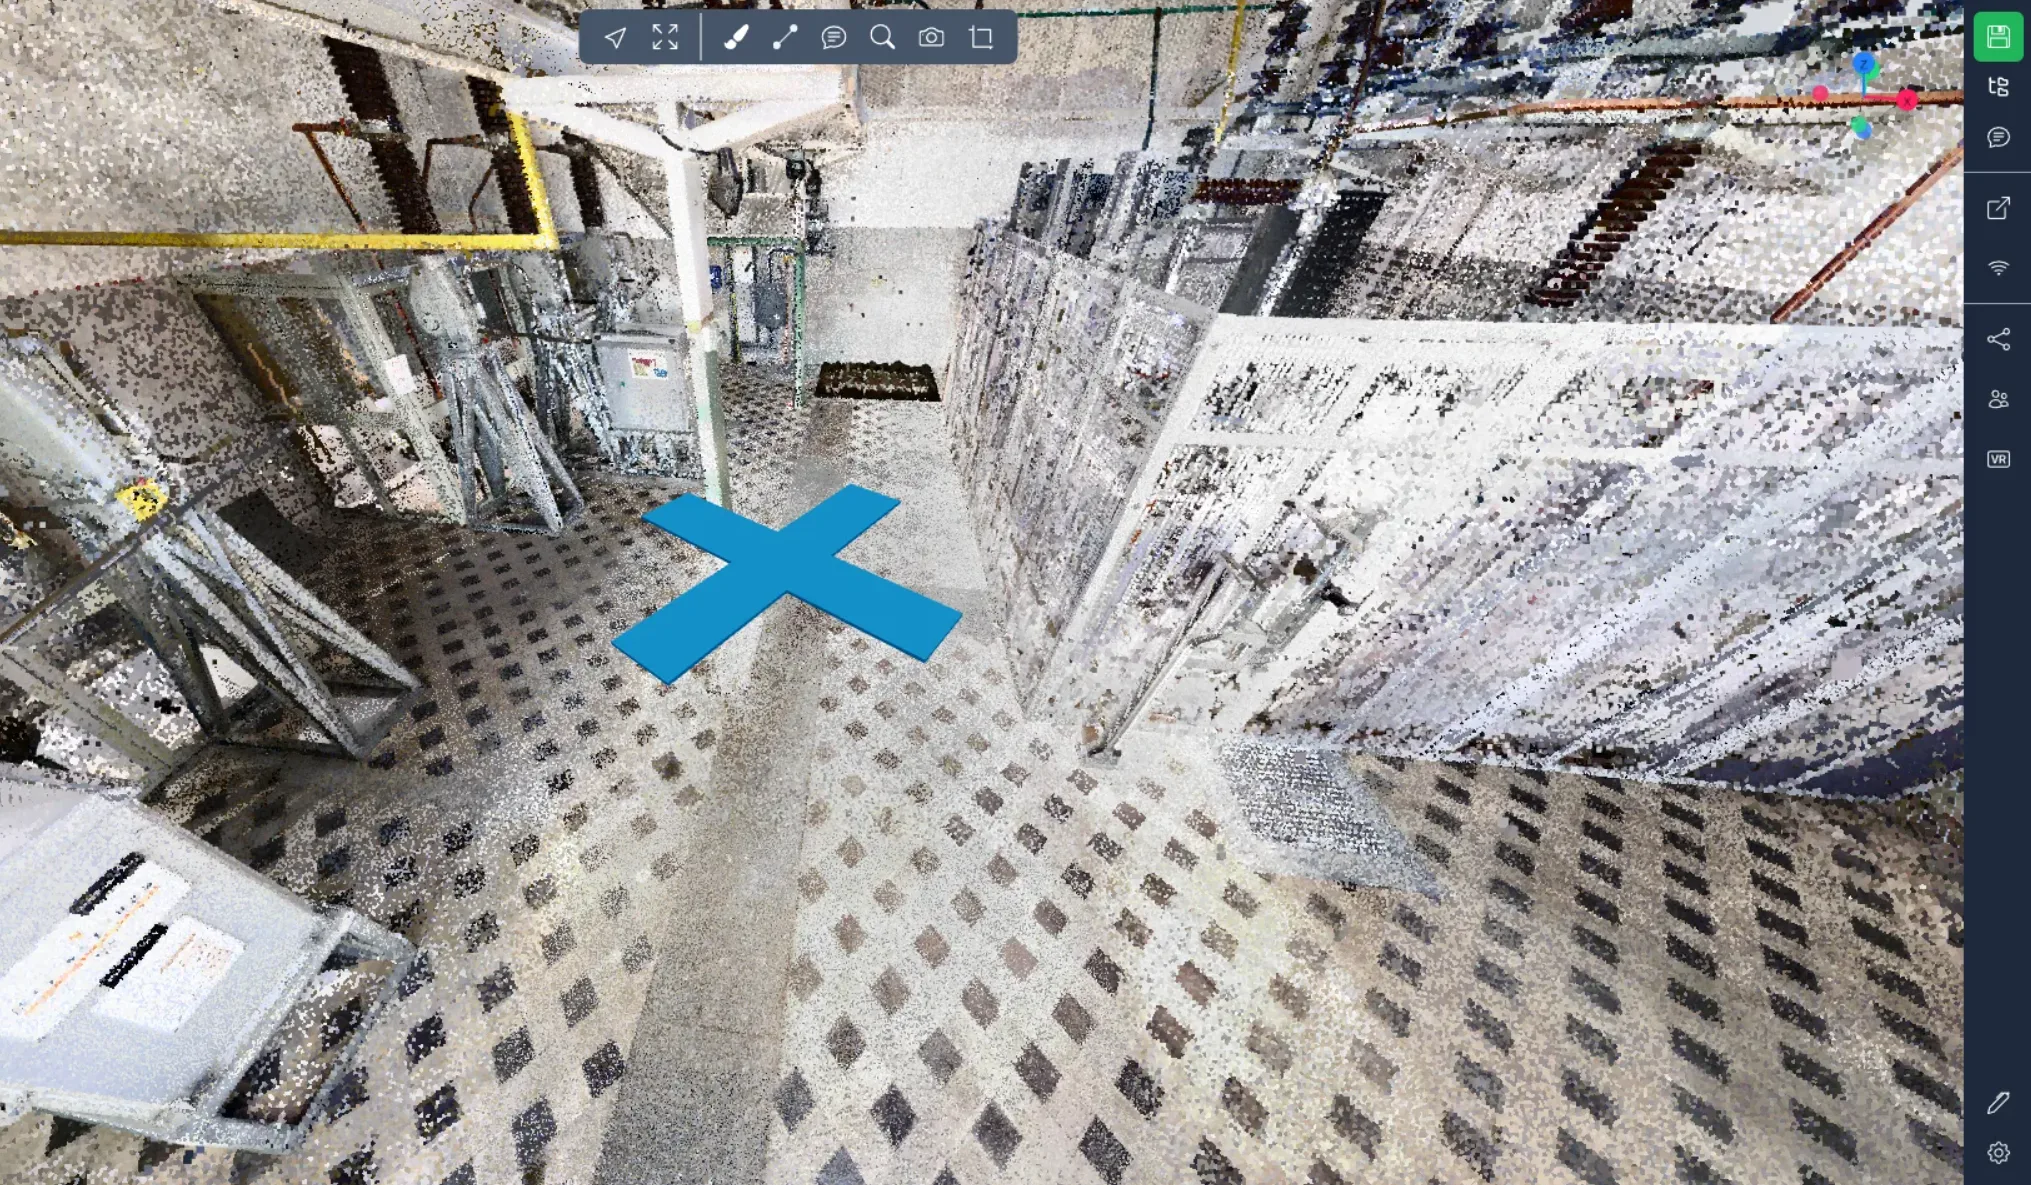
Cross: (cross)
In the CSV: The SCALE\_X value determines the length of the cross expressed in meters. The SCALE\_Y and SCALE\_Z values are not used.
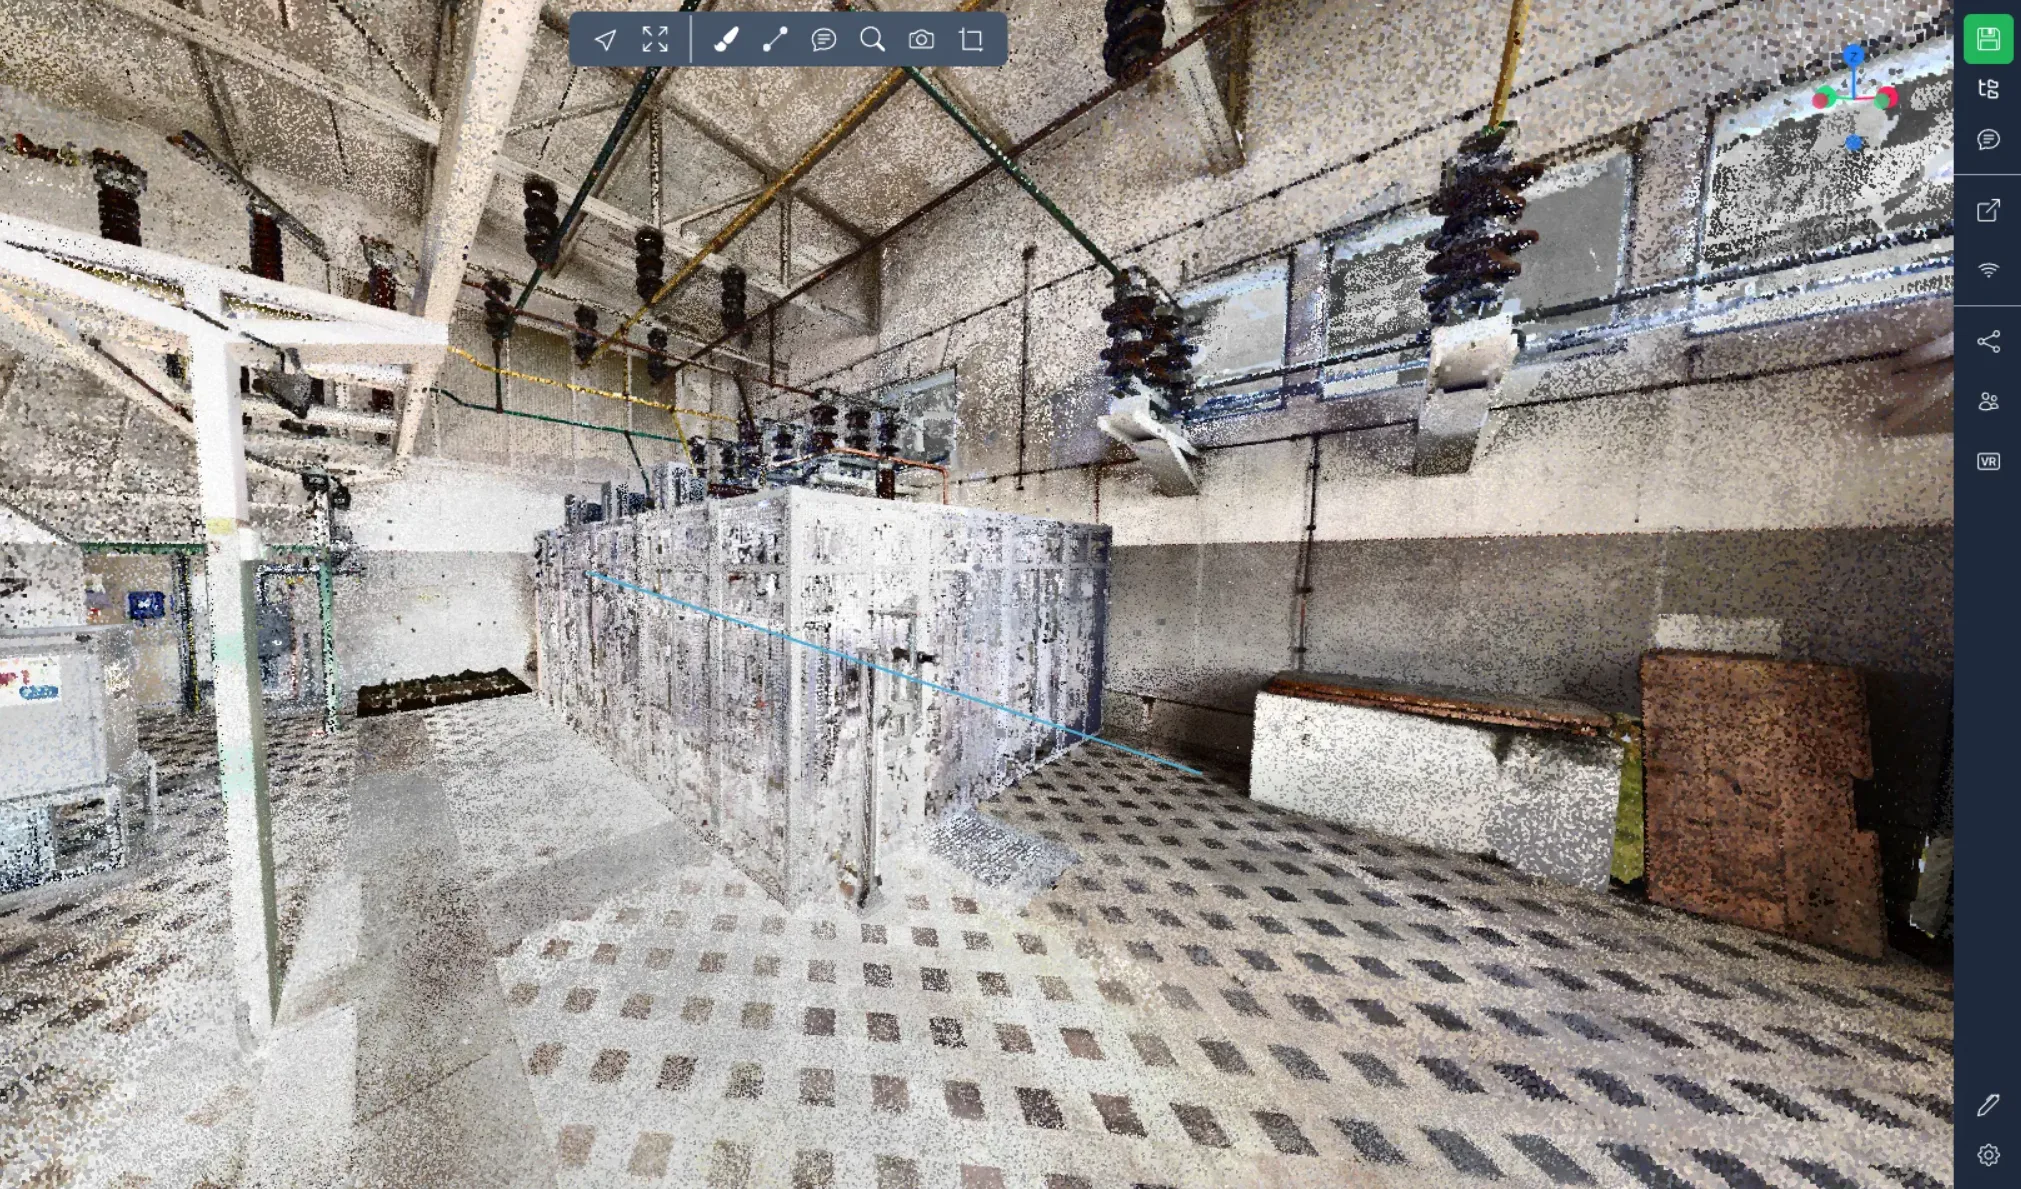
Line: (line)
In the CSV: The values POS\_X, POS\_Y and POS\_Z determine the first point of the line. The ROT\_X, ROT\_Y and ROT\_Z values determine the second point of the line. SCALES values are not used.
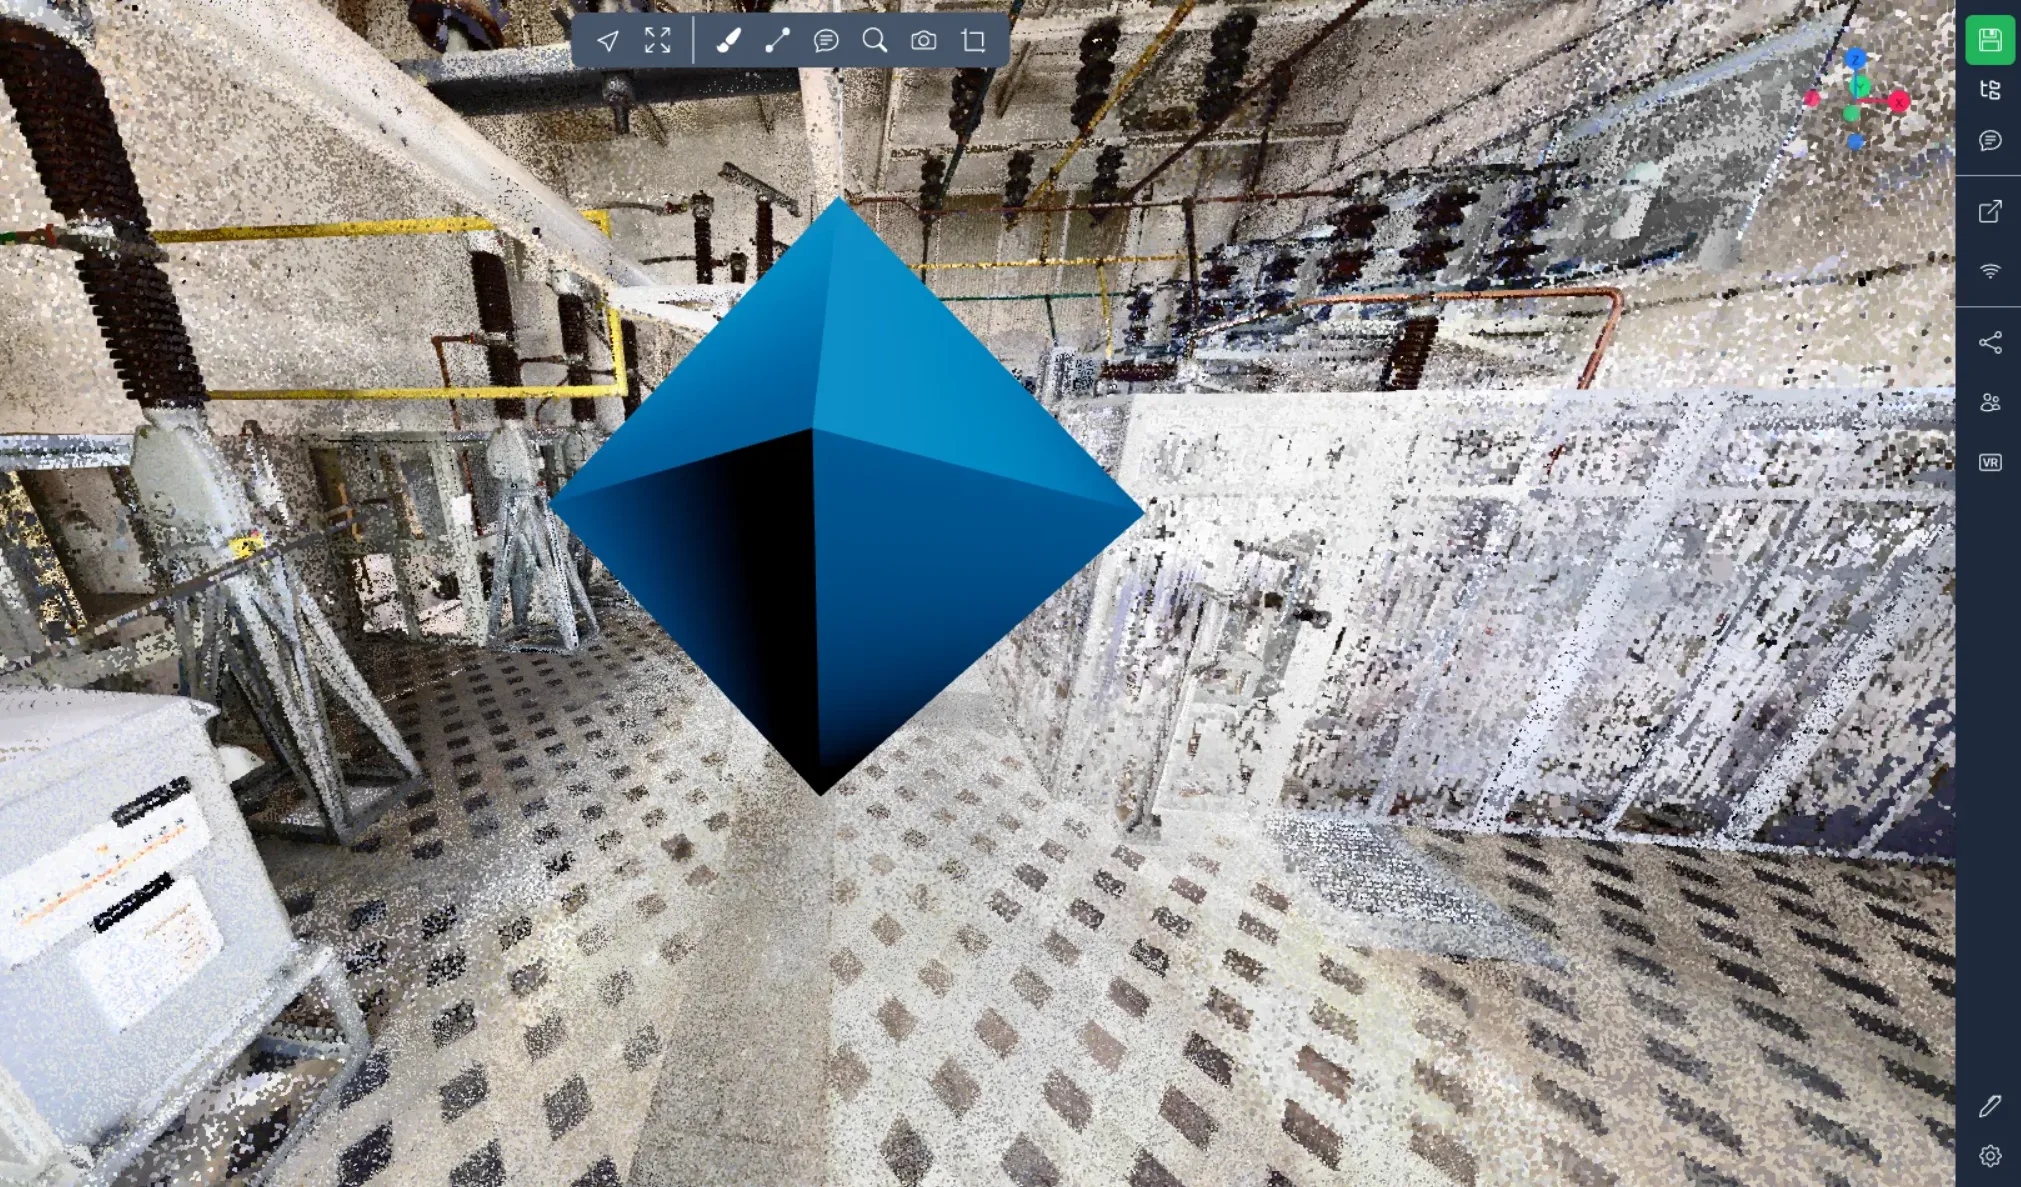
Pyramid: (pyramid)
In the CSV: The SCALE\_X, SCALE\_Y and SCALE\_Z values determine its size according to the different axes expressed in meters.
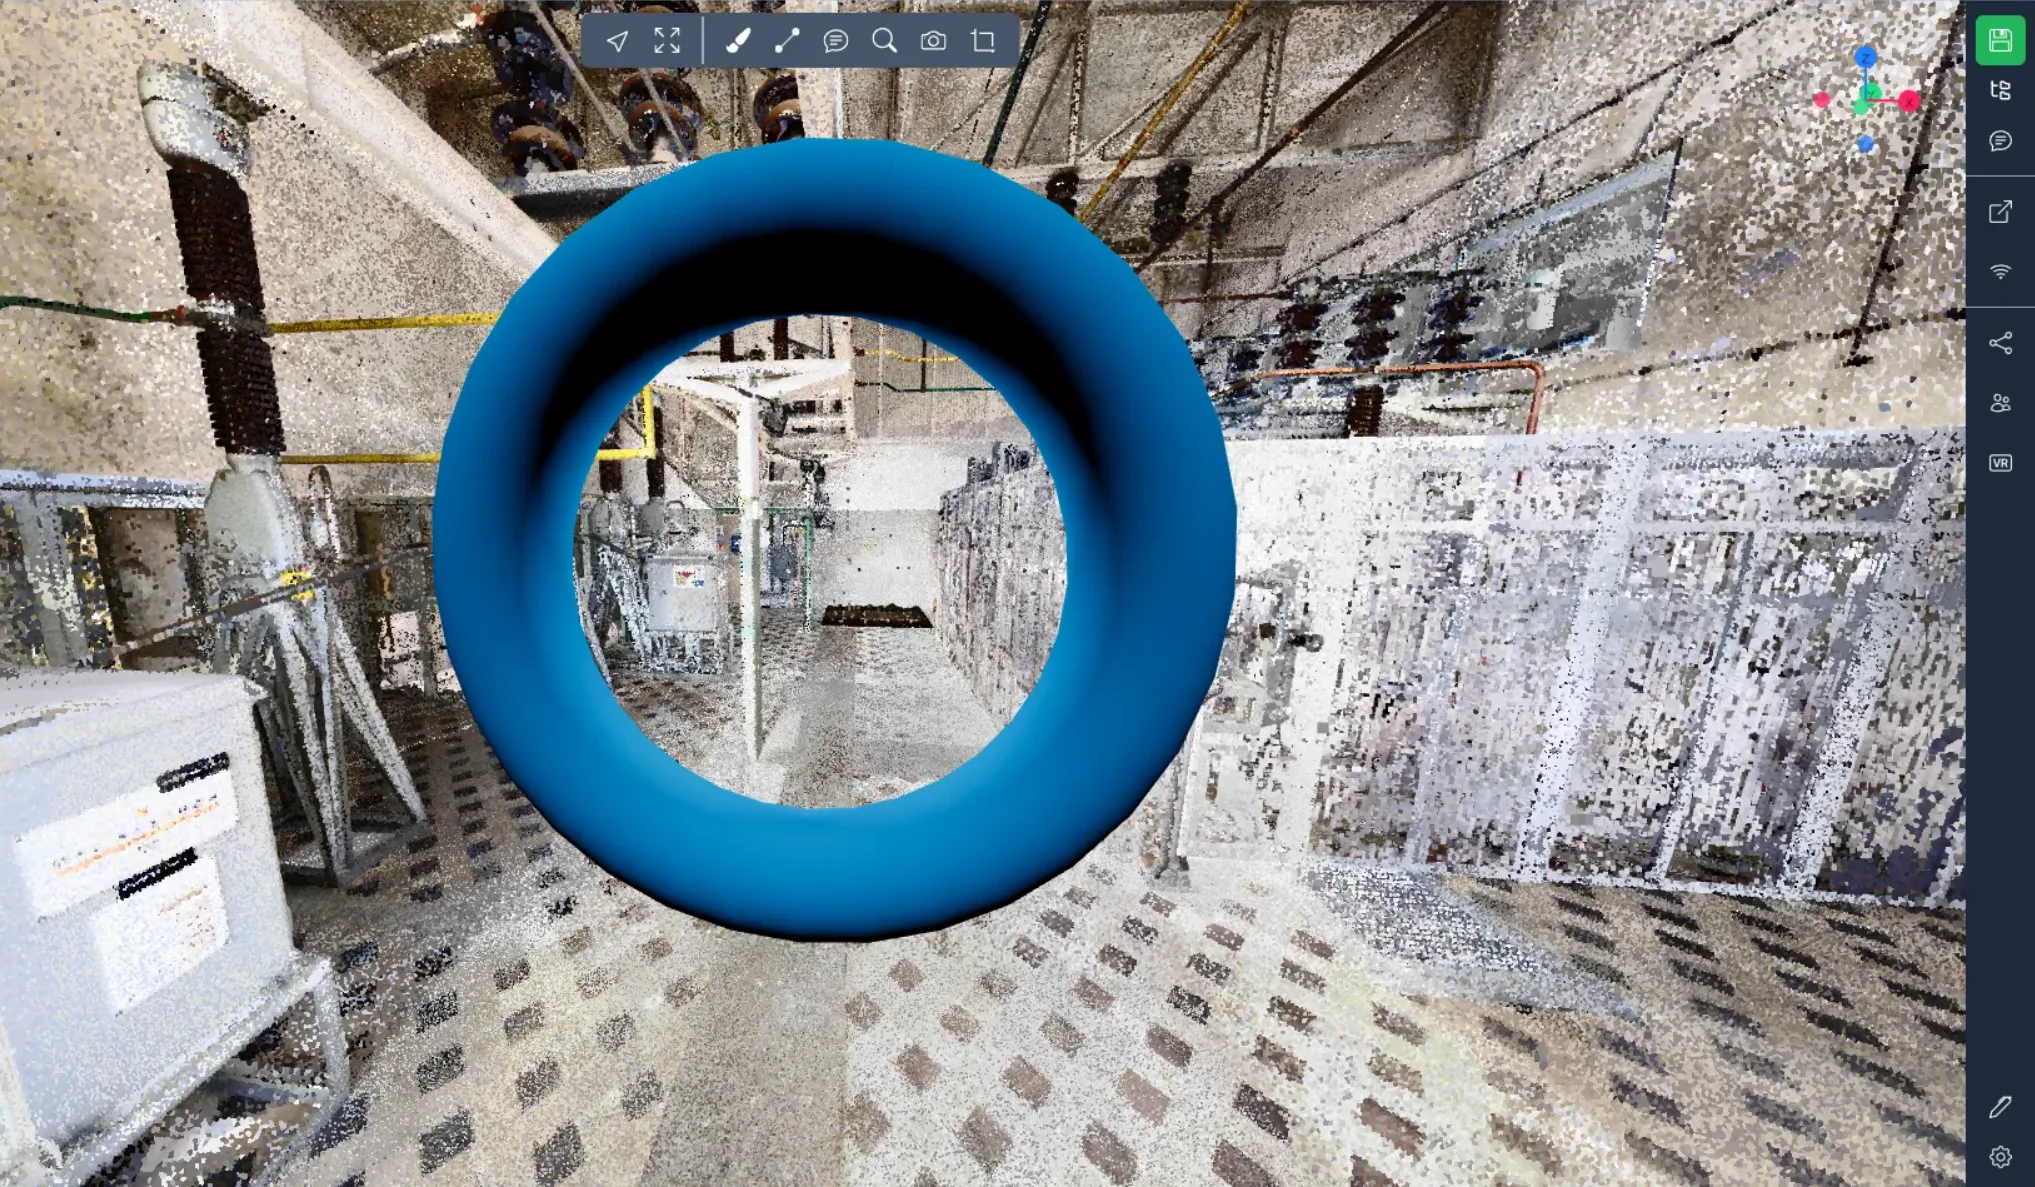
Donut: (torus)
In the CSV: The SCALE\_X, SCALE\_Y and SCALE\_Z values determine its size according to the different axes expressed in meters.
In case of problems or difficulties, do not hesitate to contact the platform team.