Add Textured 3D Objects
The file
Before heading over to the platform. Let's make sure your file is correctly made.
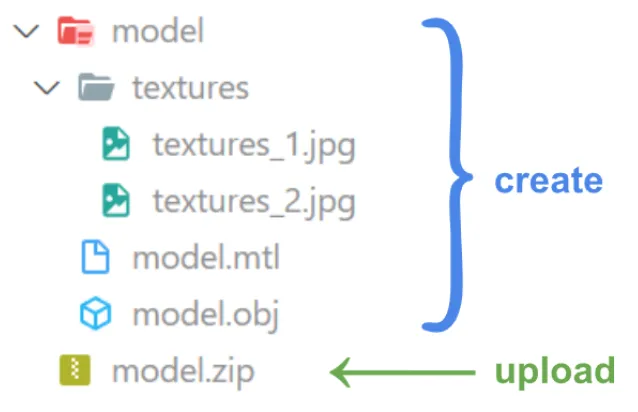
The ZIP file should contain all the necessary files,
- Your texture files (JPG, PNG, TIFF, TGA, etc.)
- Your material file (MTL) format
- Your template file (OBJ)
Recommendations
- Uncompressed OBJ file is recommended to be less than 500 MB.
- Maximum number of Texture Images : 12.
Textures can be in the root directory or in a subfolder, this depends on the MTL file
For an OBJ with MTL file that is looking for the textures files (JPG, PNG, TIFF, TGA etc.) in a folder “textures”, the ZIP file should look like the example below :
Adding to the project
To add a textured 3D object to your project, follow the same initial steps as for any other file type.
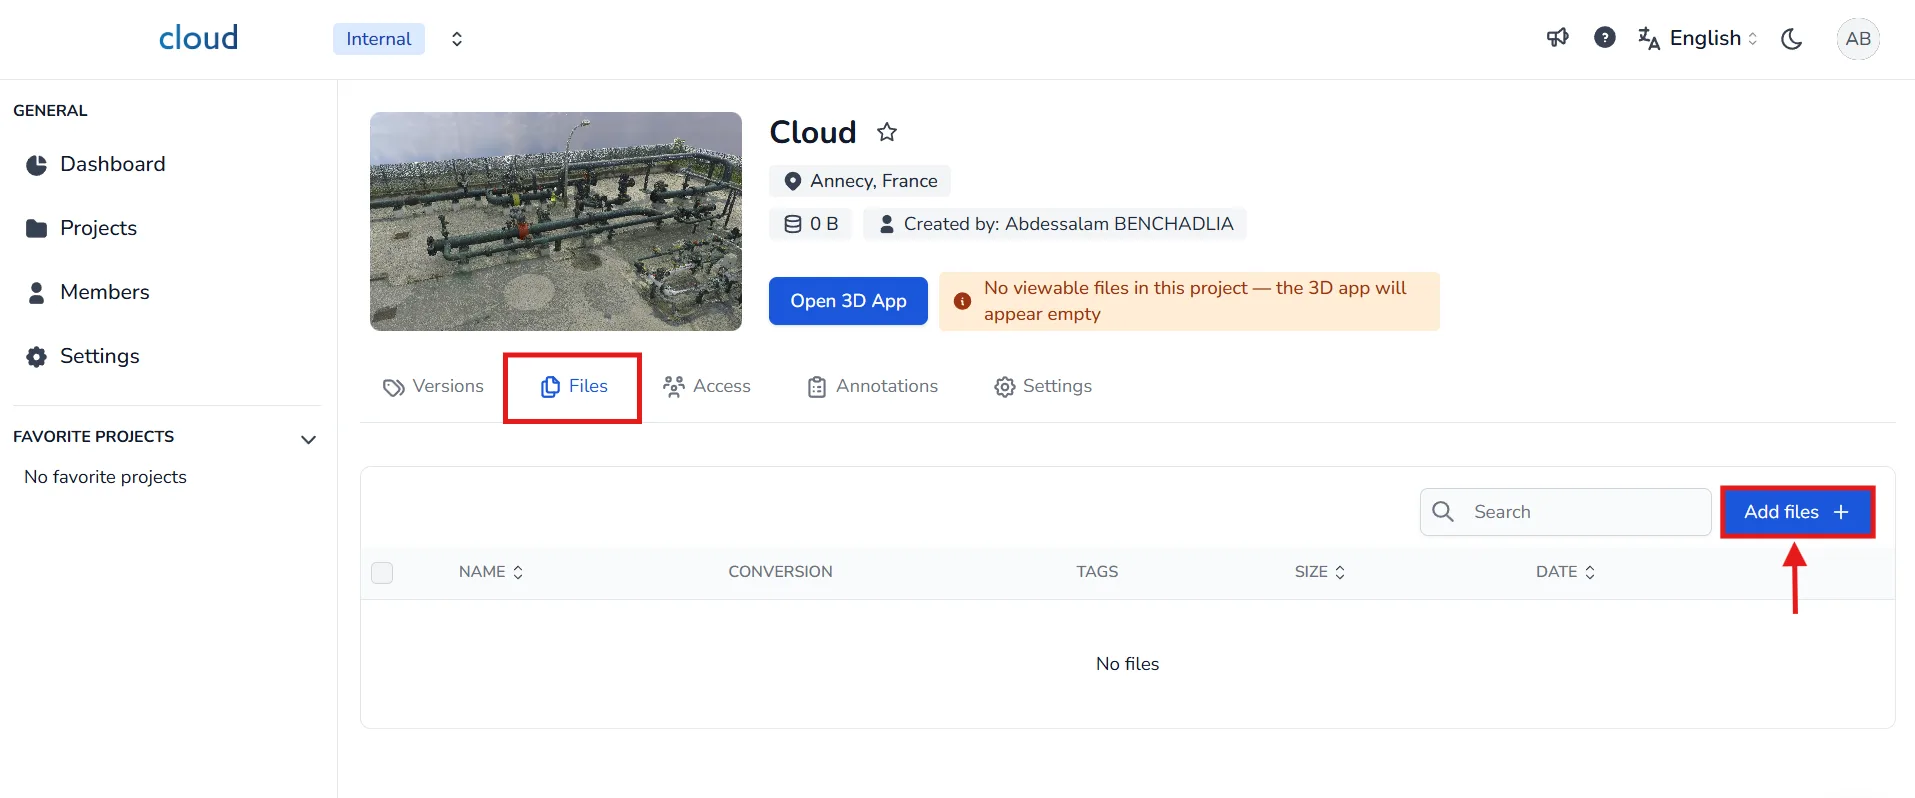
Navigate to your project and click on the Files tab. Then, click on the Add file button in the upper right corner.
A window titled "Add files to project" will open. Here, you can drag and drop your ZIP file or use the Browse File button to select it manually.
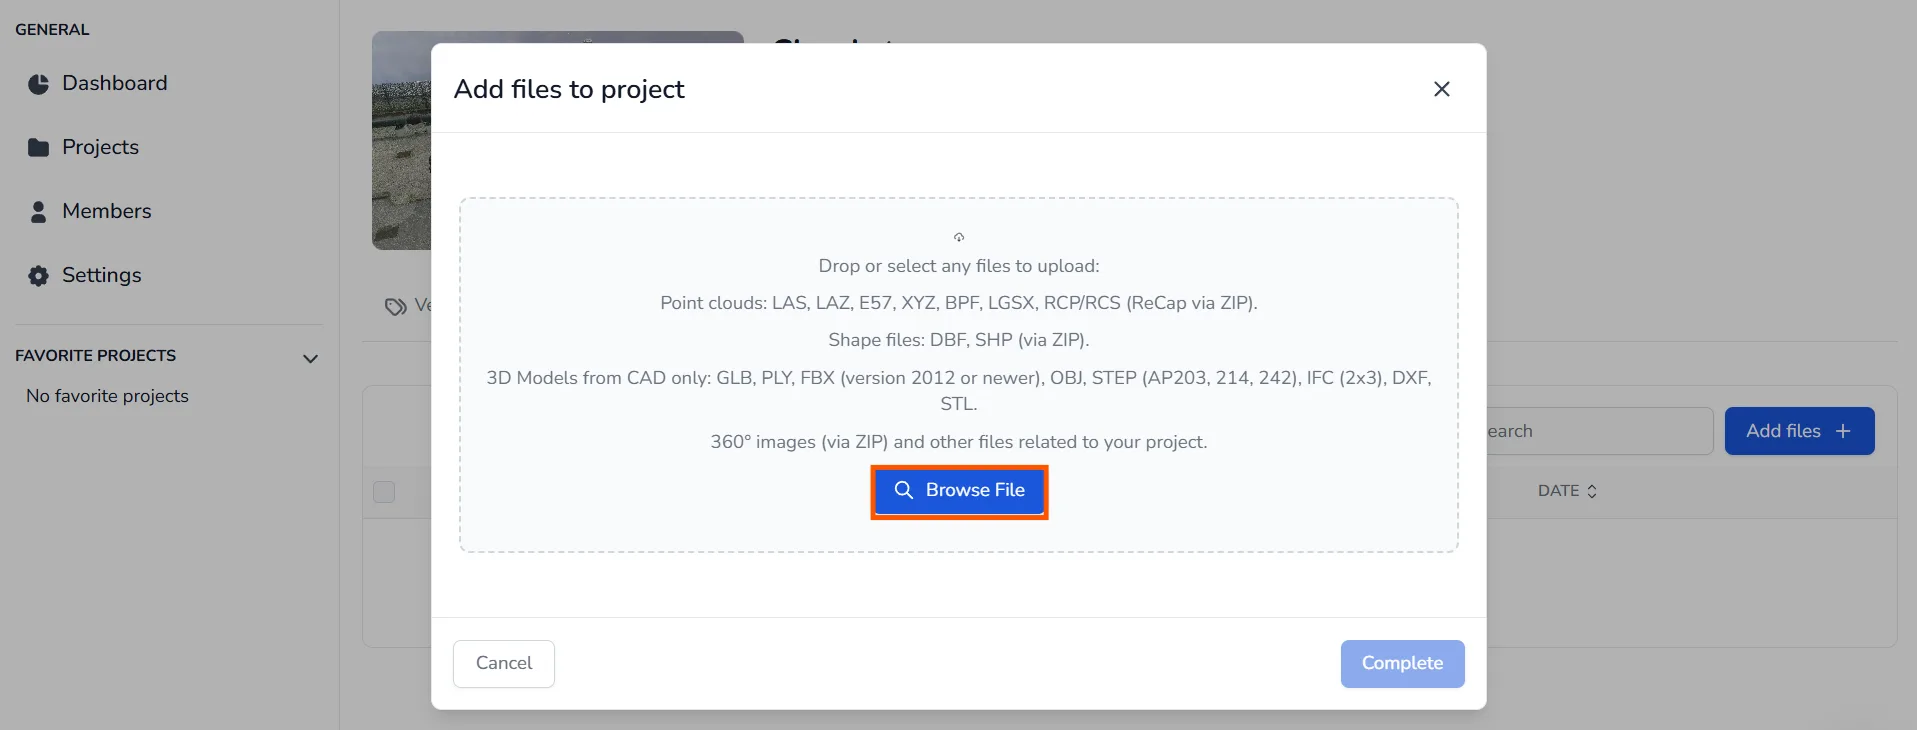
Your ZIP file must follow the correct structure to be recognized by the platform, as explained at the beginning of this article. If the structure is respected, the system will automatically detect the OBJ file and categorize it as a BIM format.

Once the file is selected and appears in the list, click the Complete button to confirm the upload. The conversion will start automatically.
Remember to stay on this page while the file has not been sent.
Loading in the 3D Application
When the processing is done (check the files tab to verify the status), you can load the 3D model in the 3D Application just like any other model. Check out the article Objects / Scene modification for more information.
It can happen that the imported object is not oriented correctly. As a reminder, you can modify this by selecting the object from the scene menu (right menu) then by changing the parameters of this object from the table located at the bottom of the menu after clicking the object.
You can also make the change by activating the rotation mode by pressing R then selecting the object from the tree view, or by pressing CTRL while targeting the object. See the article Interact with resources.
In case of problem or difficulty, do not hesitate to contact the platform team.