Autodesk Revit Plug-in - Collaboration
If you don't have the Autodesk Revit plugin installed on your computer, you can first go to the Autodesk Revit plugin installation article, then return to this article afterward.
The collaborative mode is used to work with several collaborators on the same project.
It consists of :
- A "Center" file stored either in the Autodesk cloud or on an internal network in LAN mode
- A local project referring to the “Center” file, stored on your computer
This architecture enables each collaborator to make progress on their local project and to synchronize with the central project, which is then passed on to the other people involved in the project.
To begin collaboration, open a project.
Once the project has been started, open the Collaborate tab and click the Collaborate button.

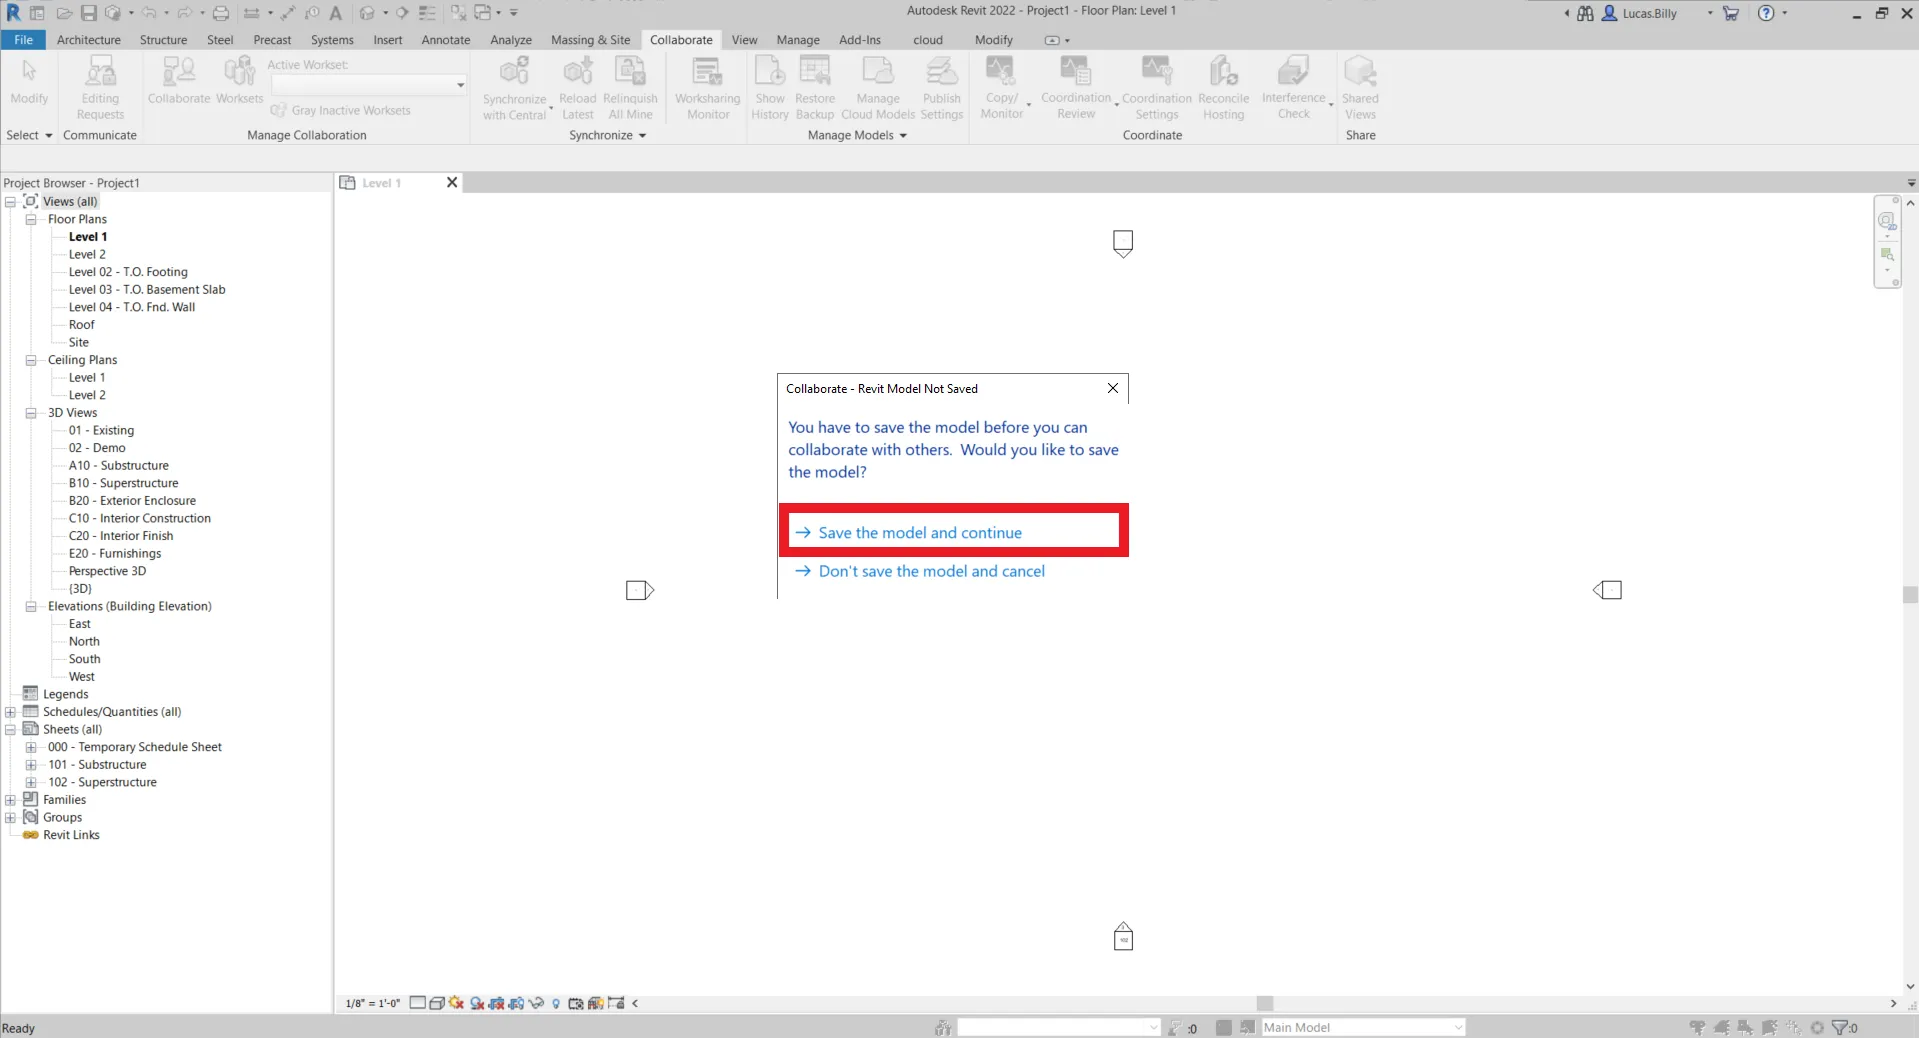
If the project has not yet been saved, Autodesk Revit will ask you to do so. Click on Save the model and continue.
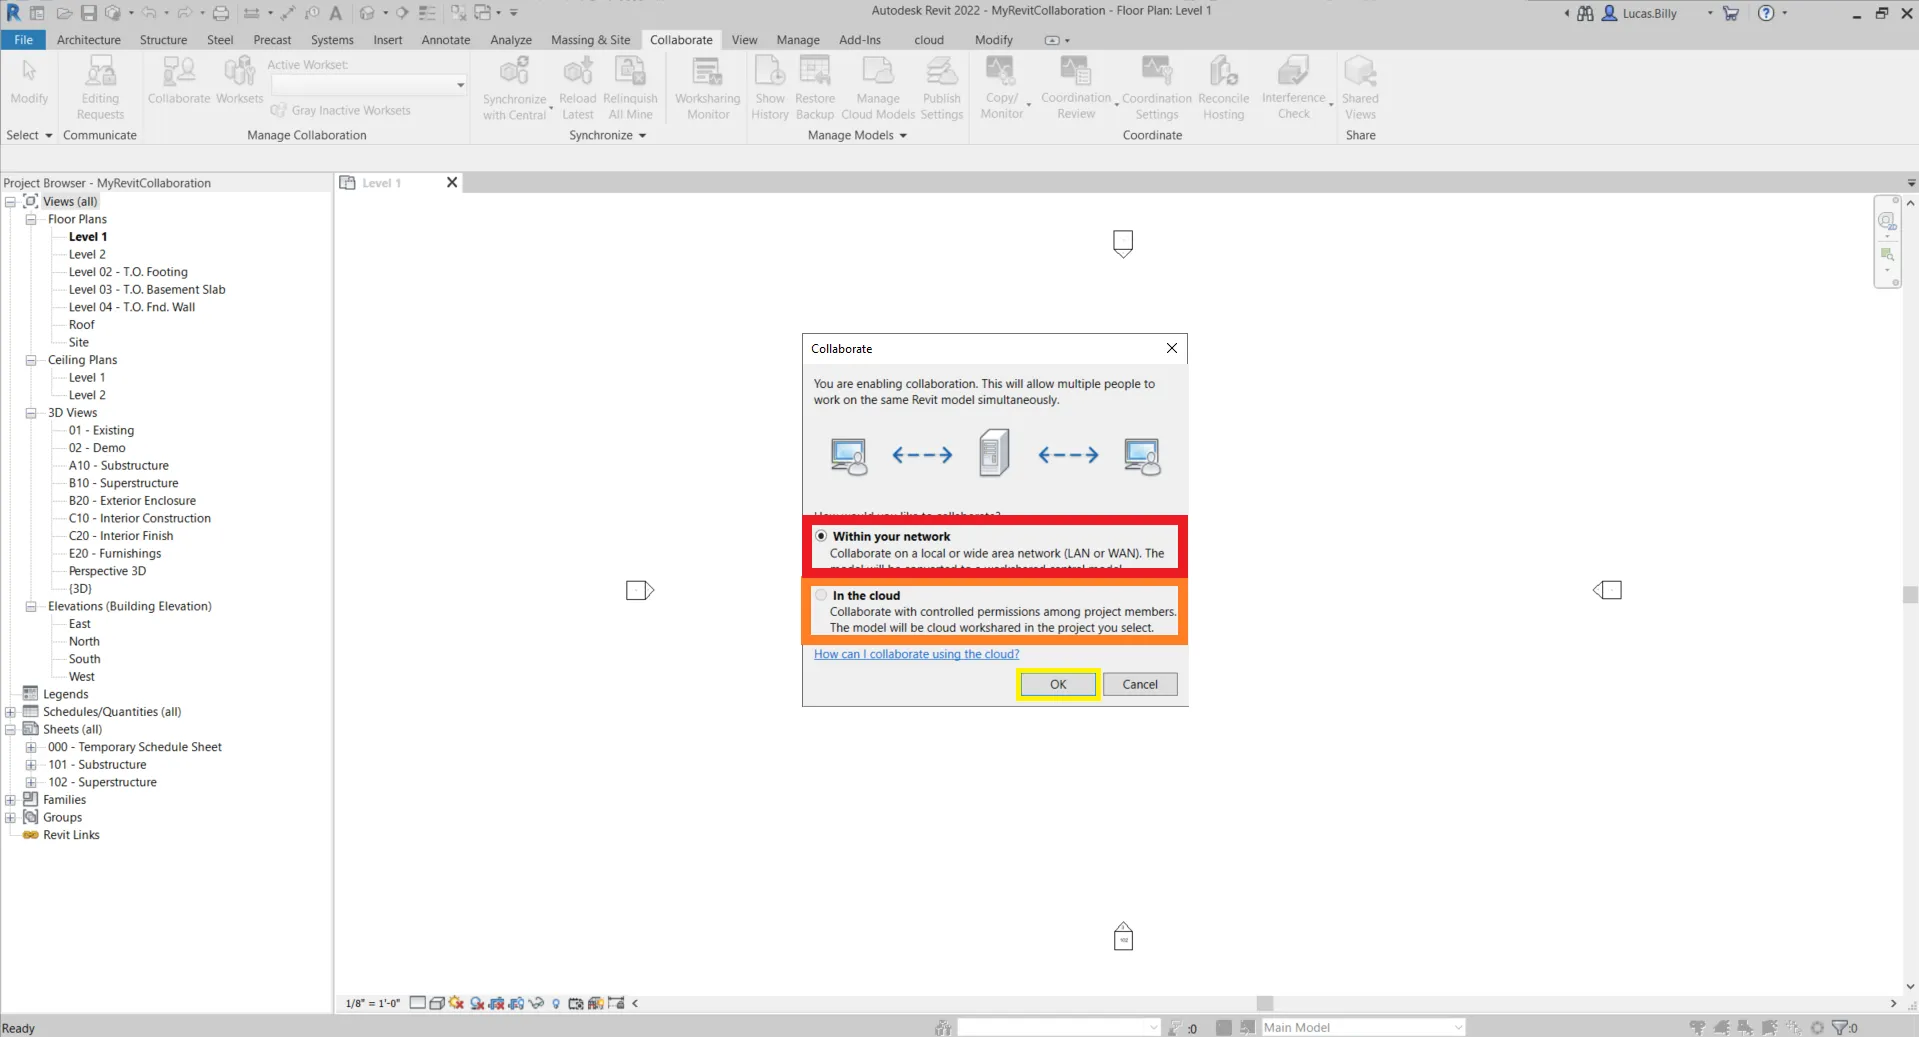
Once saved, you'll need to choose where you'd like to put the center file. The center file is the base of every collaboration project, it is the one that centralizes all information about the project
You can save it on your network, or in the Autodesk Revit Server cloud.
Please note that each collaborator must have access to the center file in order to collaborate.
Once you have selected your storage mode, click on OK.
If you just selected In the Cloud, the project will automatically be saved. On the other hand, if you selected Within your network, you will have to do so manually, see the selection below to see how to save the file on your network.
Deal with local file in my network
Save the project
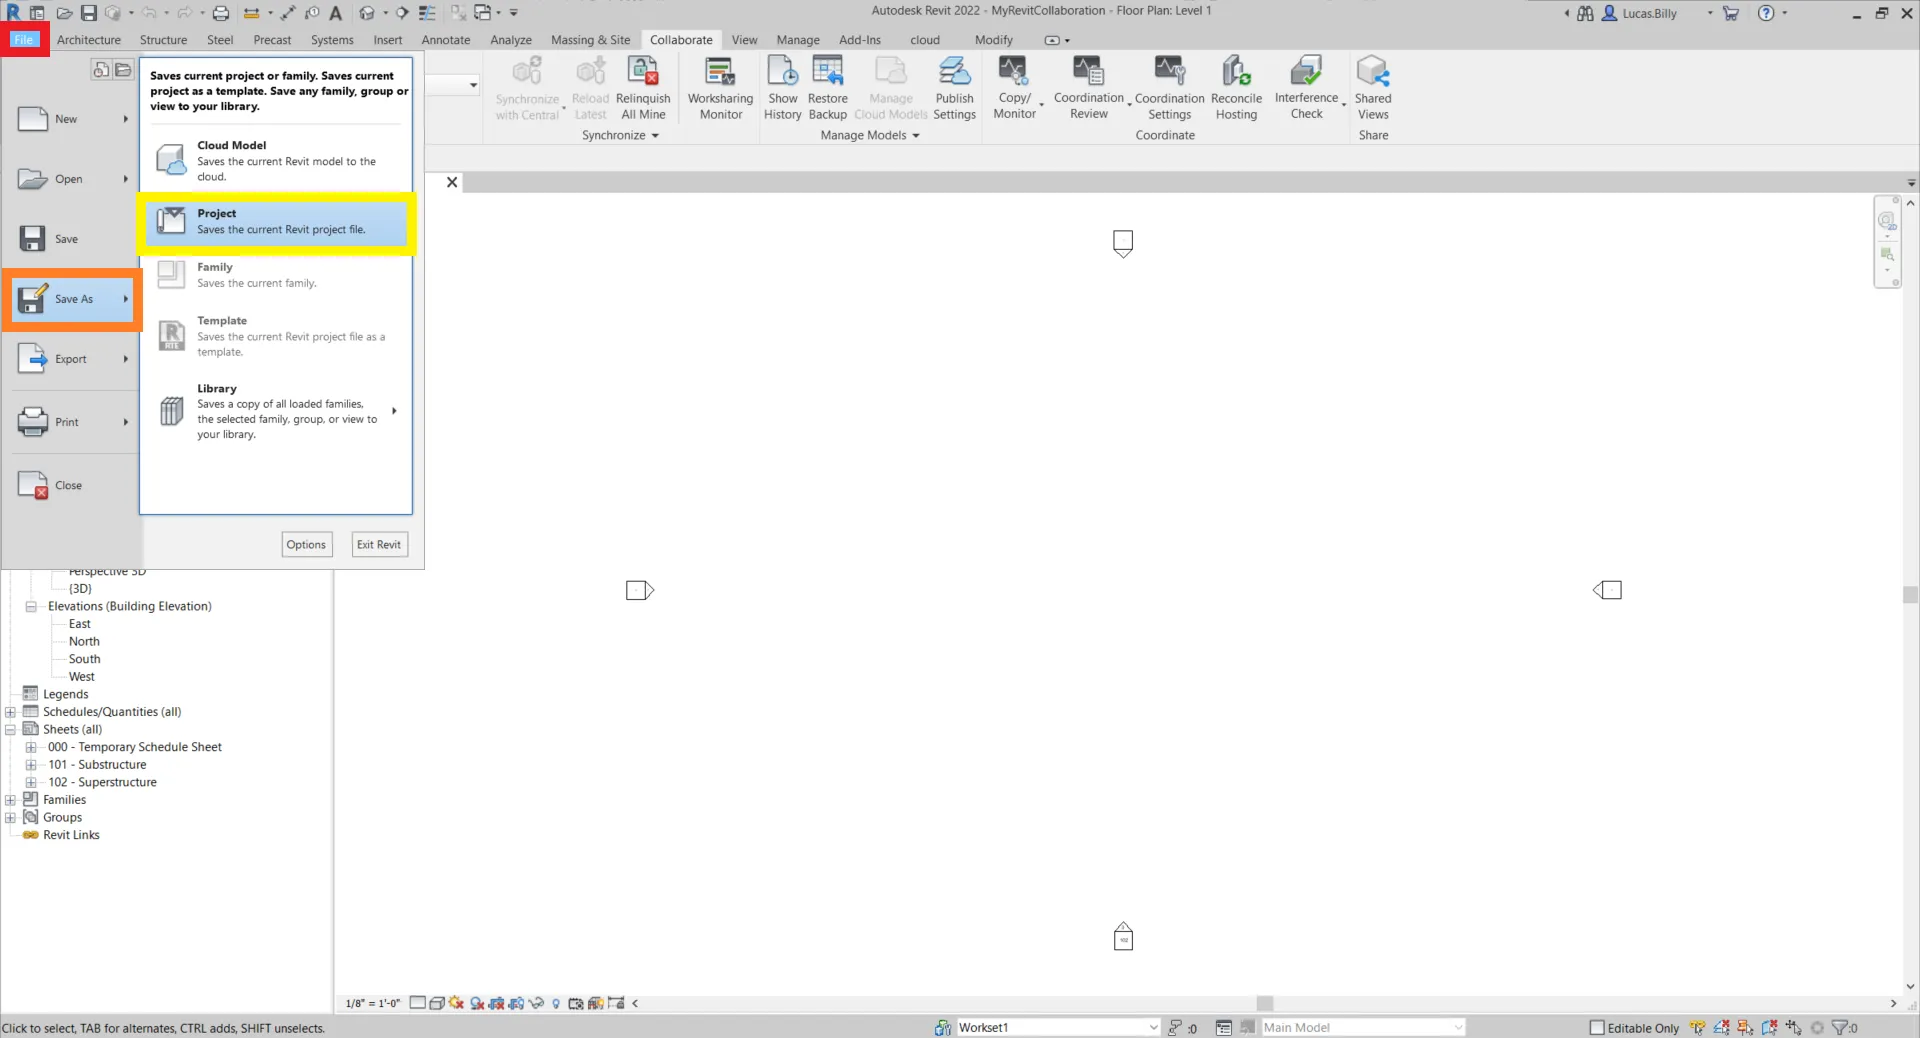
To save the project and make it accessible to all your collaborators, click on File > Save As > Project
Remember to save your project in a directory accessible by all your collaborators and make sure each of them can edit files in the directory, otherwise they won't be able to save their changes
Open the project
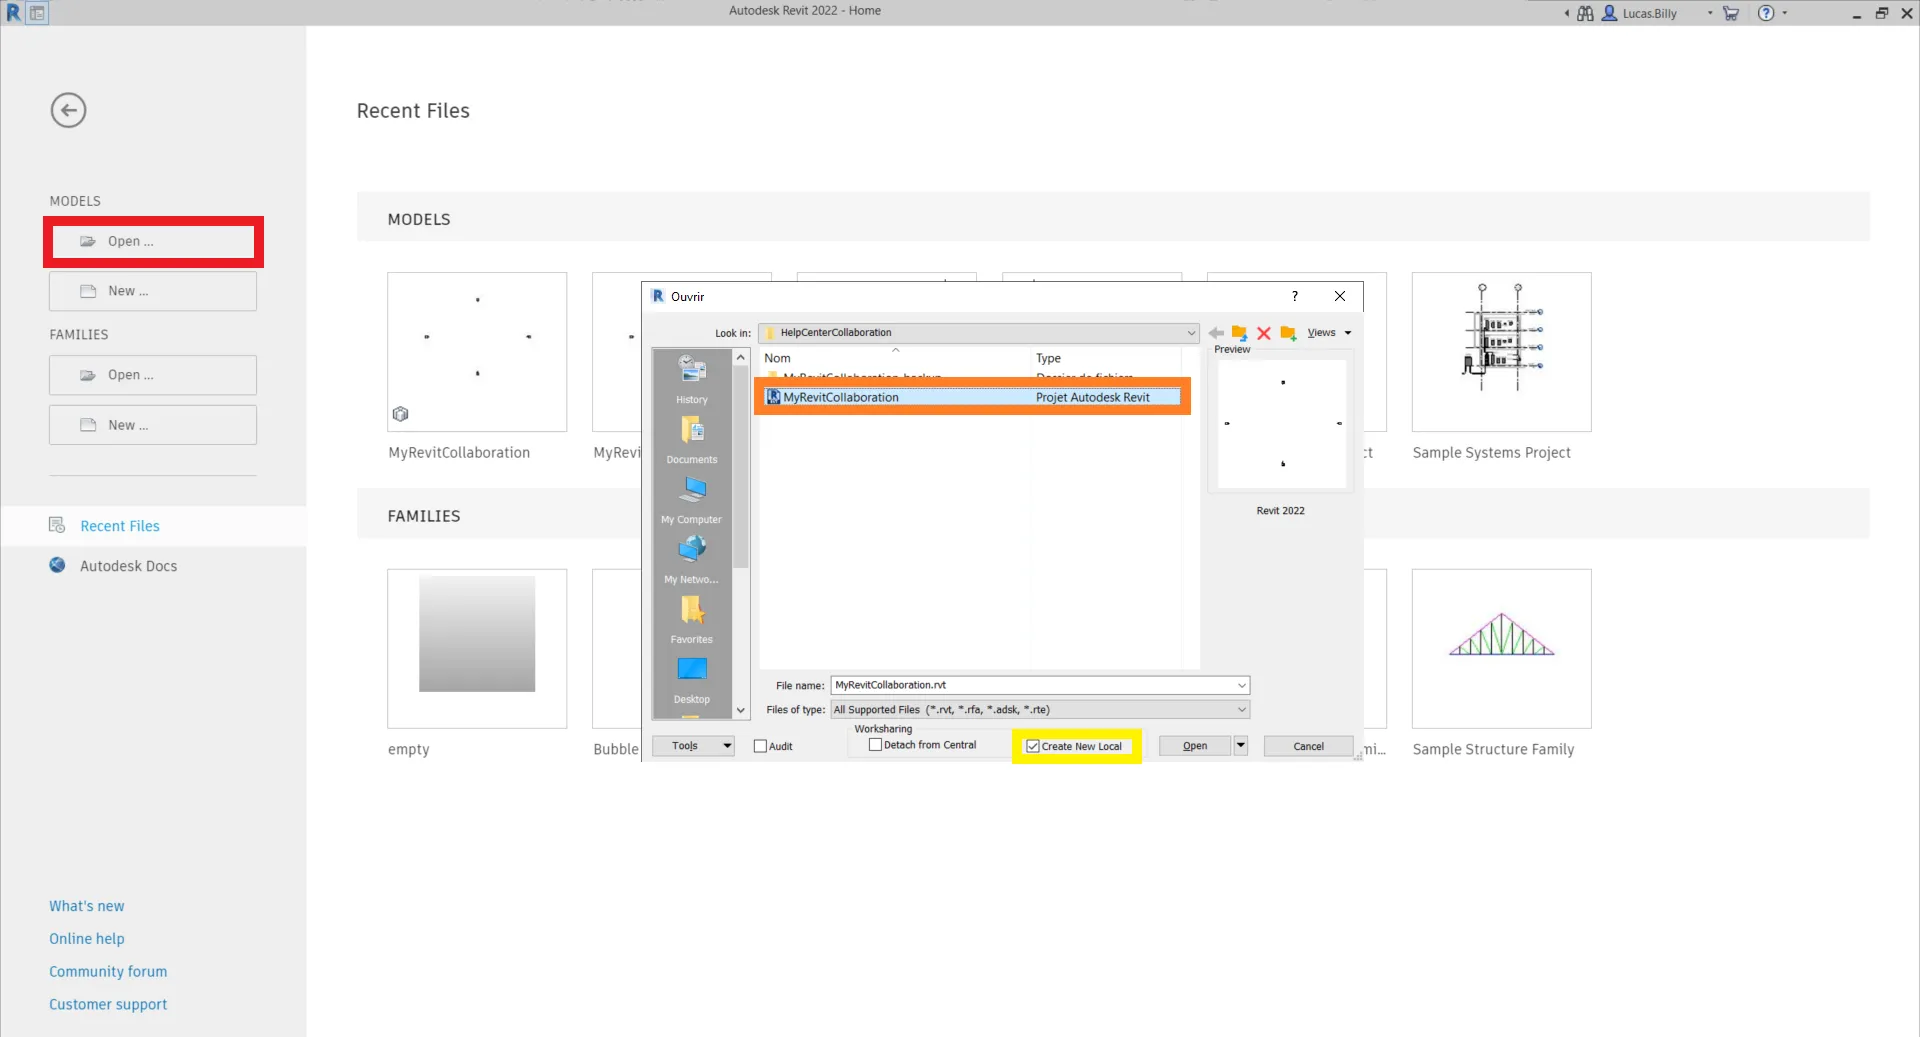
Any collaborator, with access to the project's files, can then open the project. To do so, click the Open button upon launching Autodesk Revit. Then, select the file in your network and open it. Don't forget to check the Create a new local option.
Deal with local file in cloud
Save the project
As said previously, this is automatic, so no need to look for buttons to do so.
Open the project
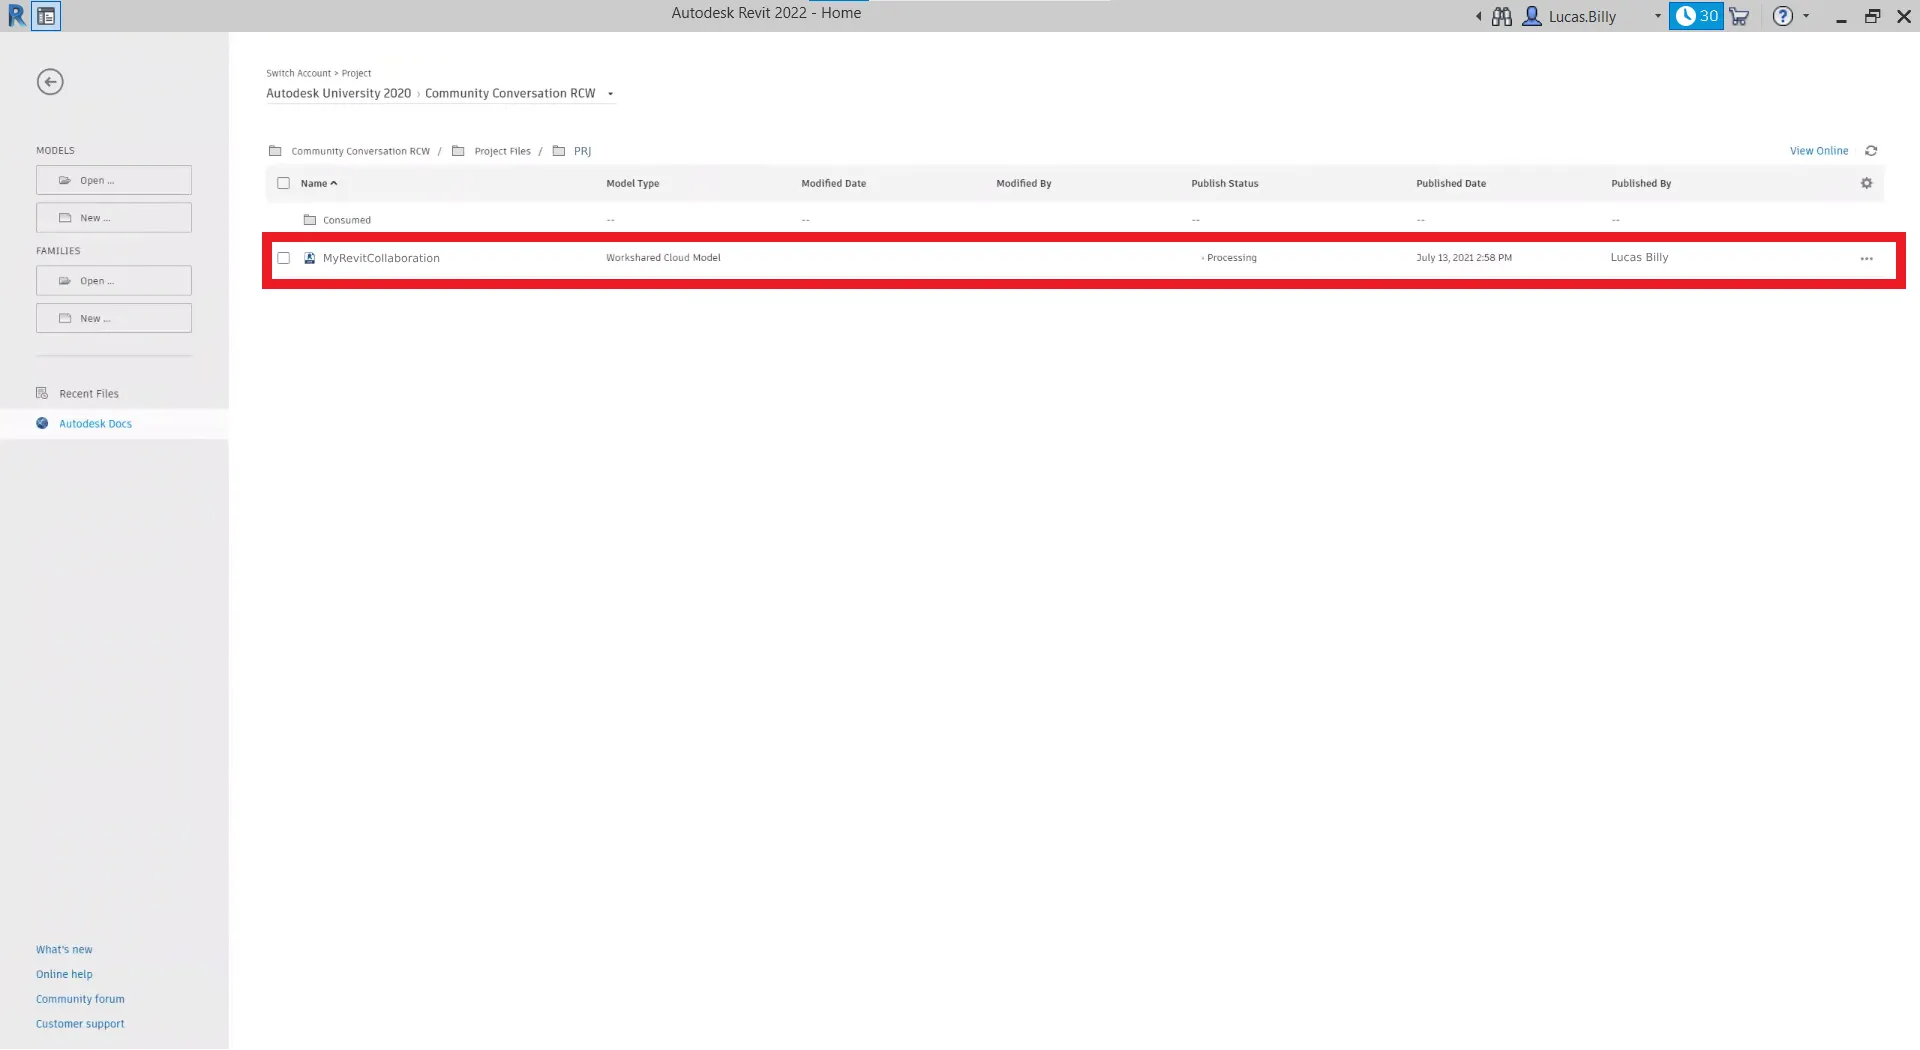
To open the project in cloud mode, Select the Autodesk Docs and click on your project in the list. A loading screen will appear, please wait for the project to initialize.
Close the project
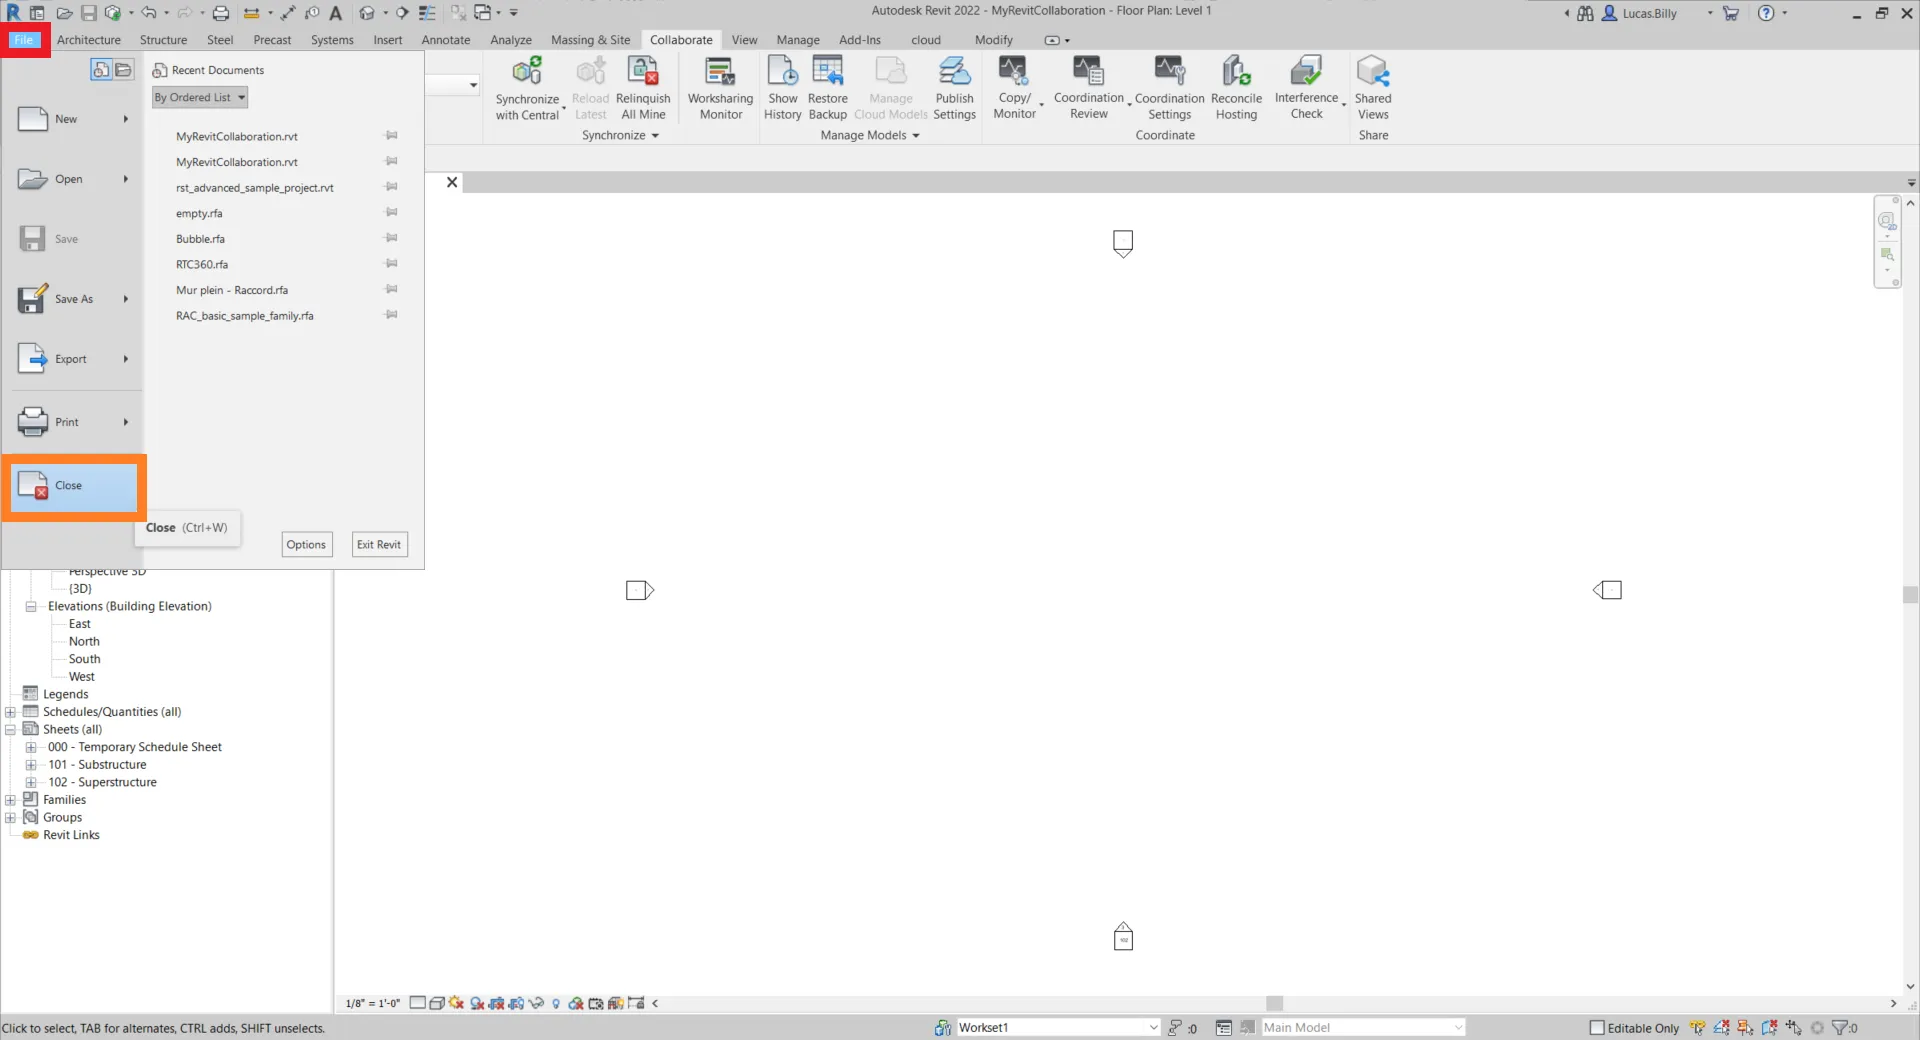
Whether you use the network or the cloud, don't forget to close the project before closing Autodesk Revit as it could corrupt your files. You can find the Close button in the File tab.
Synchronize the project
Synchronization allows to you to push changes that you have made to the saved project and also to retrieve changes made by others, both actions are performed simultaneously.
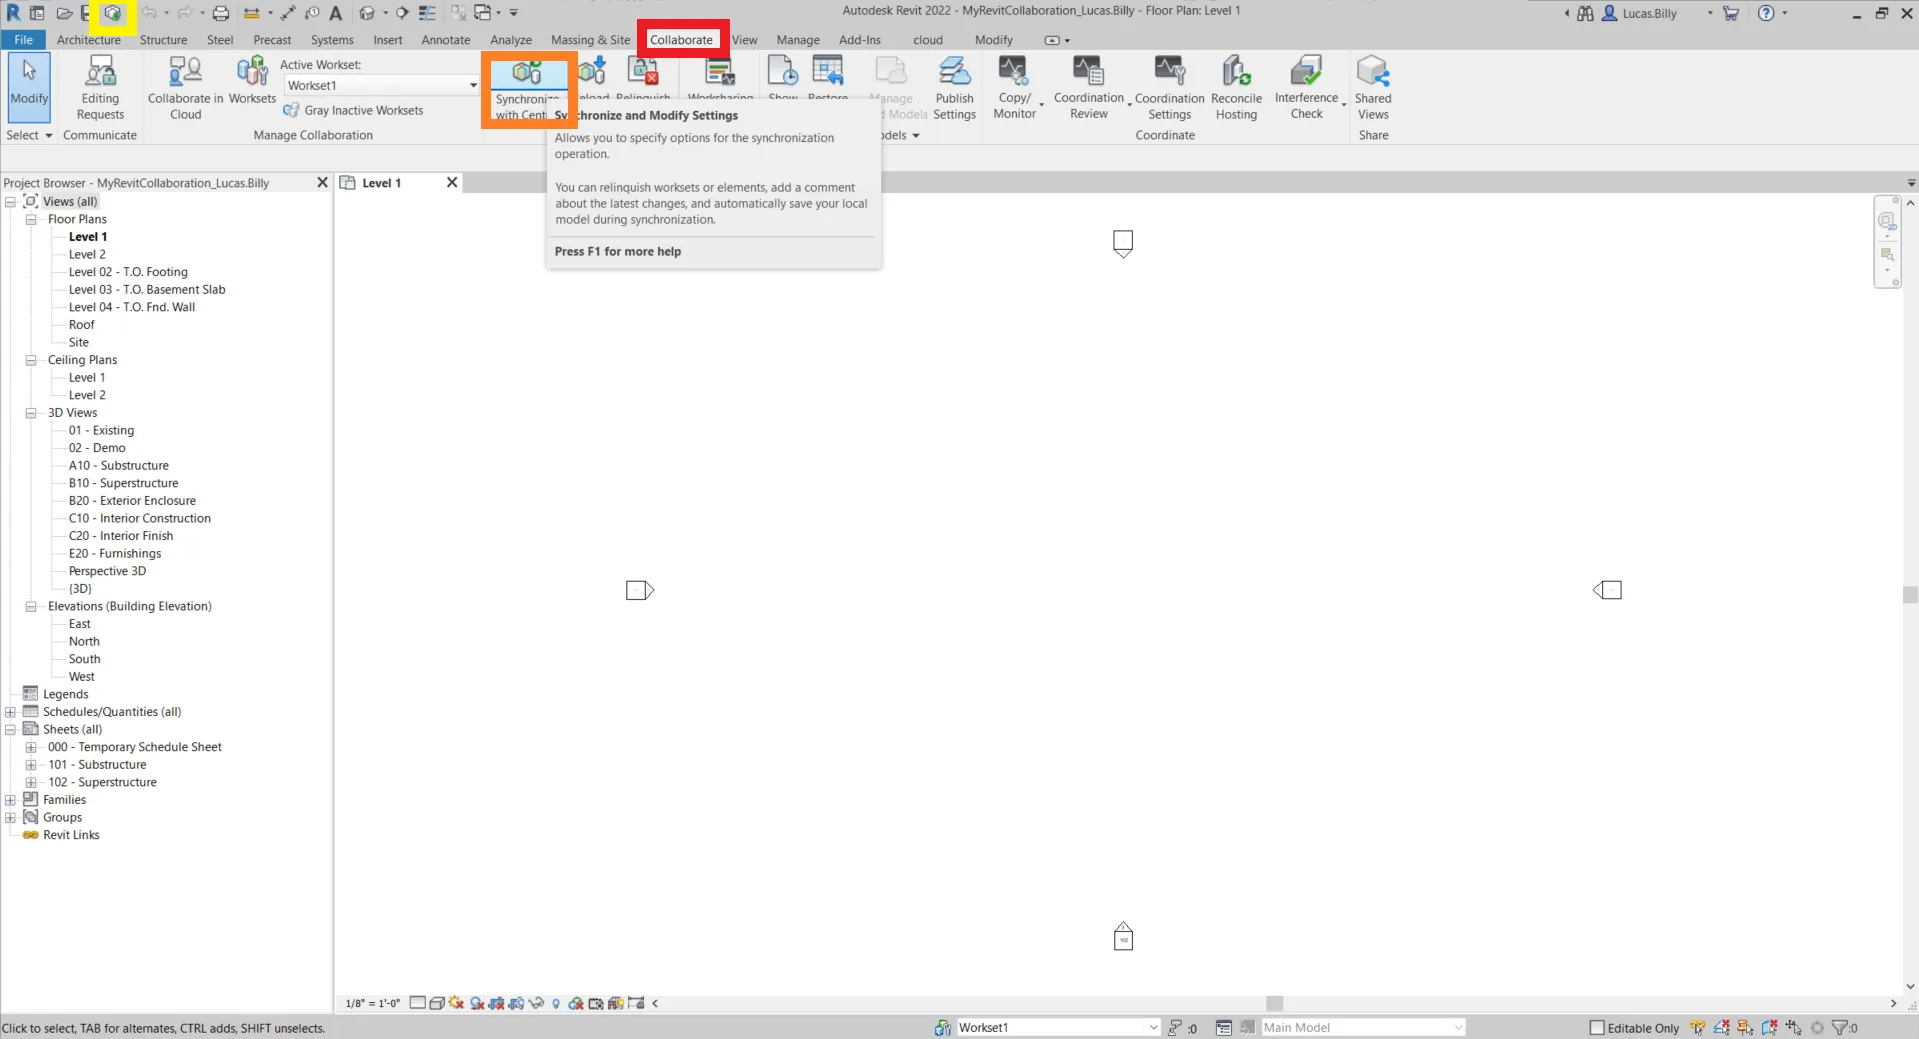
To synchronize the project, open the Collaborate tab and click on Synchronize with Central or simply click on the synchronize icon.
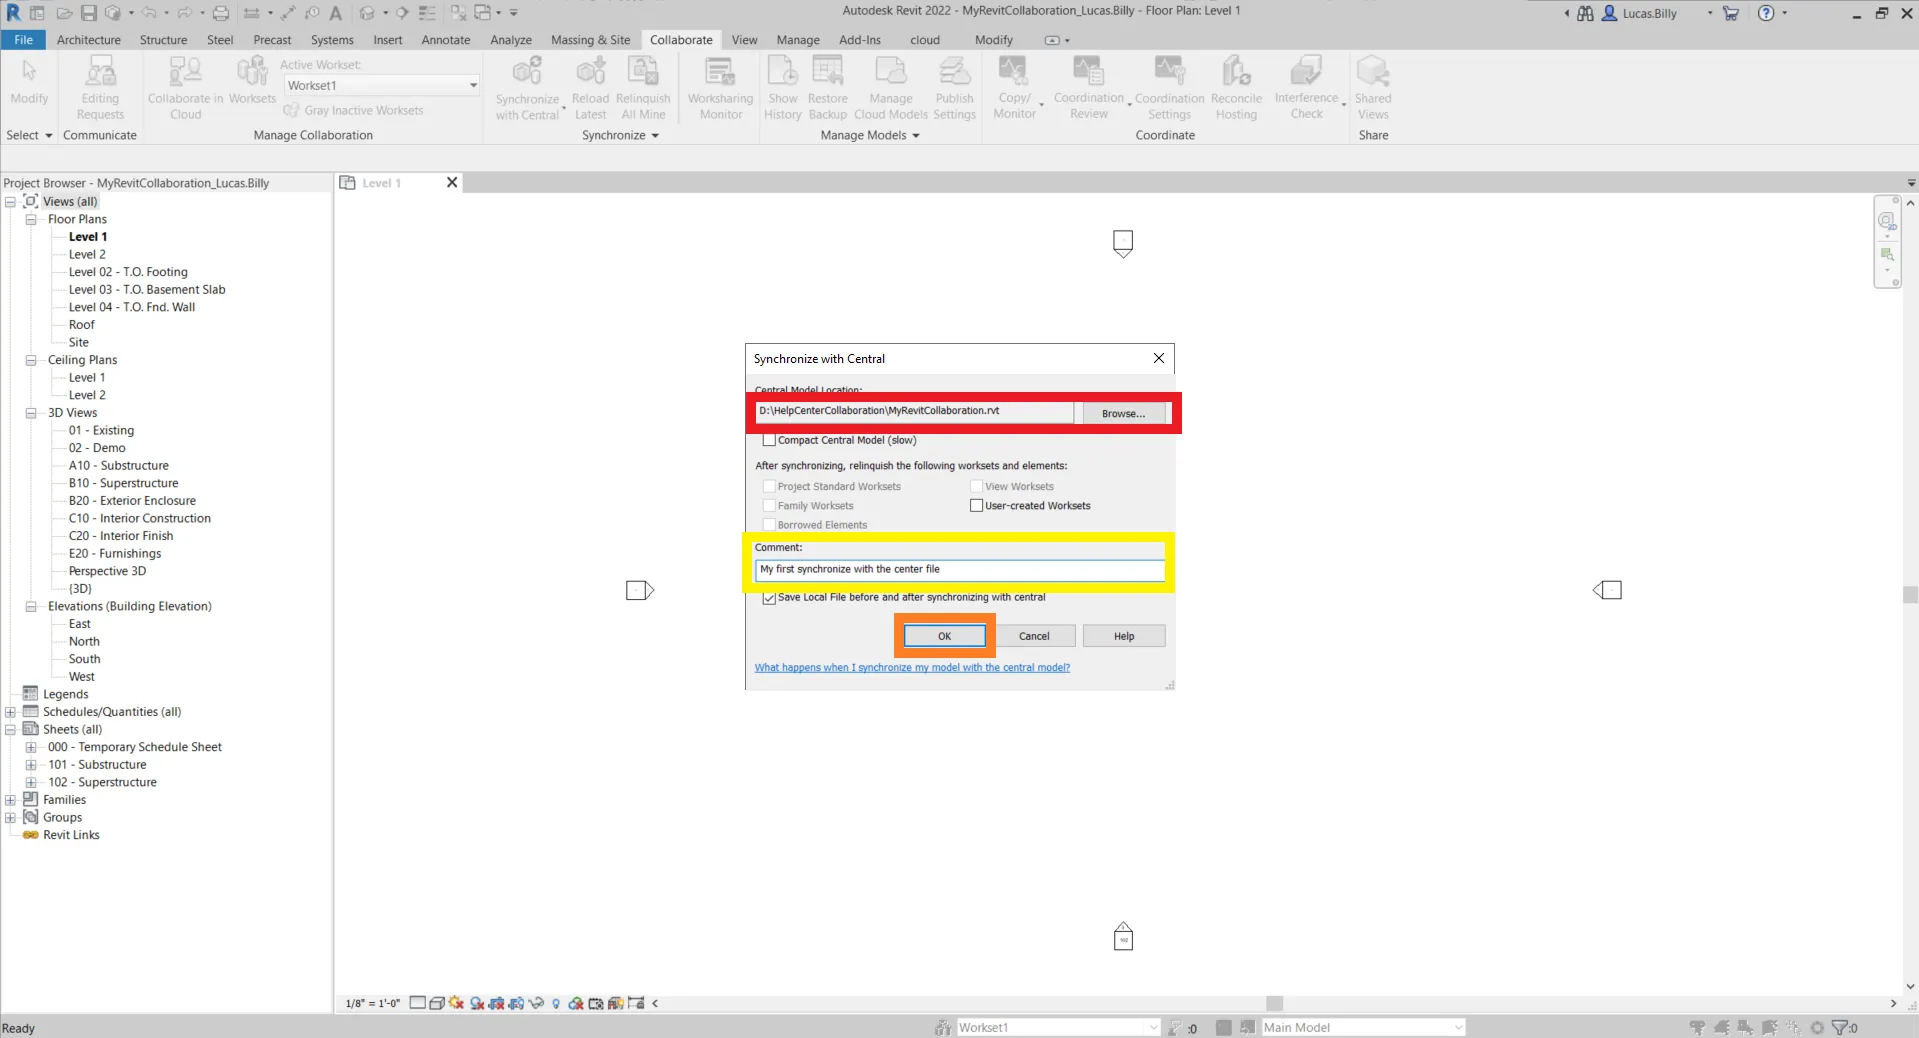
A window will pop up, use it to make sure the file path is correct (if using the network version). Also, do not hesitate to leave a note in the comment box to tell your collaborators what changes you have made. Click on OK to validate.
How does the collaboration work with the plugin ?
First case scenario : You want to add a streamed point cloud to the center file.
Use the plugin to add a point cloud to the project, you can follow this article to learn more about it.
Then, synchronize the project, just like we've seen in the section above.

Second case scenario : You are loading a project that has a streamed point cloud in it.
Synchronize the project, just like we've seen in the section above. Once the synchronization process is over, the point cloud will become visible and a window will appear. Past an access code from the related project to have access to the 360 images. You can learn how to get a code on this article.

That is everything you need to know to work in a collaborative way on Autodesk Revit while using our plugin.
In case of problem or difficulty, do not hesitate to contact the platform team.