Navigation Assistants
It is possible to display a performance indicator. This will allow you to see how your device reacts to the display of 3D, the value that matters most to us here being the FPS (Frames Per Second), this corresponds to the number of images being displayed per second.
To give you an example, in the cinema industry, most films are recorded in 24fps, in video games we more often try to achieve 60fps.
If you notice that your FPS is dropping too much when using the platform, you can adjust the display settings to increase your FPS again. You can also look at this article to verify that your browser is using the correct graphics card.
You can display the performance indicator by opening the settings menu at the bottom right.
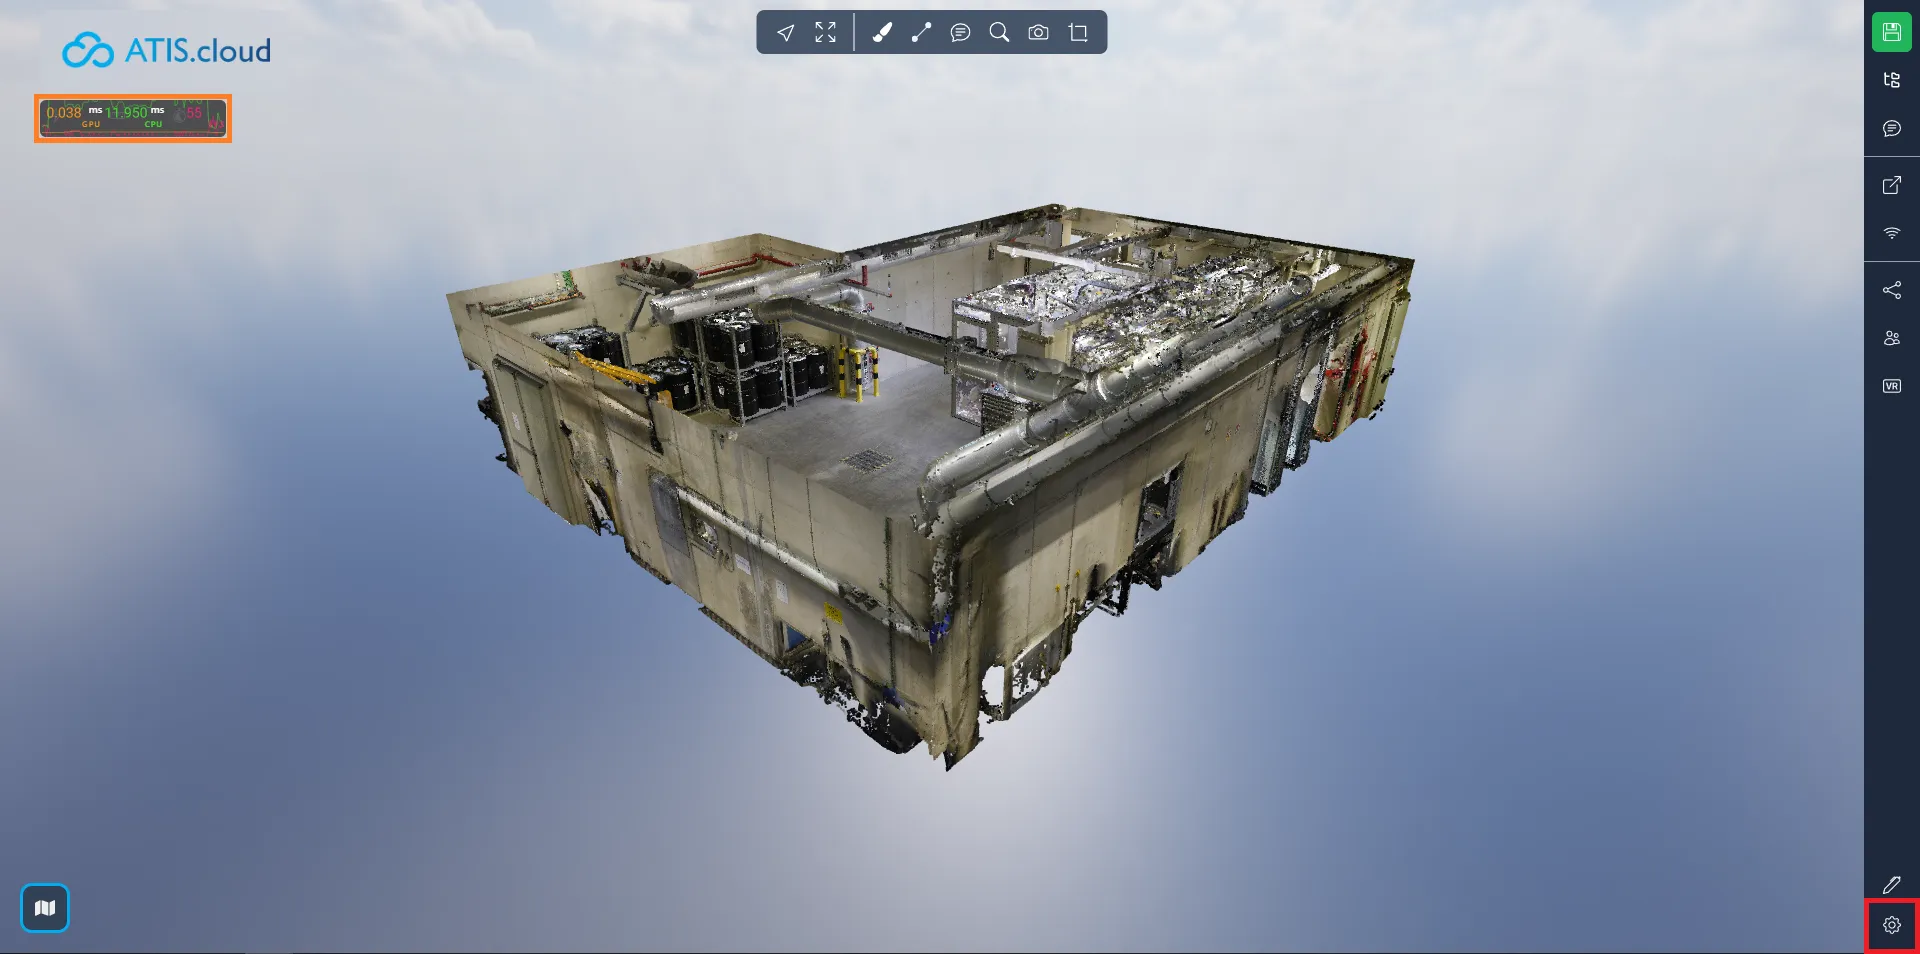
You will then find the option in the General tab.

The orientation assistant:
You can display a compass or a cube to show you your orientation in the project. You can use the button at the bottom right to open the settings.
In the first image below you can see the three possible positions for the compass or the cube, you can select the one that suits you the most, the default one is top-right, the one used by the cube in the second image.
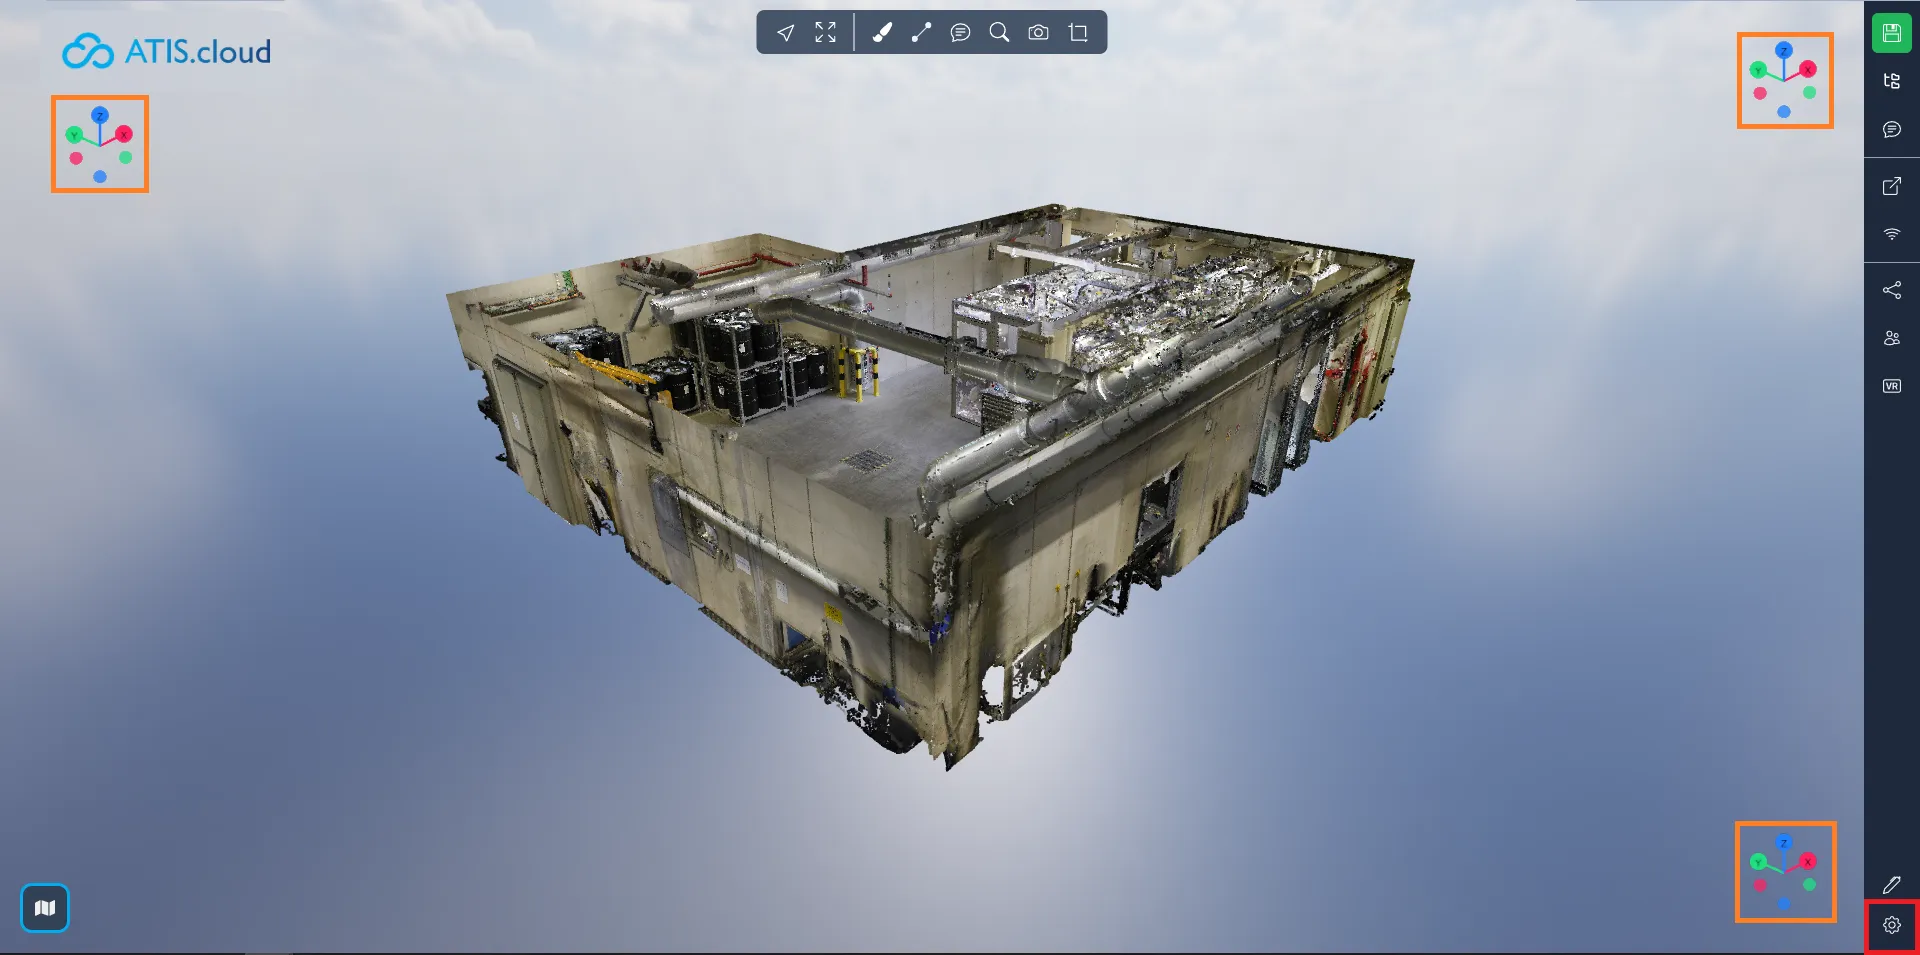
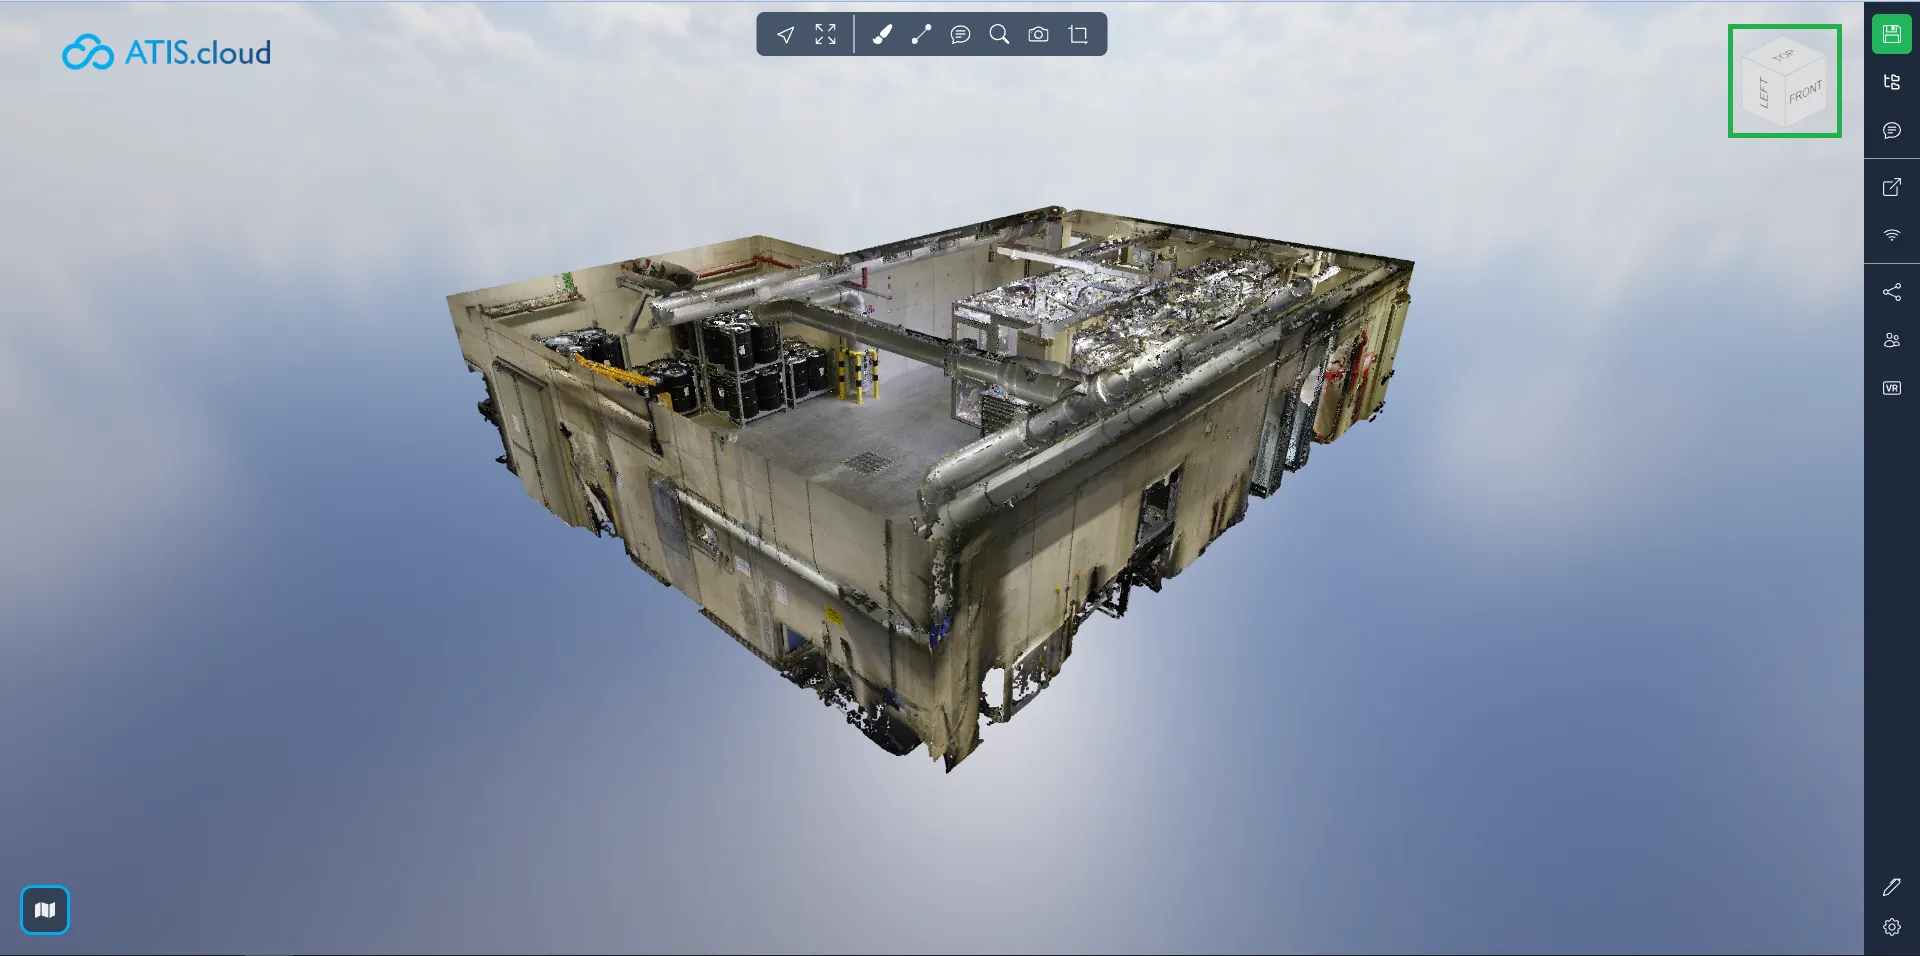
In the General tab, you will find the Orientation assistant options to select if you would rather use the compass, the cube or nothing. And an option to decide on the placement, as we have seen just above.

You can learn more about the orientation assistants in this article.
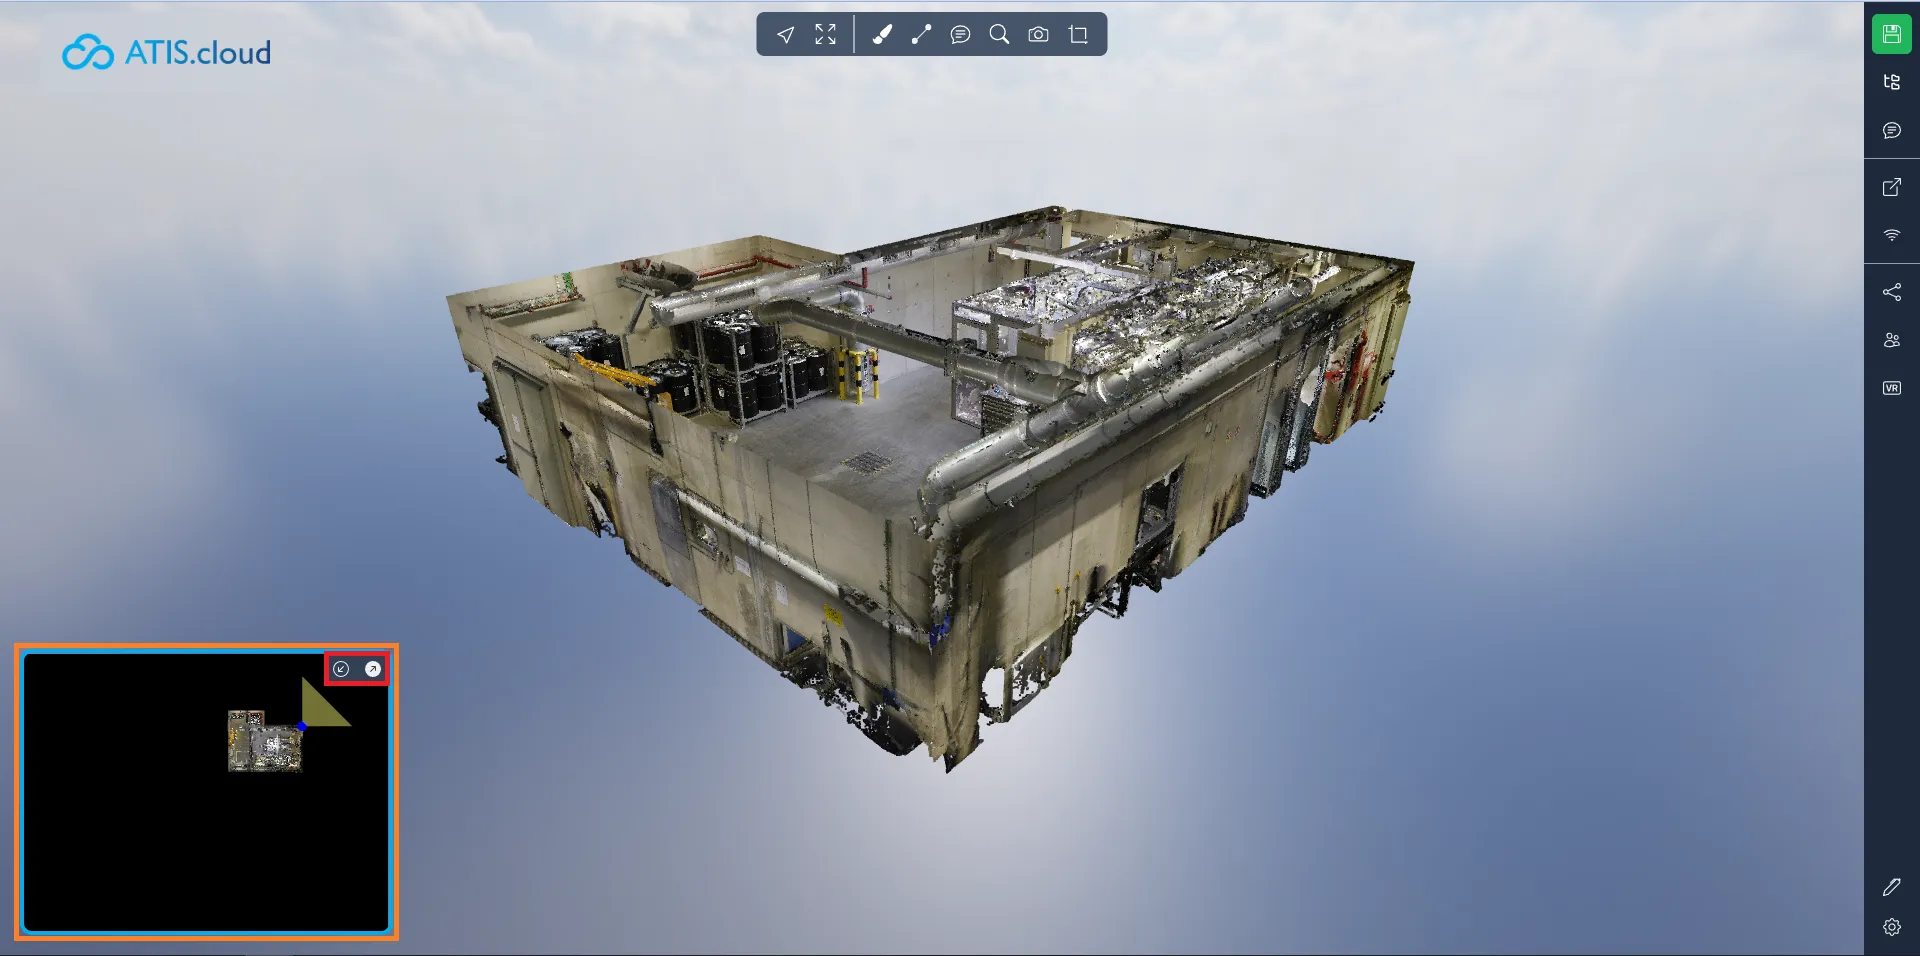
The map :You can show/hide the map using multiple ways, the easiest way to do it is to click on the map icon at the bottom left. Or you can use the settings menu.
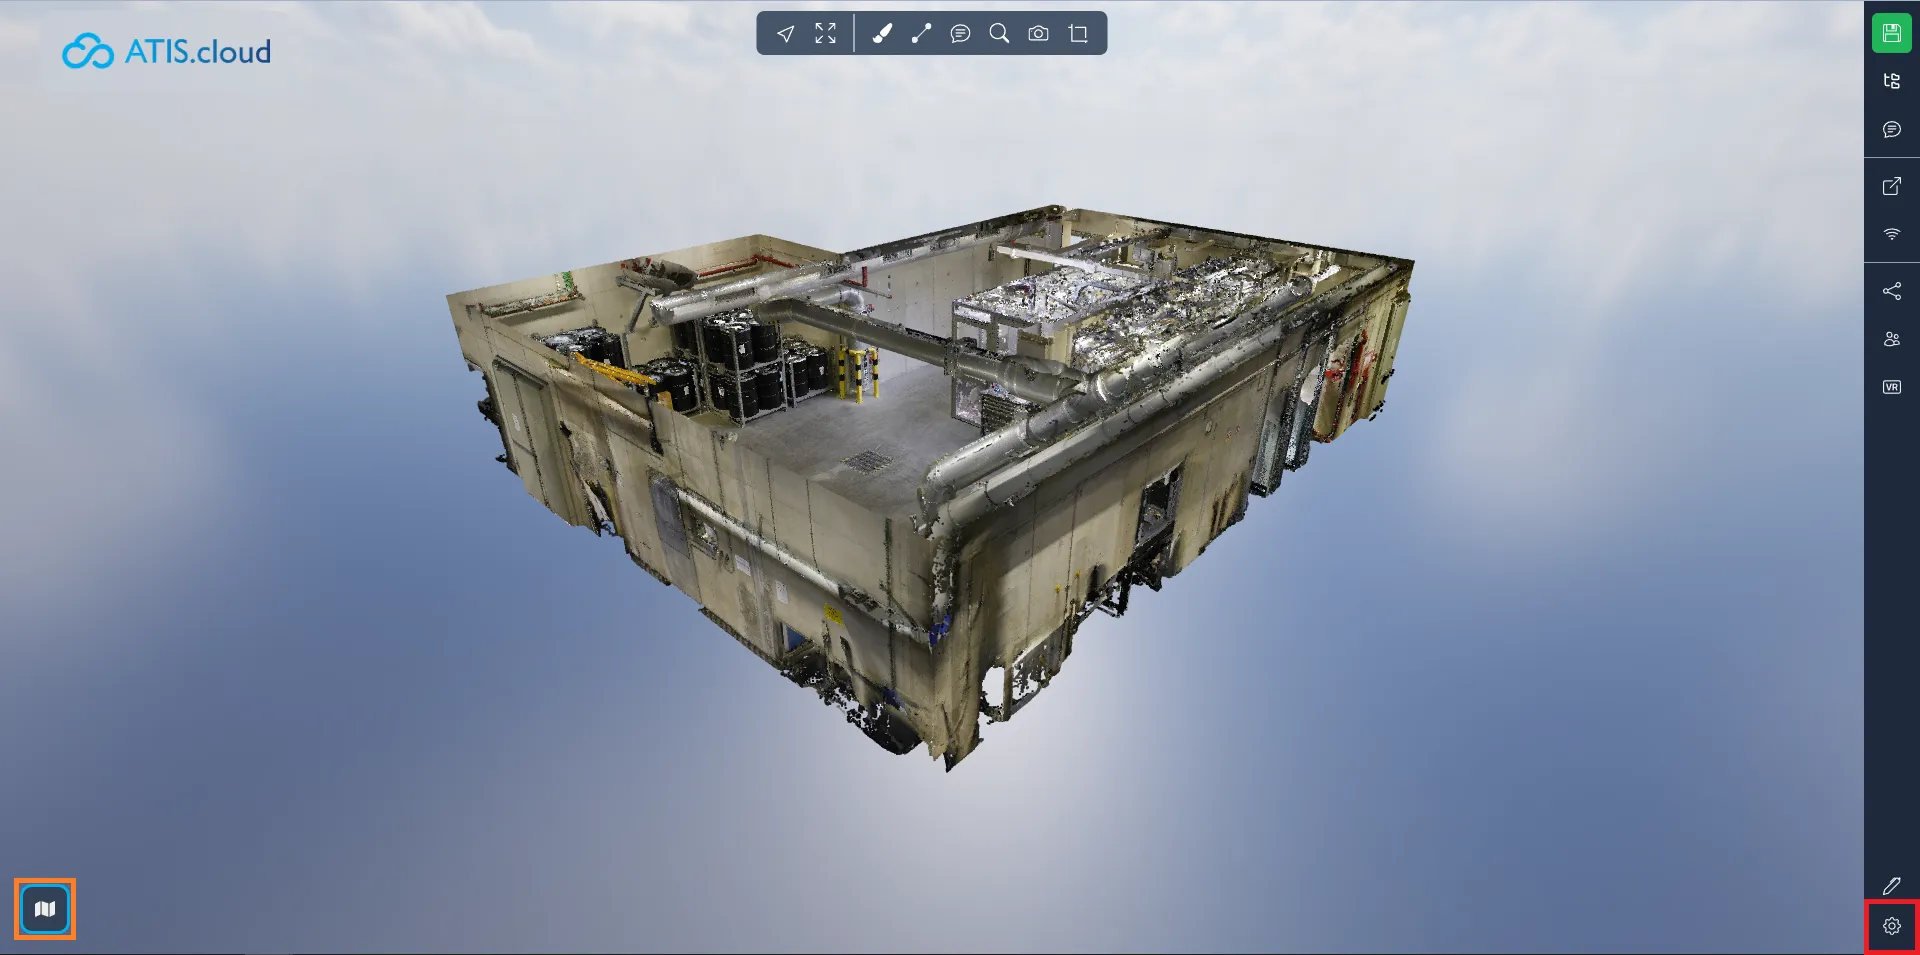
In the Display tab you will find the option to show or hide the map.

The map allows you to locate yourself within the project, you can see a point in the middle representing your position and a triangle representing your field of vision. It gives you a top view of your point cloud. The point cloud is cut horizontally at the height of your camera, this allows you to see exactly where you are if you are in a building for example. You can change the size of the map using the arrows at the top right of the map, and you can zoom in/out using your scroll wheel while hovering your mouse over the map. Use your left click to move around the map, or double-click an image to navigate to it directly from the map. If your project uses projection, the Google map tiles will automatically display in your map container.
If you run into any issues, our support team is here to help. Happy exploring!