
Import measures :
To begin, in the viewer, open the project menu and click on the + button. Here you will find an area to import measurements or primary elements. Click on it to open the importation page.
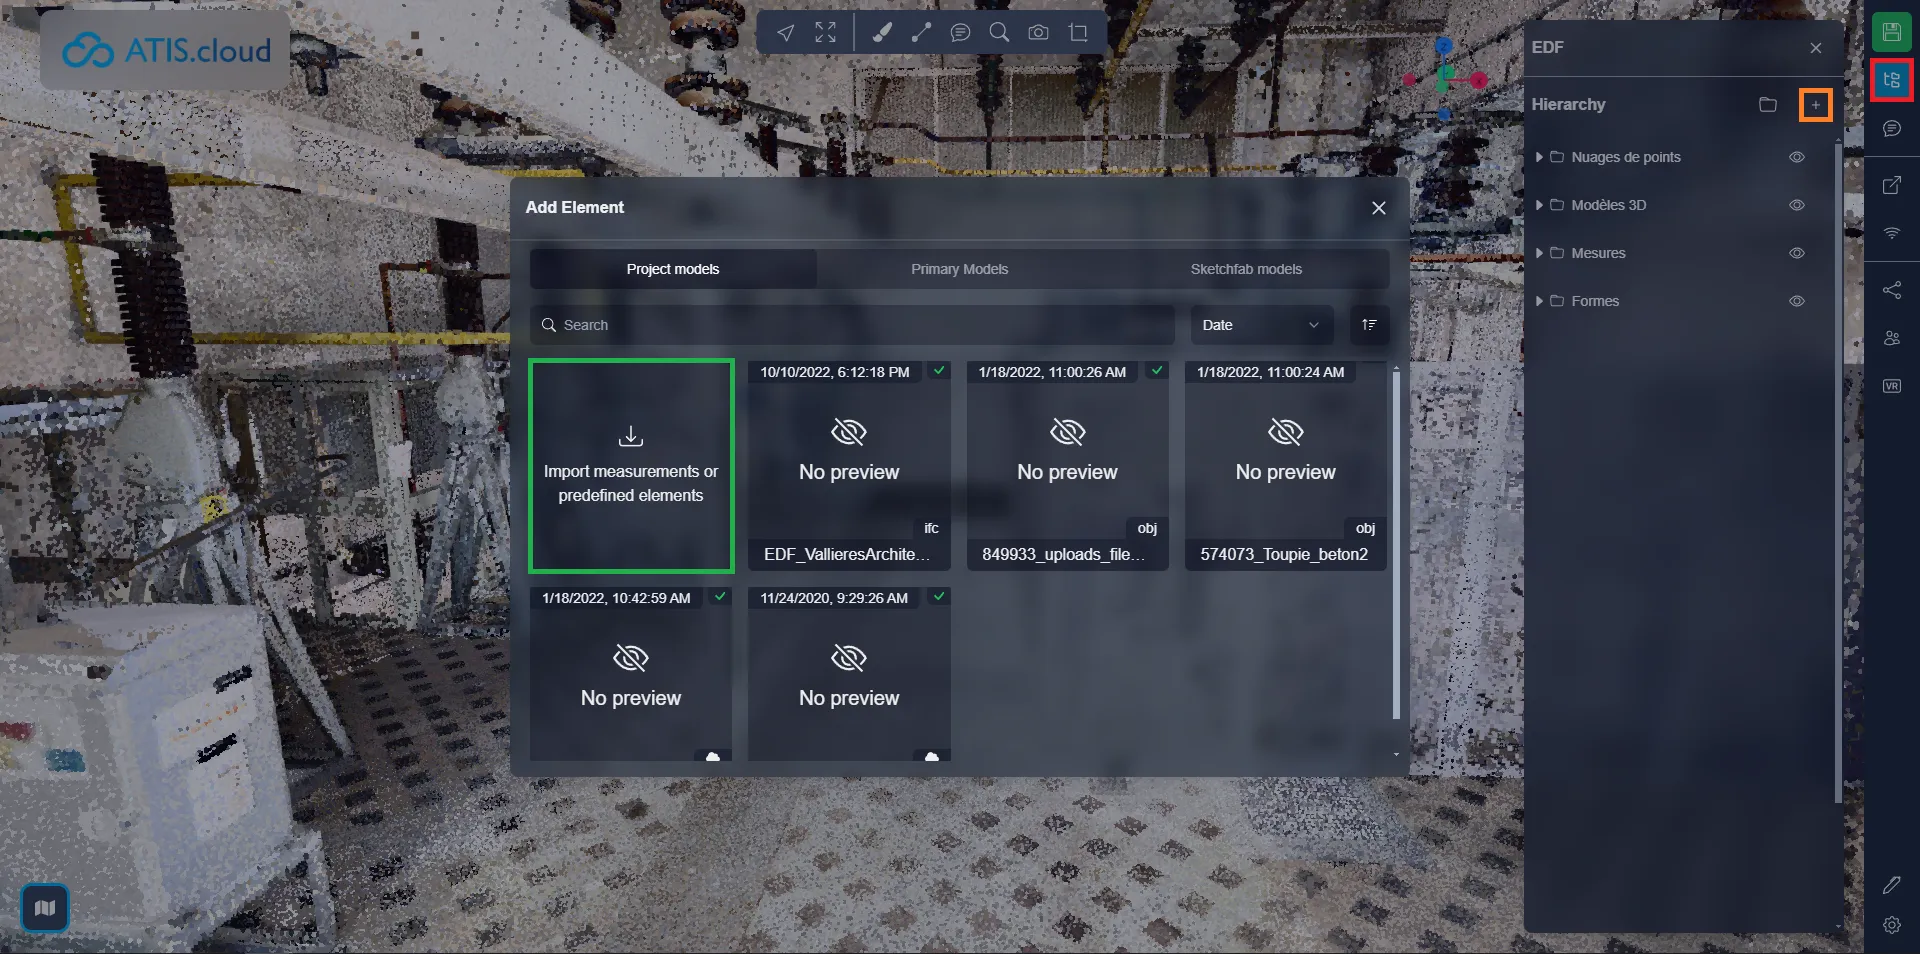
On this page, you can either directly drag your CSV file or click on the button to open the explorer. You can also drag the CSV file directly over the viewer without using the importation menu that we saw just above, this will take you directly to this stage.

Here you can see two examples of measure import, the first one is the “empty” import, where the measures don't have any positions, measurements element will therefore only be created in the menu but won't be visible in the viewer. The second one is a full import where every measure has position information, each line representing a measure point, allowing the system to create the measurements both in the menu and in the viewer.
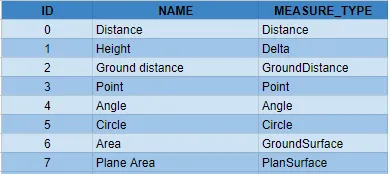
- Empty measures : The ID corresponds to the measure, it has to be unique for each measure, allowing you to have multiple measures with the same name. The name is what will be displayed in the menu to identify the measure, the measure type is the type of measurement that this measure is going to be, the screenshot below contains all the available types, please make sure you use these exact names for the system to understand them perfectly. You can learn more about the different measurement types in the dedicated article.
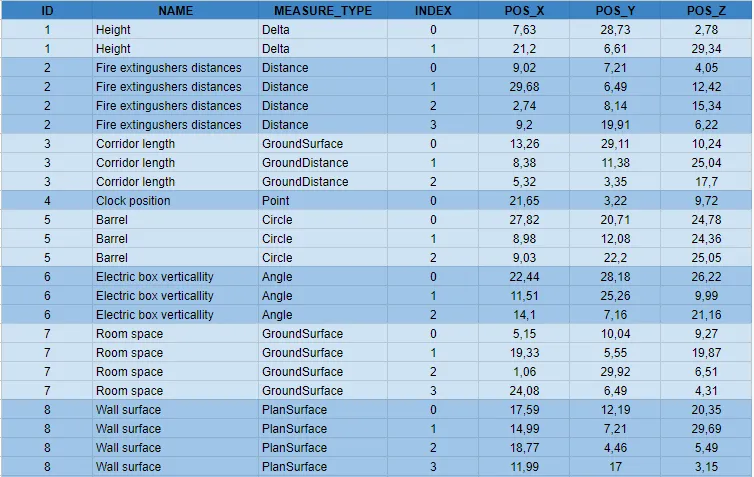
- Full measures : The ID here works just like explained above, it allows the system to understand which points are related to a same measurement. The name and type are also similar to what is above. The index allows you to tell the order in which the points are to be created in the measurement. The index starts at 0 and is incremental for each measurement. The pos X, Y and Z corresponds to the X, Y, Z position of the point. The system will create the measurements and create points for each line in the CSV. Pay attention, some measurement types can only have a limited amount of points :
- Distance : Unlimited
- Delta : 2
- Ground Distance : Unlimited
- Point : 1
- Angle : 3
- Circle : 3
- Ground surface : Unlimited
- Plan surface : Unlimited
Once an empty measurement has been imported, or if you wish to edit a full measurement, you can open the project menu, select your measure and click on the “Repeat measurement”. This will allow you to start adding the points from that measurement, if the measure already had points, it will reset those.

Export measures :
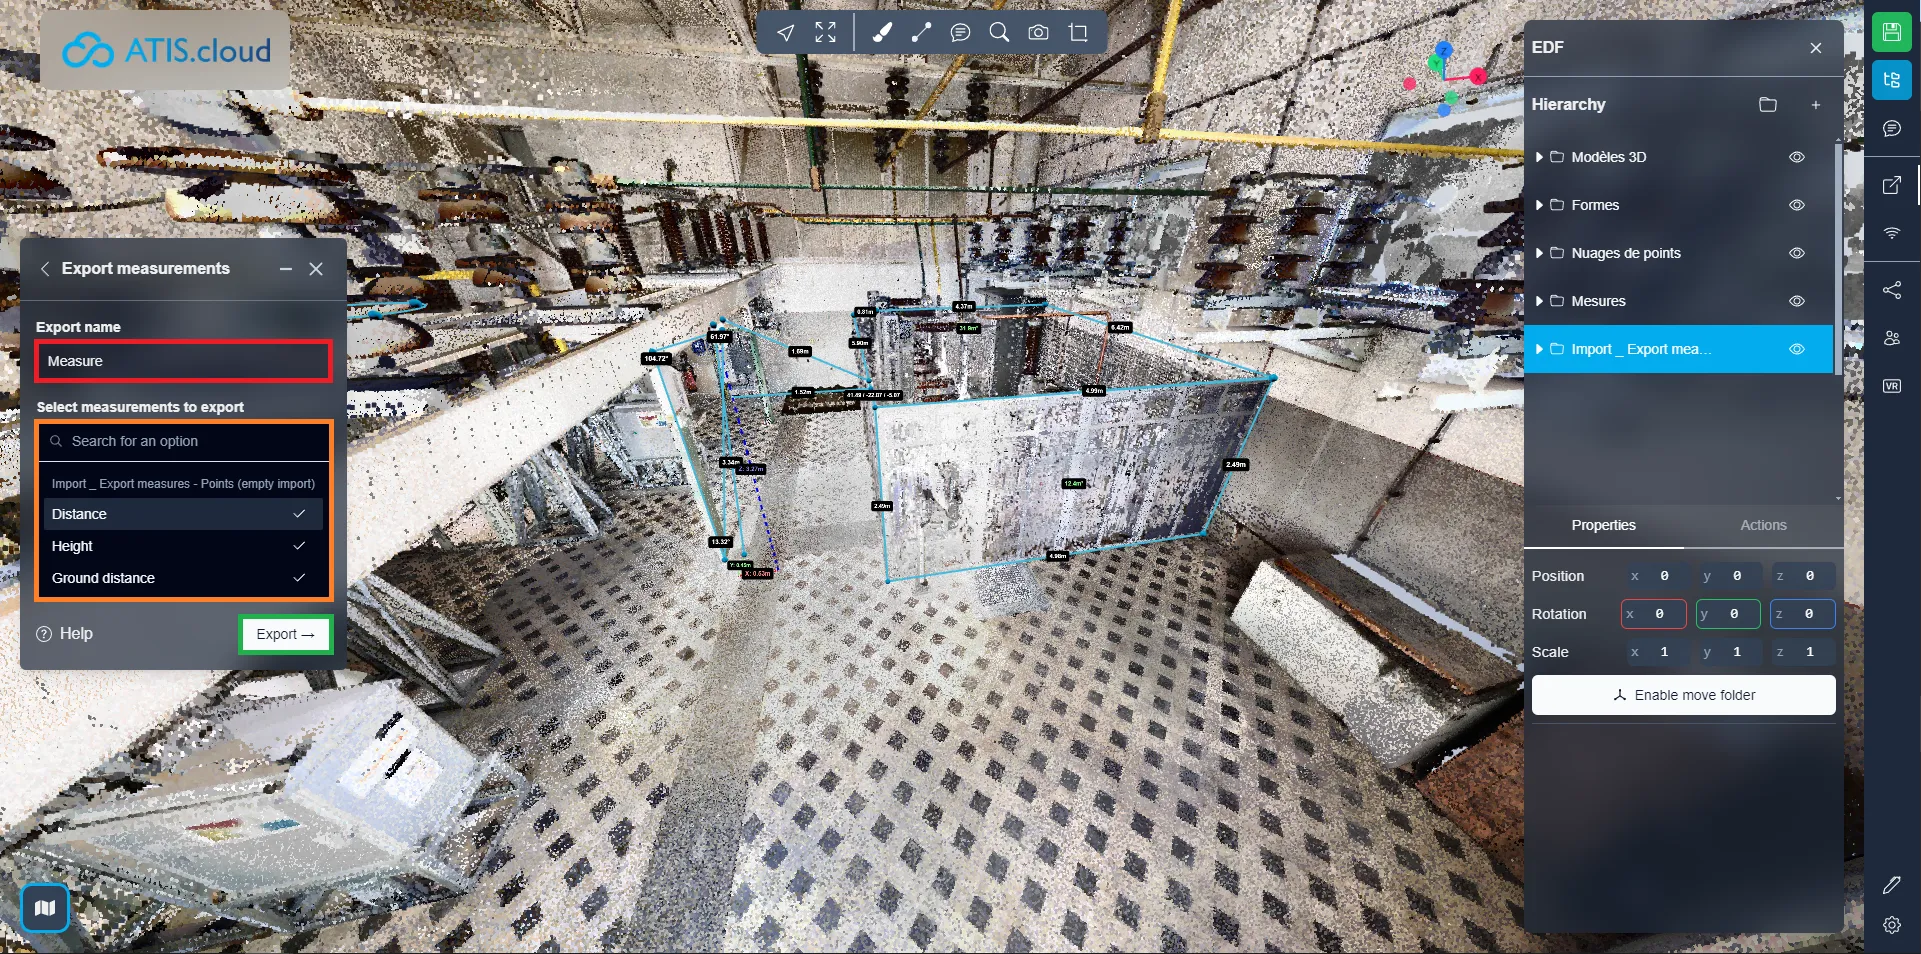
You can export measures in a CSV file if needed. To do so, open the export menu and select “Measurements”.

After entering a name for your CSV file, you can proceed to select the measurements you want to export. Simply click on a folder to choose all the measures contained within it. Once satisfied with your selection, click on “Export”. This action will initiate the download of two CSV files: one labeled “Export name (Project name) - points” and the other “Export name (Project name) - measurements”.
The first file, "points", will encompass the positions of each measure's points. This file serves as a comprehensive measurements import file, enabling you to utilize it for re-importing the measurements if necessary.
On the other hand, the second file comprises the actual measurements values, such as distances, heights, circumferences, and so forth. This file, "measurements", can be utilized to retain measurements information. It functions similarly to the previously mentioned CSV file, containing IDs, names, and measure types. However, instead of positional data for the three axes, it includes measurement values.
In case of problems or difficulties, do not hesitate to contact the platform team.