Customize Your Platform with a Branded Interface
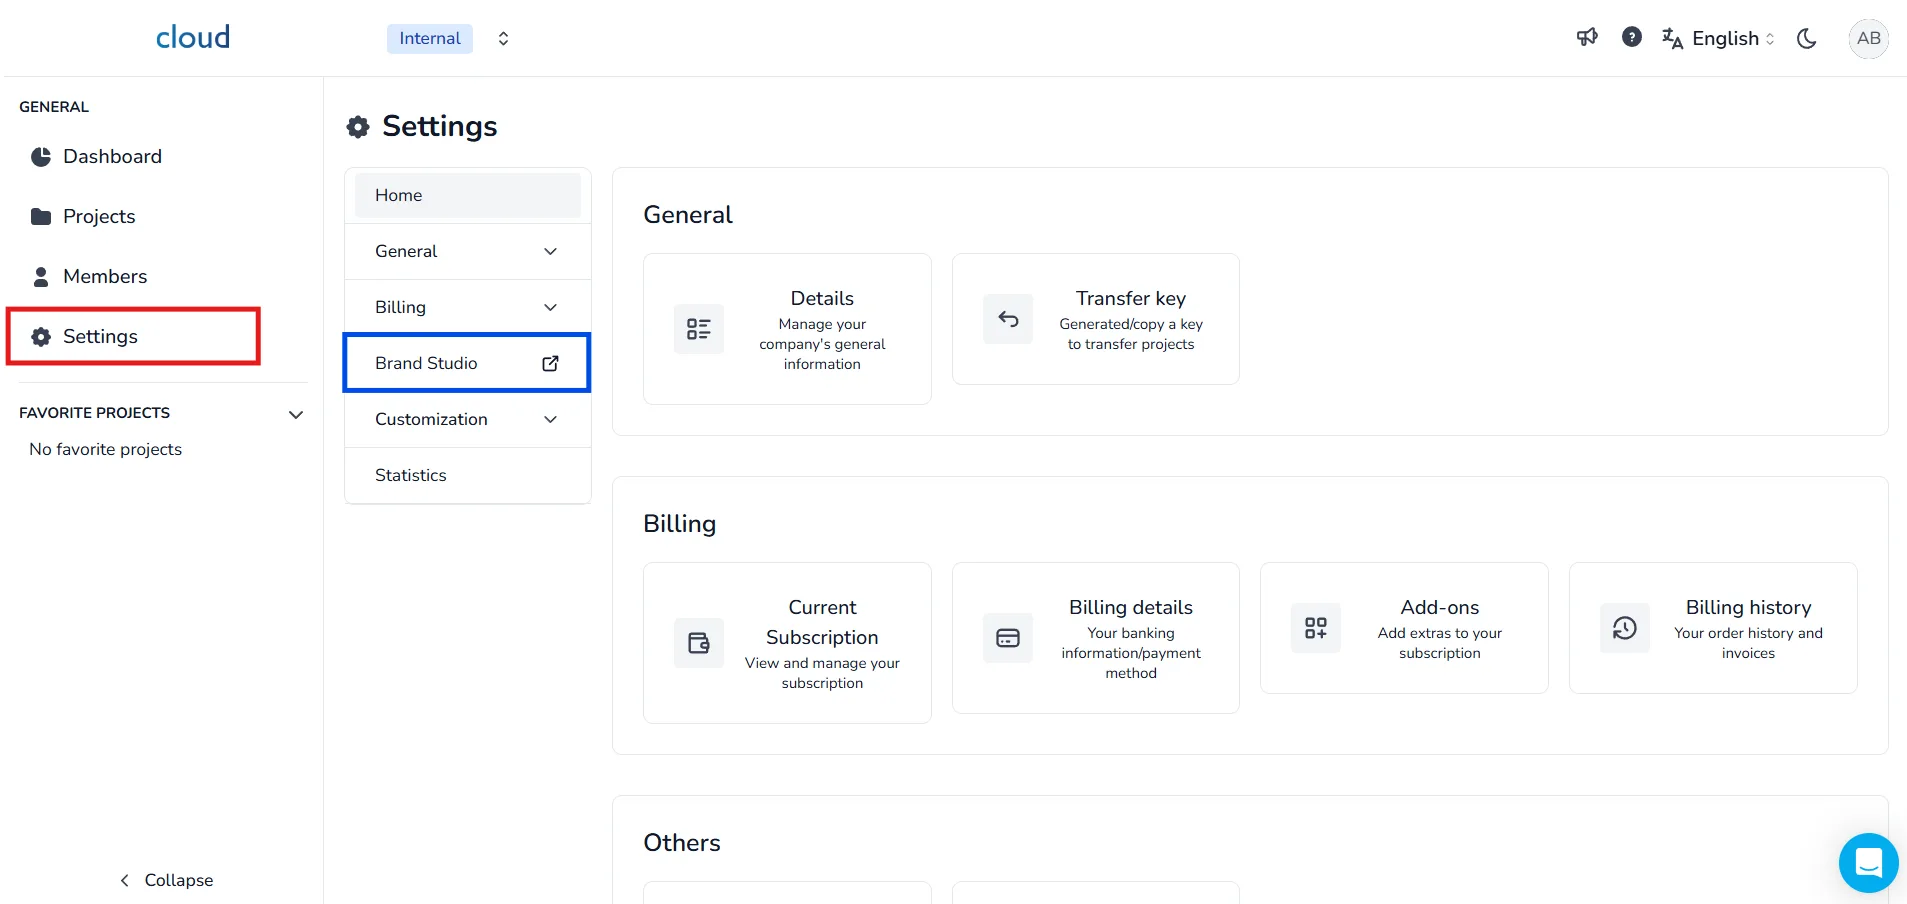
To begin customizing your interface, go to the Settings menu and open the Brand Studio section.
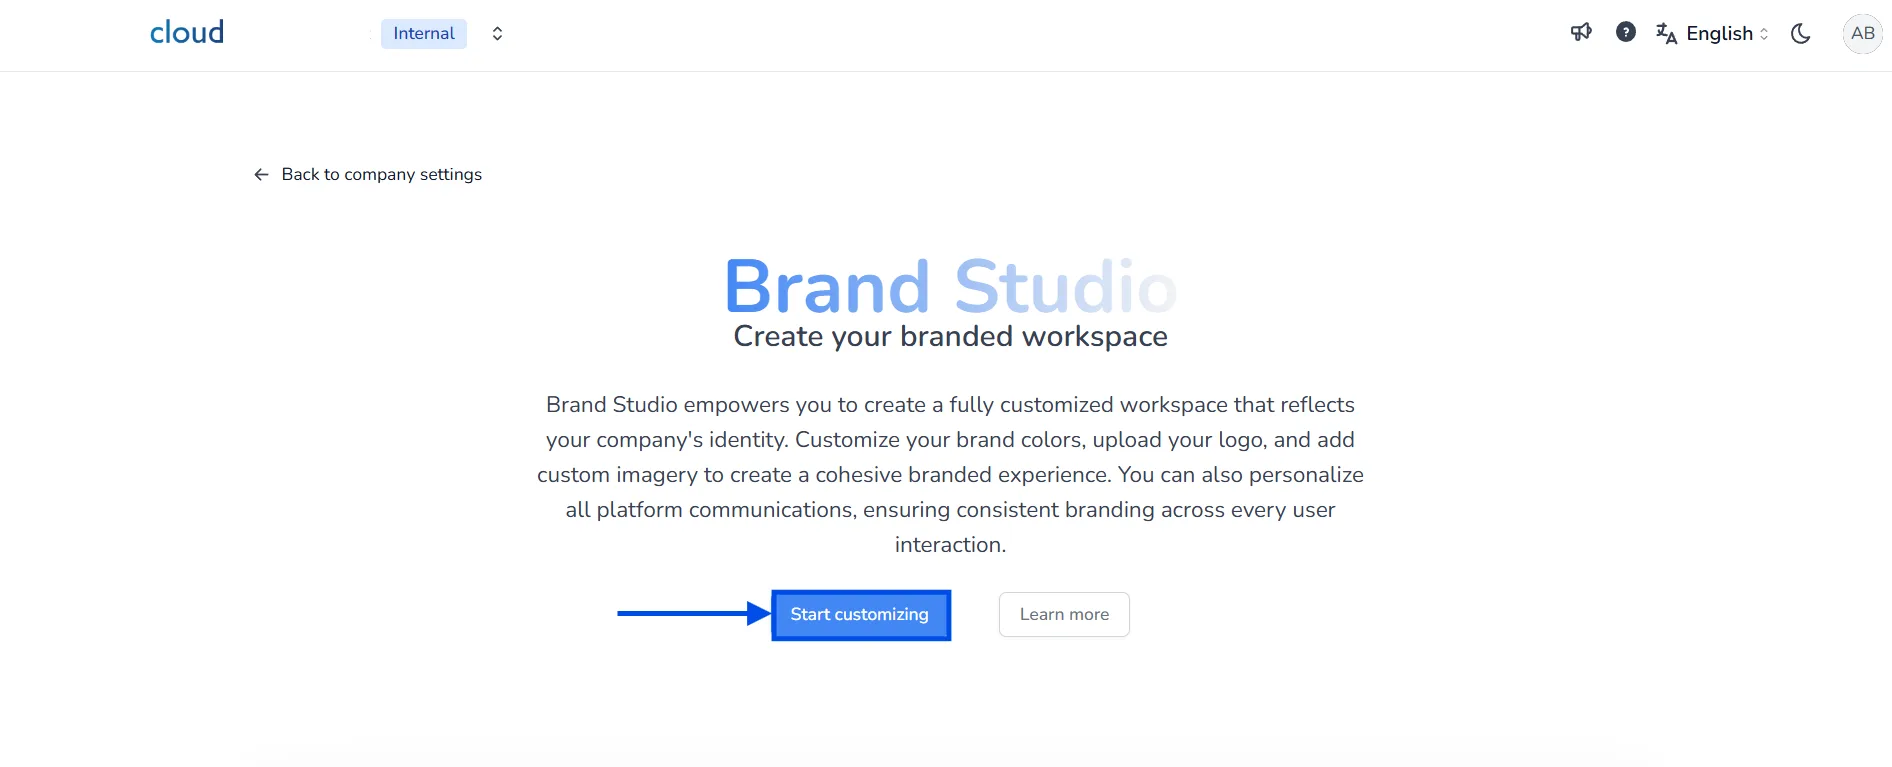
Click on the Start customizing button to launch the interface customization tool.
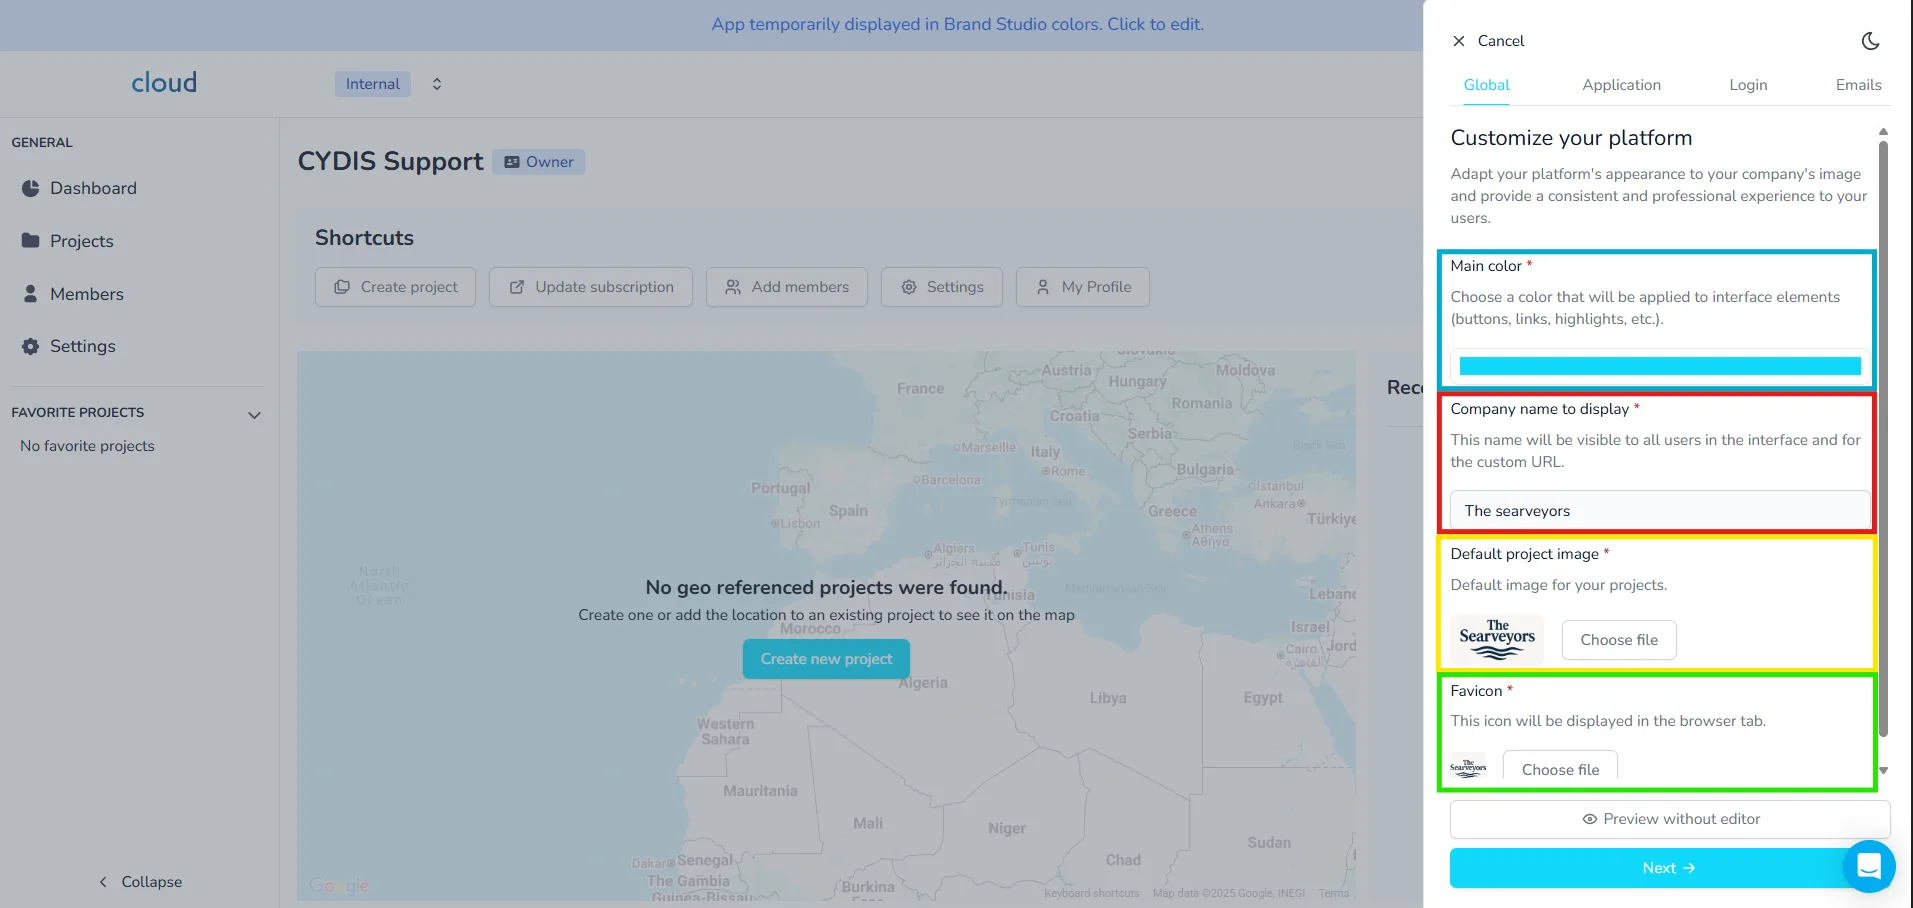
Global Customization
In the Global tab, you can configure the visual identity of your platform:
- Main color: Color applied to interface elements like buttons and highlights.
- Company name: Visible to users and used in the custom URL.
- Default project image: Used when no custom project image is set.
- Favicon: The icon displayed in the browser tab.
Very important step, select the main color for your interface, it will be used for all buttons, tags and some texts and style effects, so choose it wisely. We recommend using your company's main color, a flashy one is usually better, white, gray and black tones are not recommended.
You can activate dark mode to preview how your colors appear.
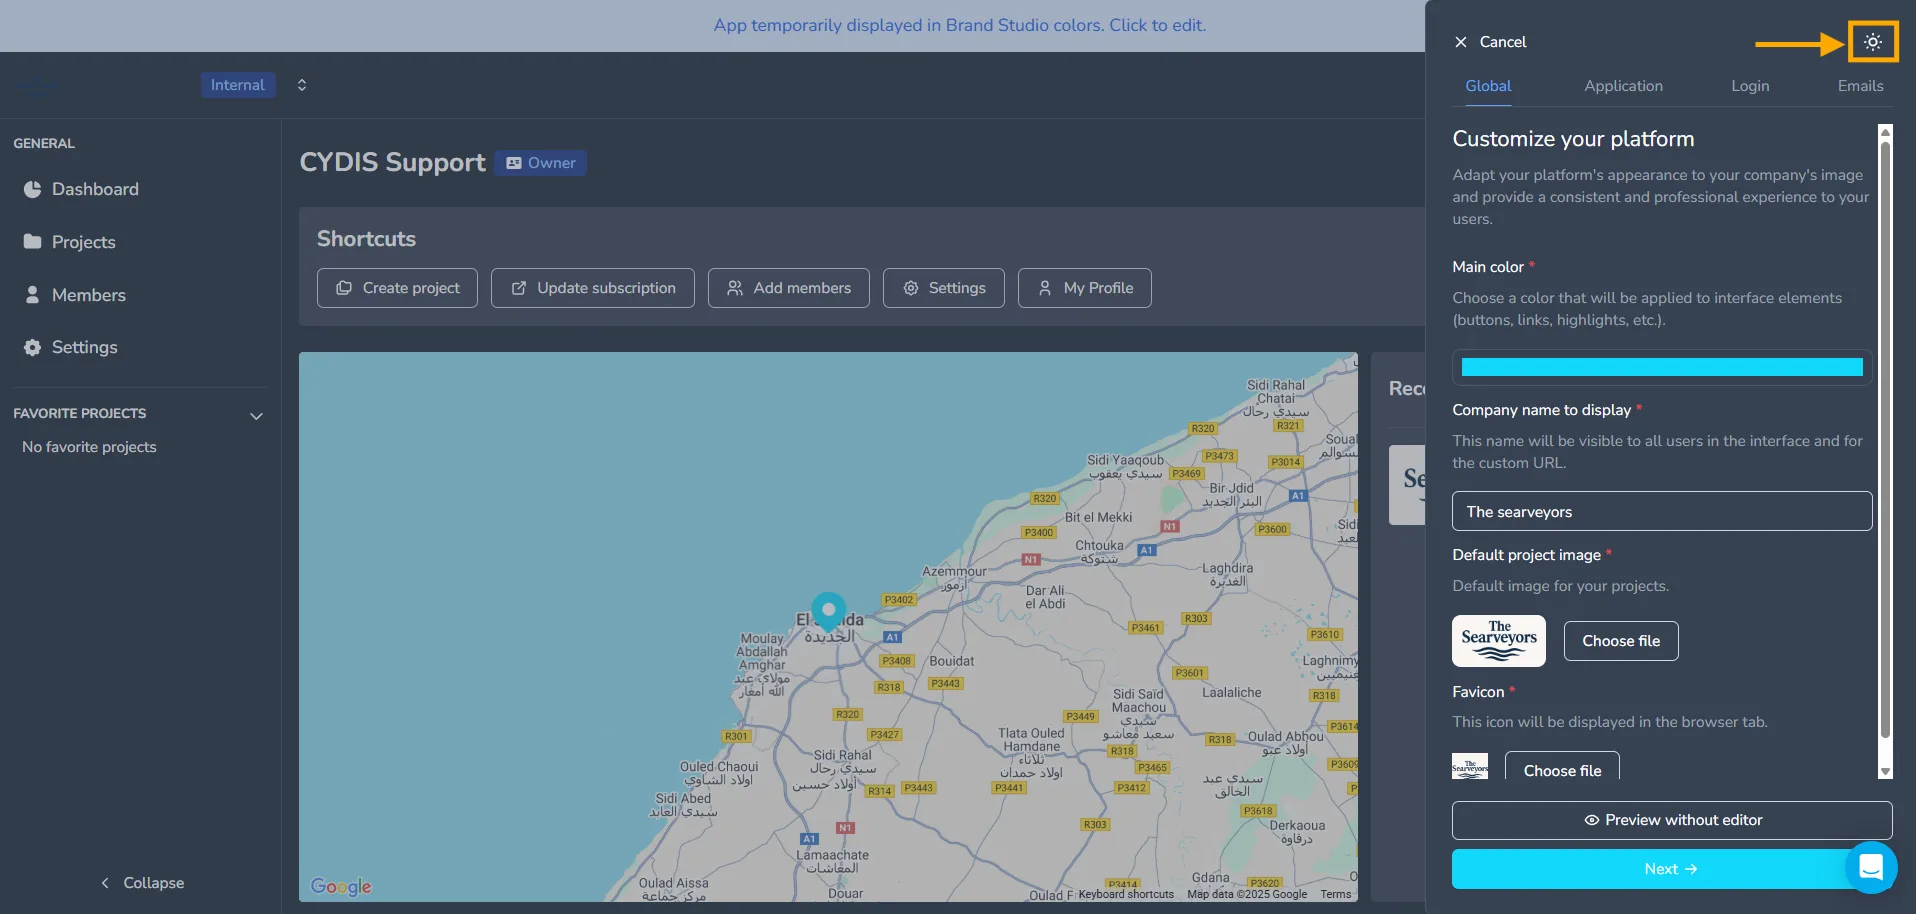
Progress is saved automatically, so you can come back later and find all modifications intact. Click Preview without editor to see the current state, then click Next
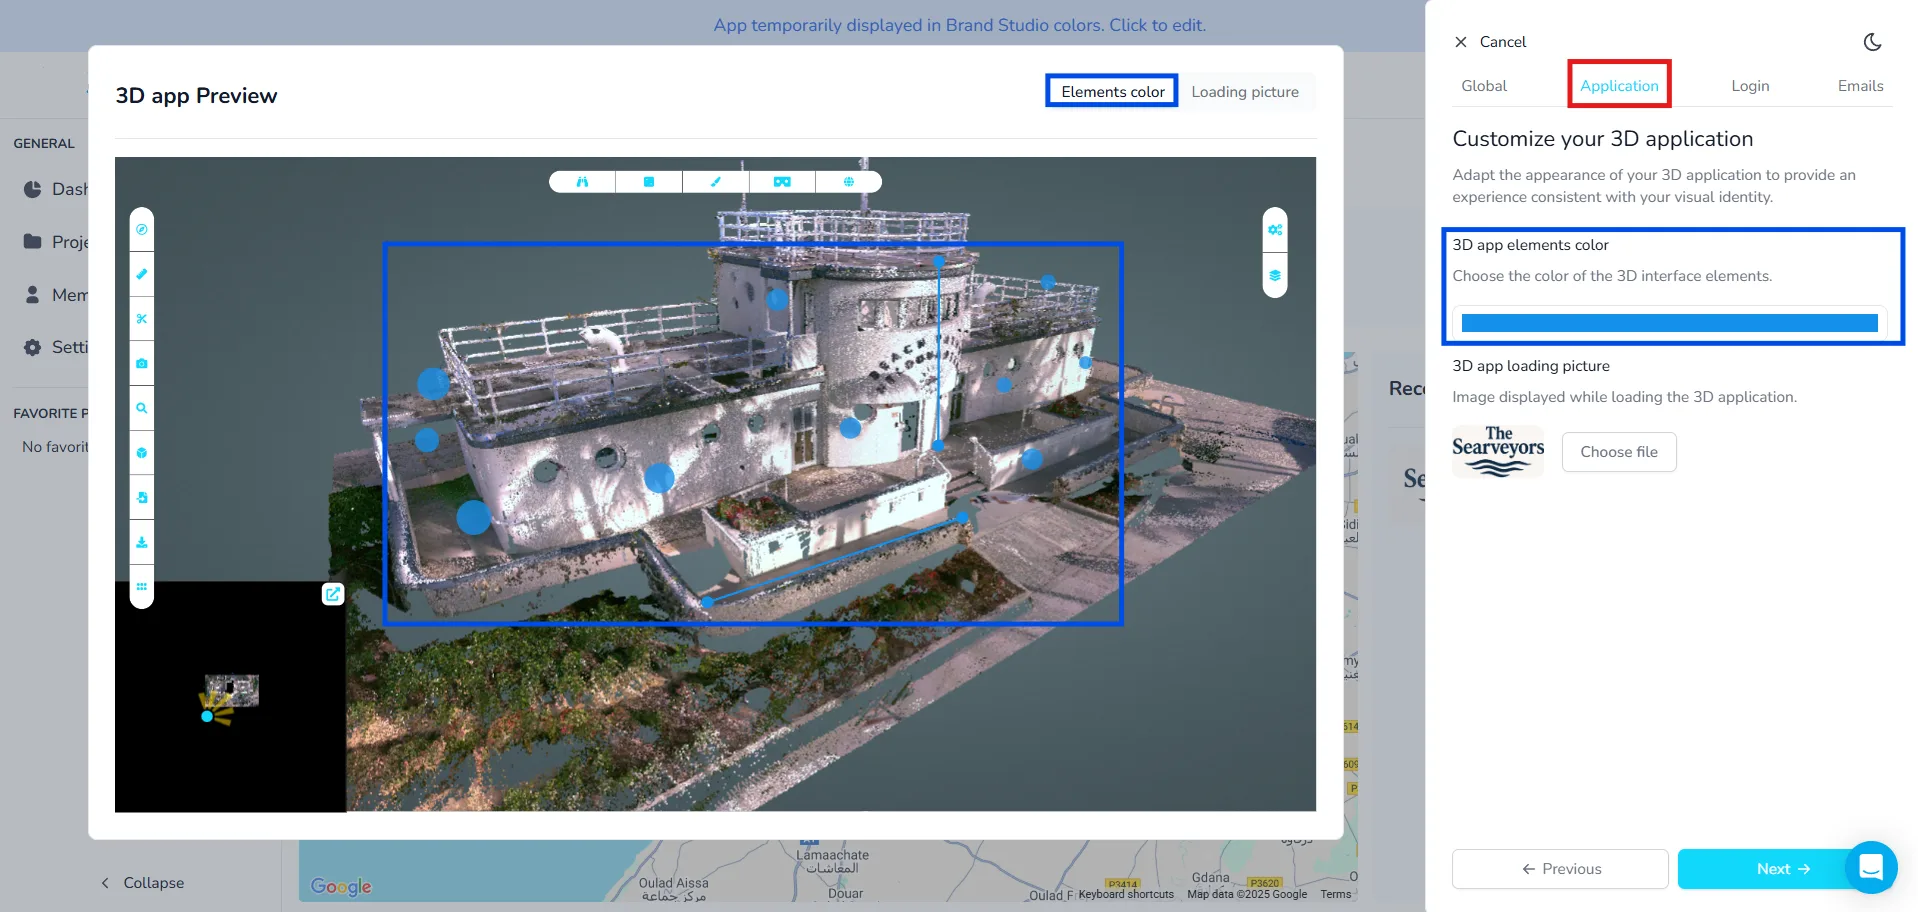
3D Application Customization
Here you can personalize the visual identity of your 3D viewer:
- 3D app elements color: Sets the color of UI elements in the 3D view.
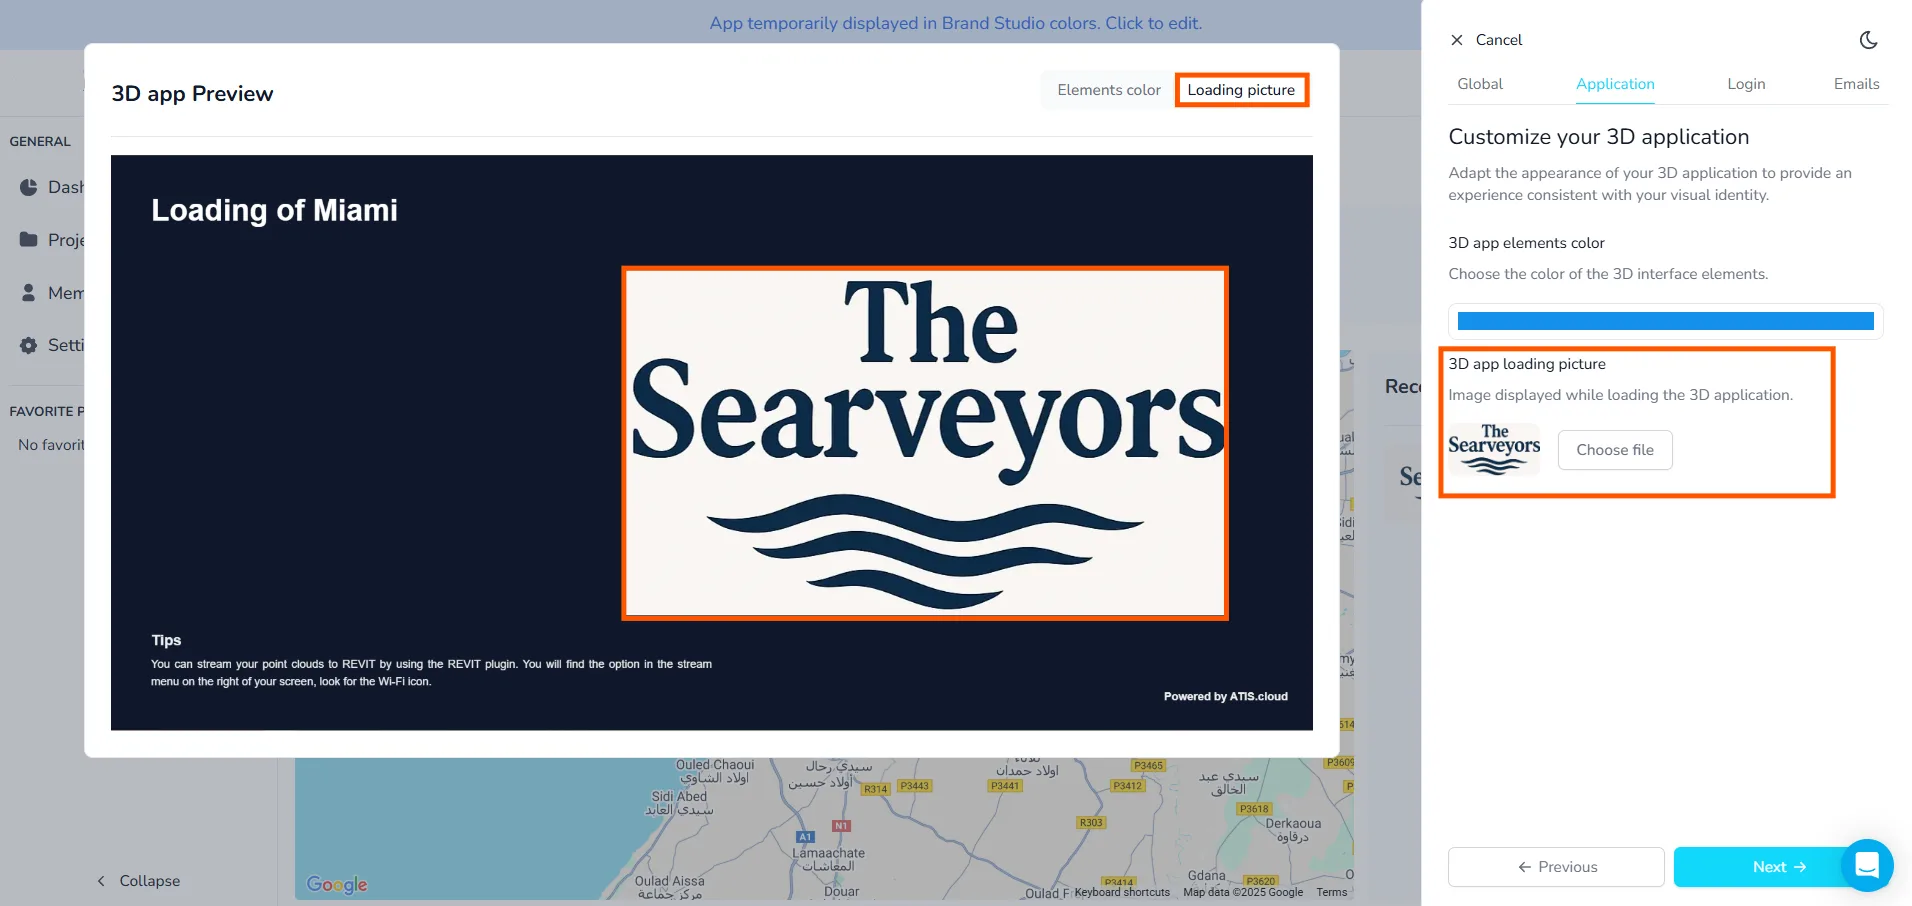
- 3D app loading picture: Image shown while the 3D app is loading.
Still in the 3D application, you can decide of the color to use for all elements, 360 images' bubbles, measures, annotations… In most cases, going with a color that is similar to your main color is the best way to go, however it is possible that you might want or have to select another color if your main one doesn't allow you to see clearly the elements. You should try to pick a color that has a high contrast with the background. We recommend using flashy colors as dark colors will be hard to distinguish.
Once done, click Next.
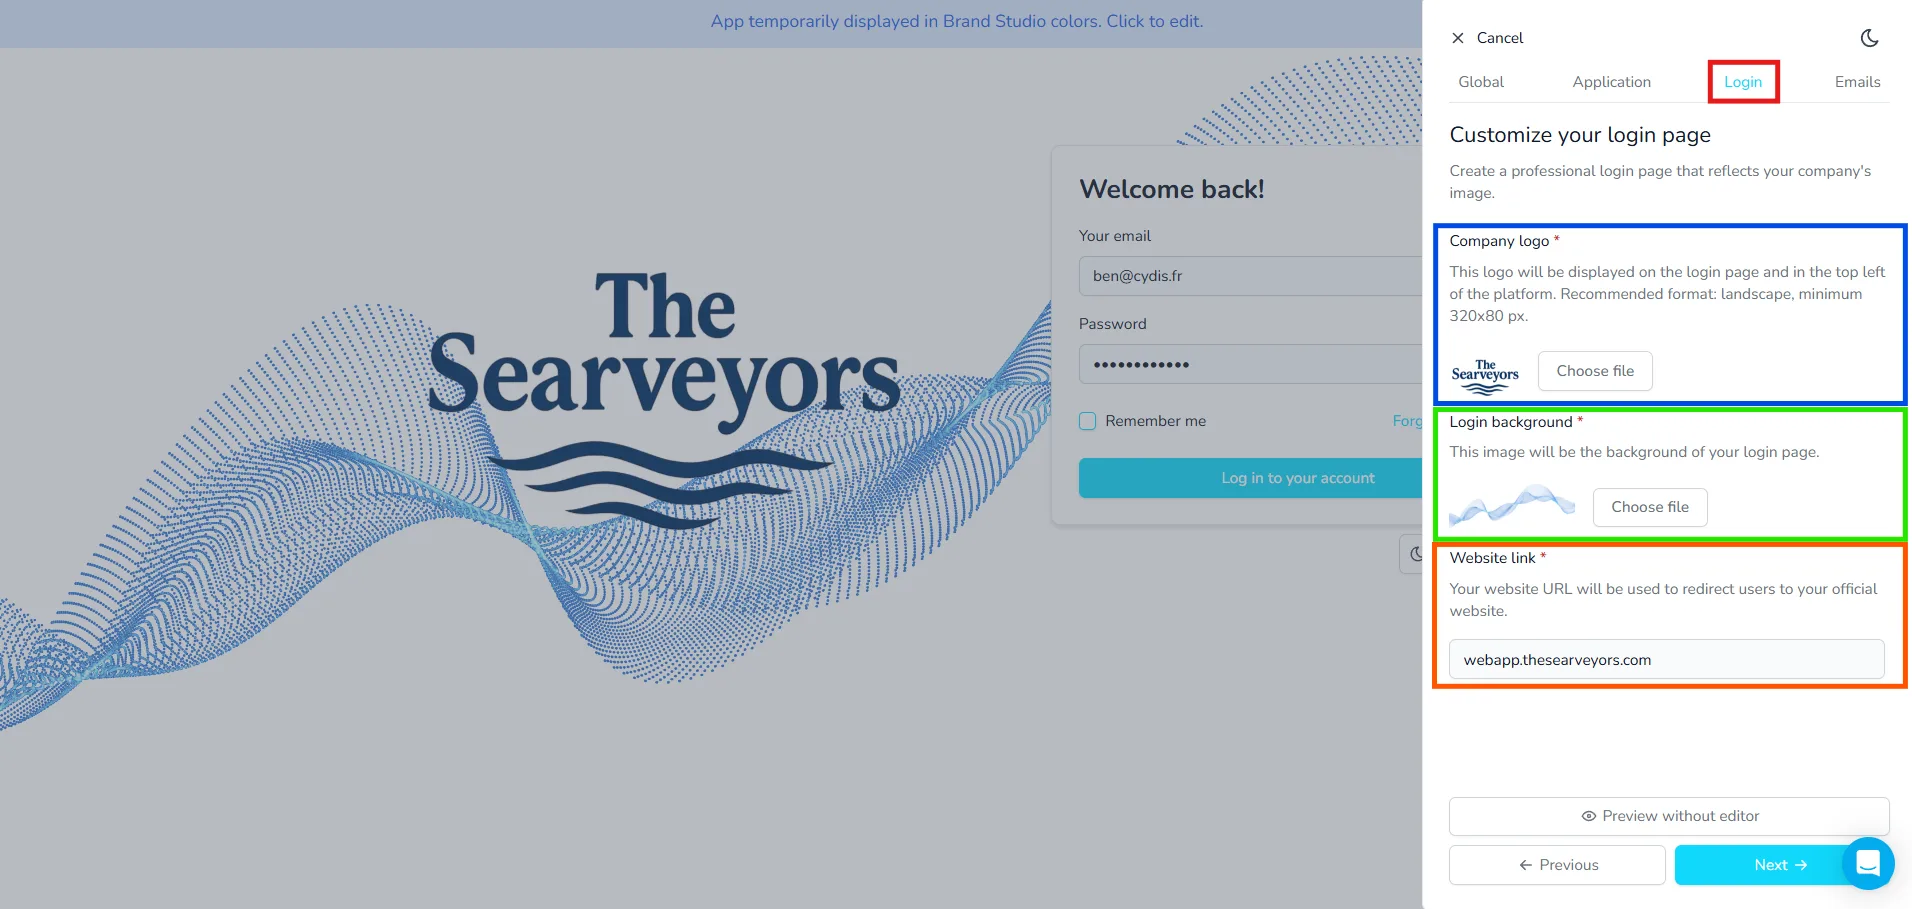
Login Page Customization
This section allows you to design a login screen that reflects your brand:
- Company logo: Appears on the login page and platform header (min. 320x80 px).
- Login background: Background image used on the login screen.
- Website link: Custom domain to redirect users post-login.
Click Next to move on.
Email Customization
In the Emails tab, configure your email templates:
- Header: Displayed at the top of all emails.
- Footer: Displayed at the bottom; can contain legal or useful links.
- Social networks: Add social links (YouTube, LinkedIn, etc.) for user redirection.
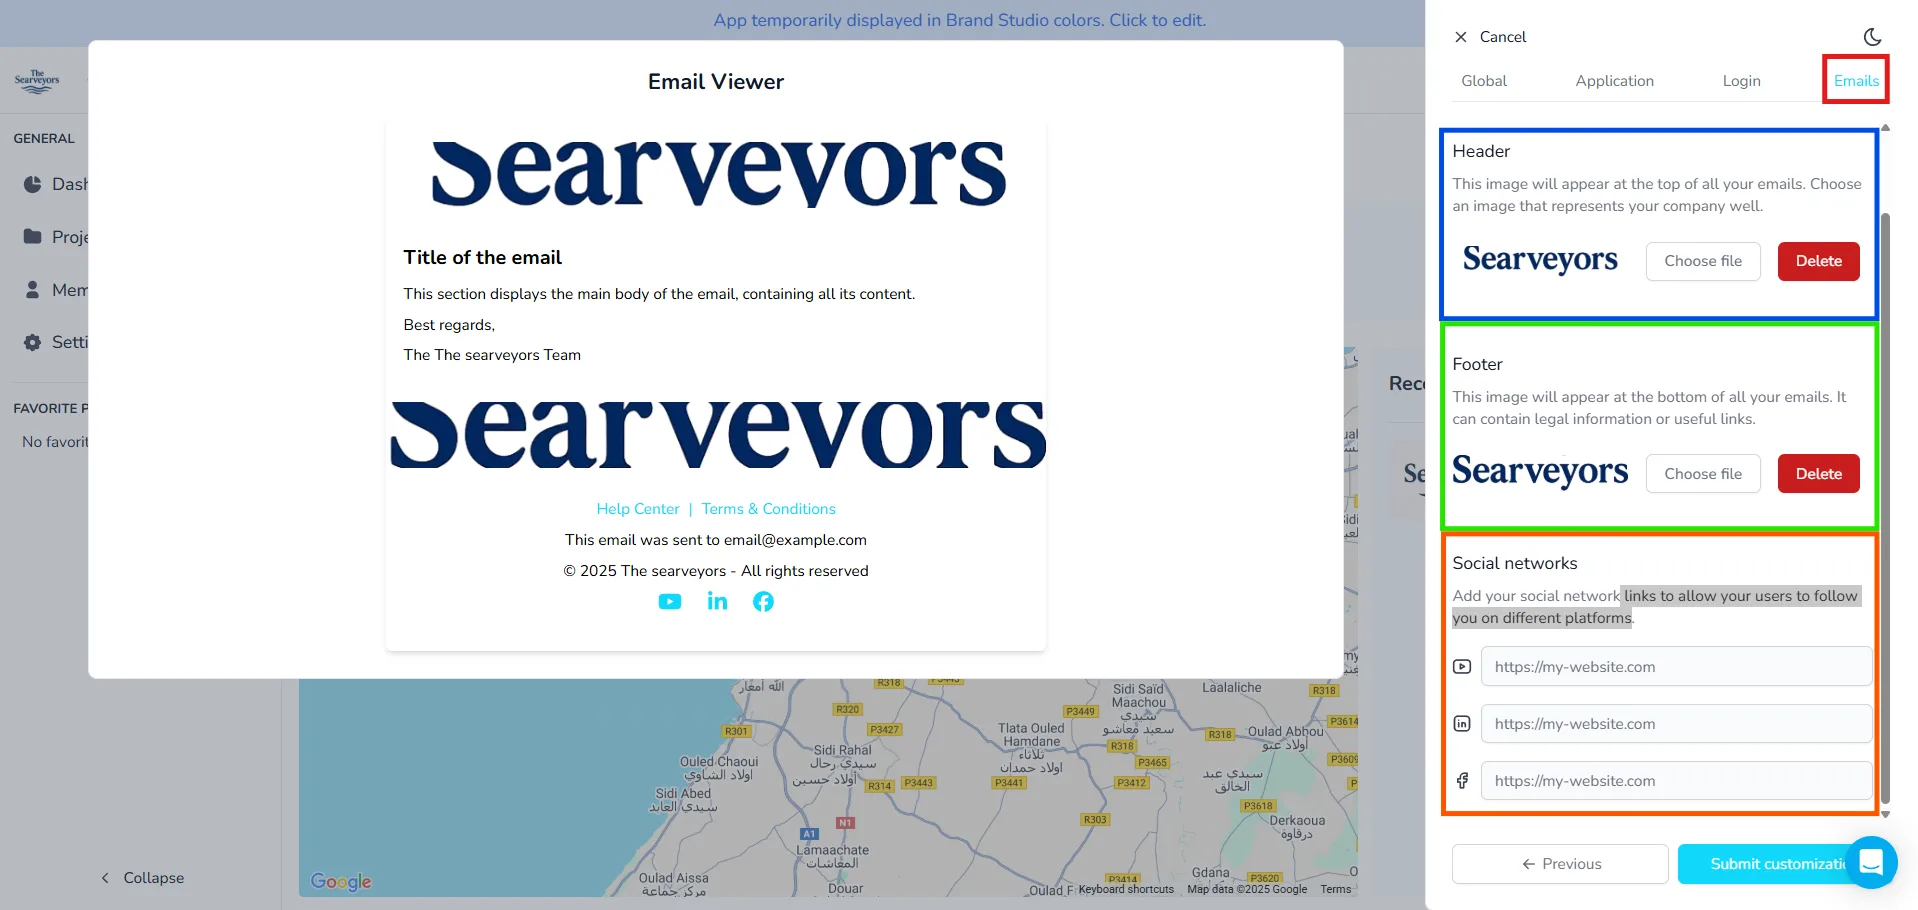
Once finished, click Submit customization to apply all your branding preferences. Our team will receive your request so they can start preparing your platform.
If you need any help using the simulator or if you have any questions about the White label interface, please, do not hesitate to contact the platform's team.