Importing a ReCap Project on the Platform
General information
Autodesk ReCap (stands for "Reality Capture") is a software application designed for processing and working with point cloud data captured from laser scanners. The software provides an intuitive interface that allows users to directly import point cloud files and apply customizable filters to remove unnecessary data, making large point cloud datasets more manageable. With its streamlined workflow and powerful optimization capabilities, ReCap helps users efficiently handle complex 3D scanning data while maintaining high quality and accuracy.
With Autodesk ReCap, you can select what you want to clean, display, edit using simple selection tools like windowing, color-based selection, and even planar selection.
Understand the structure of your ReCap project
Autodesk ReCap can open both structured and unstructured projects. Structured projects, most of the time, have an .rcp file and a support folder of the .rcp file. In the support folder, you should find the .rcs files.
- Usually, one .rcs file equals one station.
 If you only have the .rcs file or the .rcp file + the support folder with a single .rcs inside, it probably means that your project is not a structured point cloud.
One way to check the structure of your project is to open it and check the icons for each station when importing the file to ReCap:
- Structured project, scanner icon visible on each station:

- Unstructured project, icon of a cobweb visible:

- Semi-structured project, scanner icons and cobweb icons visible :

One of the ways to know if the project is structured or not is based on the 360 bubbles:
- 360 bubbles visible, your ReCap project is structured or semi-structured :

Create a ReCap project from an existing .RCS file
If you already have the .rcs file, there is no need to reprocess the raw scan data.
To create a ReCap project from an existing .rcs file:
- Open Autodesk ReCap Pro.
- Select New Project.
- Choose Import Point Cloud.
- Select your .rcs file.
- Set the project name and location.
- Start the import.
ReCap then creates a new project that uses the existing .rcs file directly, without recomputing or reindexing the point cloud.
If you later want to use this project in Revit, you only need to link the .rcs file or the ReCap project from Revit.
Optimize your ReCap project before adding it to the platform
If you are going to do point cloud cleanup on ReCap, you need to make sure your project has been saved correctly. PLEASE NOTE THAT IF YOU USE CLIPPING OR REGION, the points are not going to be deleted and will always remain visible on the platform.
In order to keep the cleaning of the ReCap point cloud on the platform, it is necessary to do the manipulation below:

Once you finish deleting the points, at the top left, click on “Save project as” and choose the save location.


When you save the project as, ReCap asks you if you want to completely remove the deleted points.
In this case, click on it and the new project is rewritten with the points completely removed.

Be careful, when you add the project to the platform, remember to add the project that has been rewritten with the points removed and not the original one.

Compress and Import the project on the platform
The platform is compatible with structured and unstructured projects. To be able to add a ReCap project, you must zip the .rcp file and the support folder linked to the .rcp.
Example 1: Structured project, with a zip containing the .rcp and its support folder (the .rcs).
In order to save space, before compressing the project, you can delete the Temporary Cache files folder, located in the Support folder.

Example 2: Unstructured project, with a zip containing only an .rcs file.
Please note that the ZIP file must contain a single .RCS file in case you do not have the .RCP file to link the .rcs
Once you get the ZIP file, you can add it into a project on the platform.
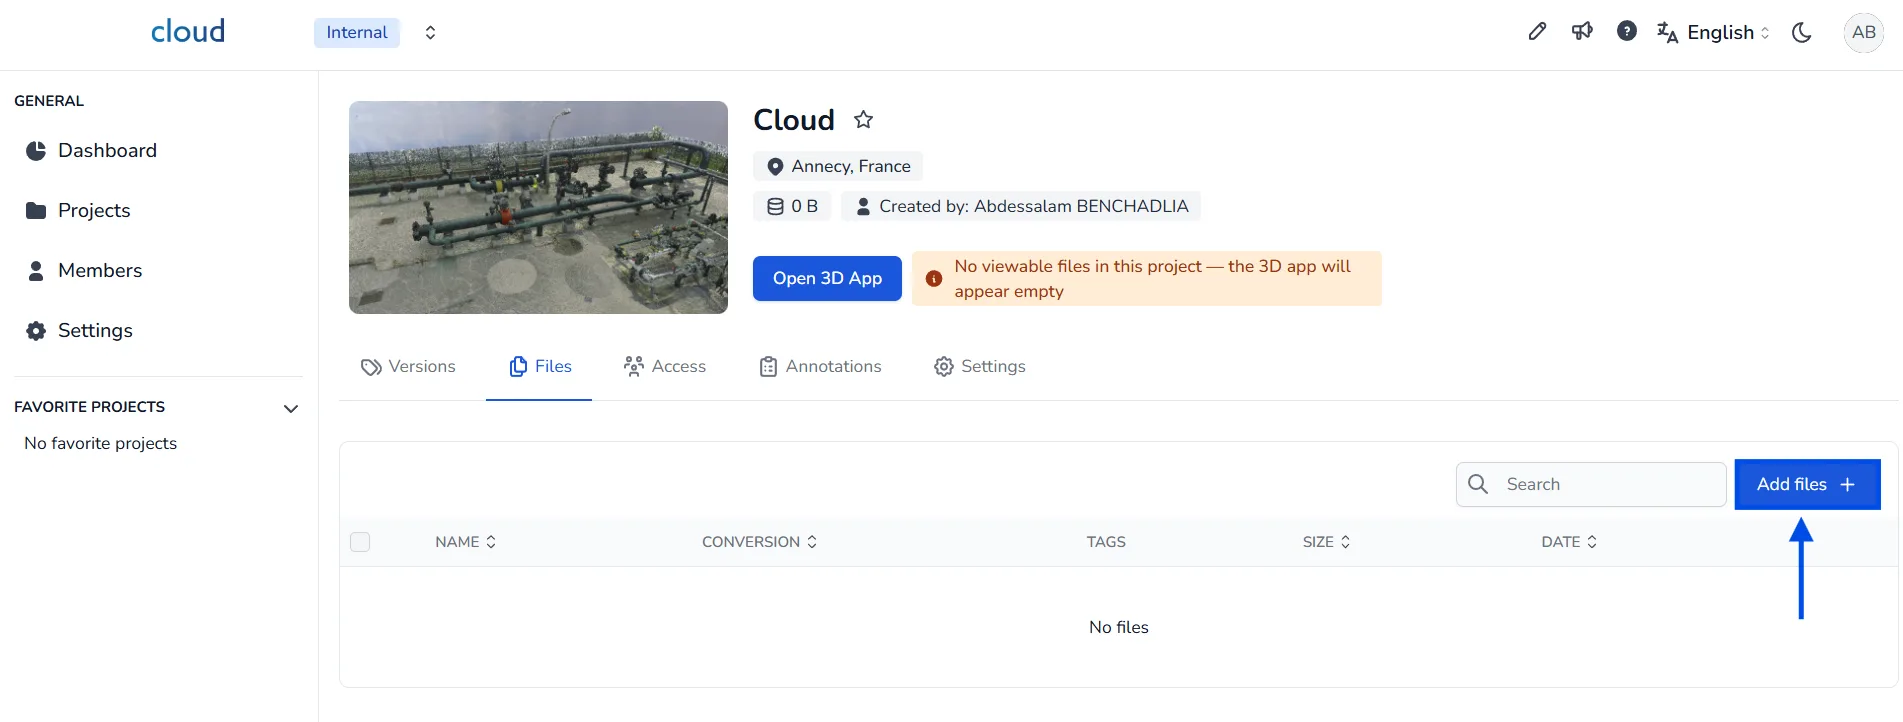
To import a ReCap project into the platform, start by navigating to the project where you want to upload your data. In the Files section of your project interface, click on the Add files + button located at the top right. This will open a window prompting you to select the files you want to import.
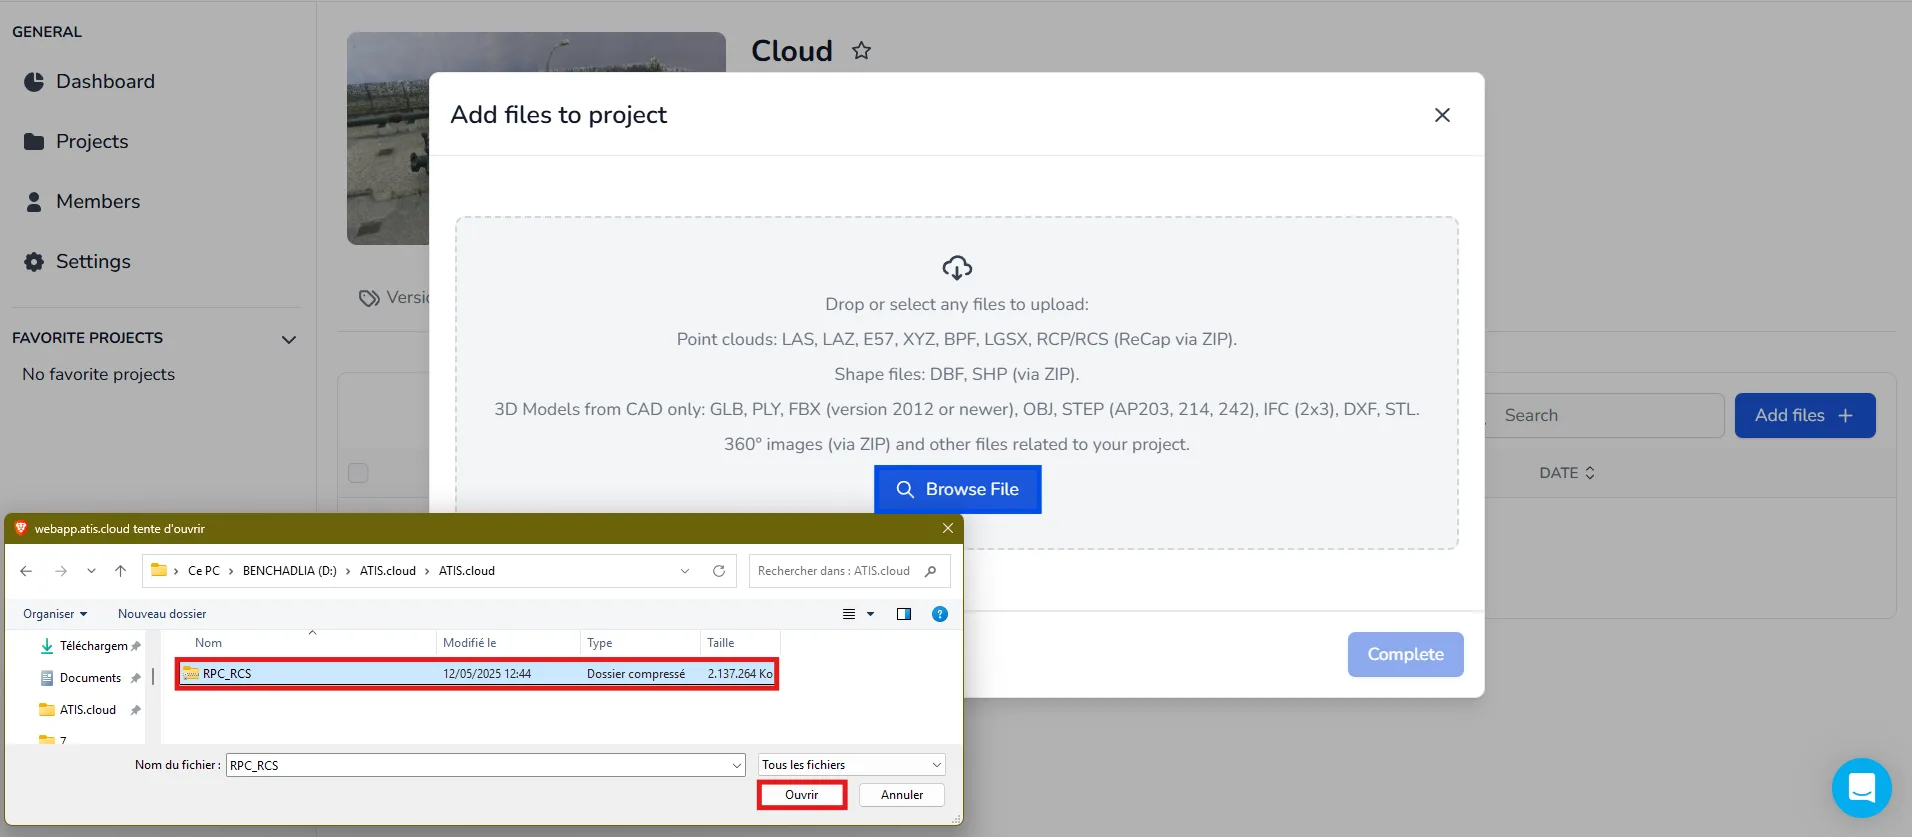
Click on Browse File and locate the ZIP file that contains your ReCap project.
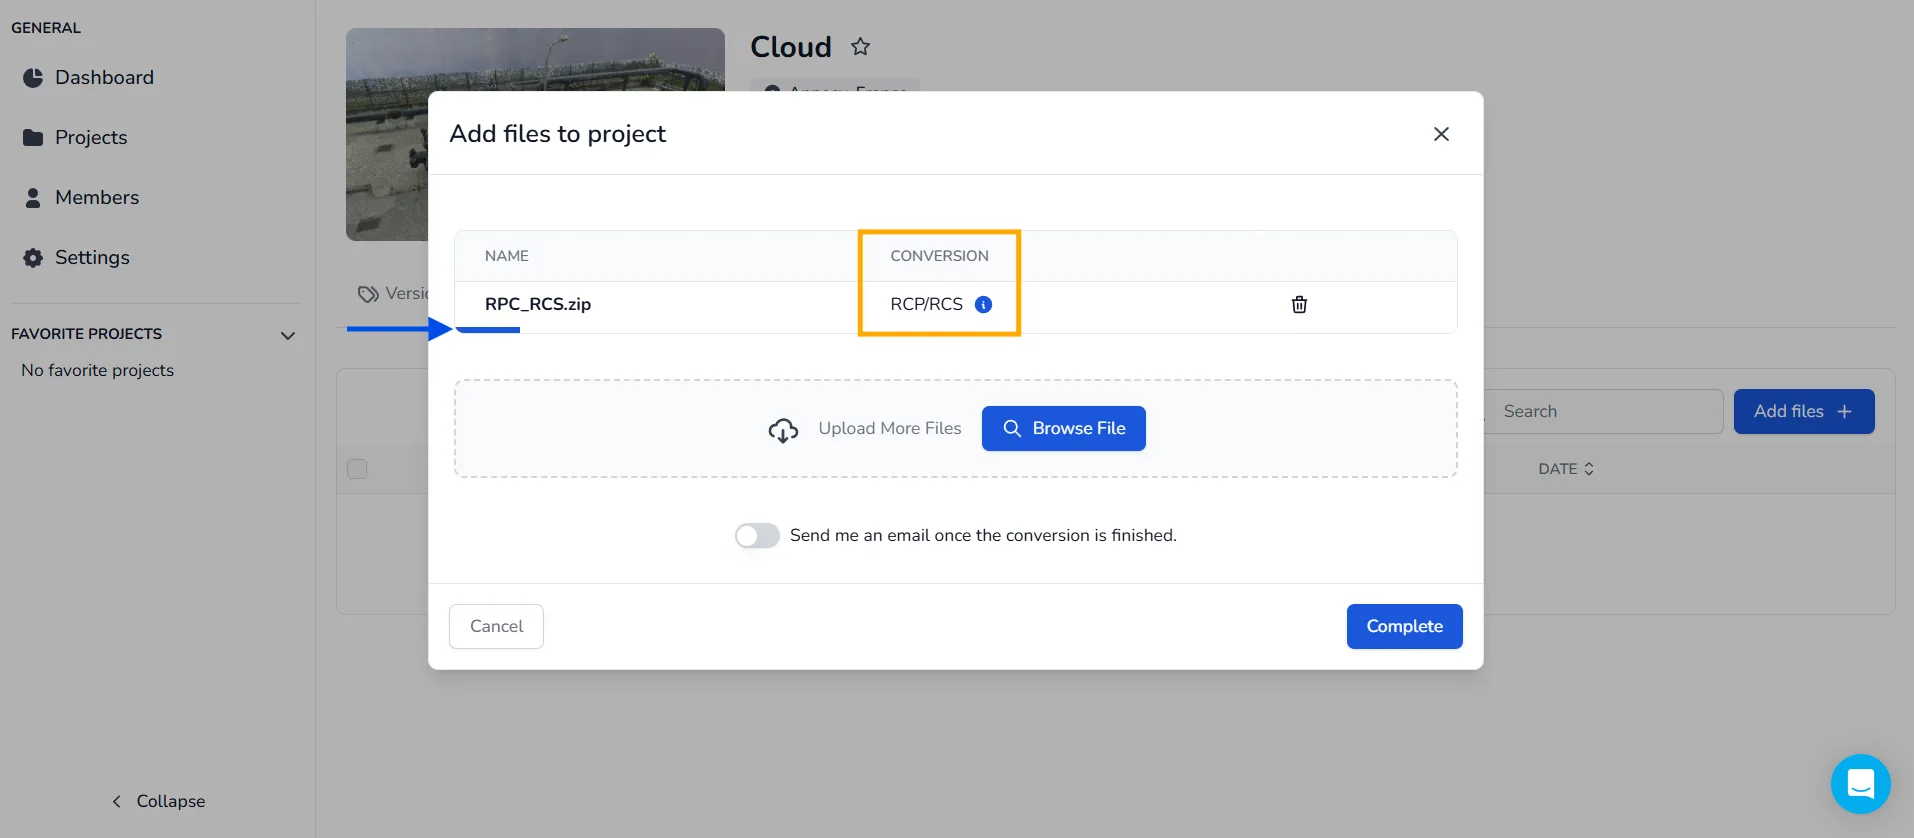
Make sure the ZIP file is properly structured and includes supported formats. If the file is valid, the platform will automatically detect the format and display the conversion type as RCP/RCS.
Wait a few seconds until the blue progress bar completes. When it’s done, click on Complete to launch the upload. The system will begin processing the file immediately.
After submission, you’ll see the status change to File being converted. This means the platform is working on converting your data.
Once the conversion is complete, the file will be marked as Converted in the list. At this stage, you’ll also receive an email notification confirming that the conversion is finished.

If you have any questions or need more information, please contact the technical team.