Add Files to a Project
First, let's access the project's edit page, note that if you just created your project you directly be taken to the correct page and can therefor skip that part.
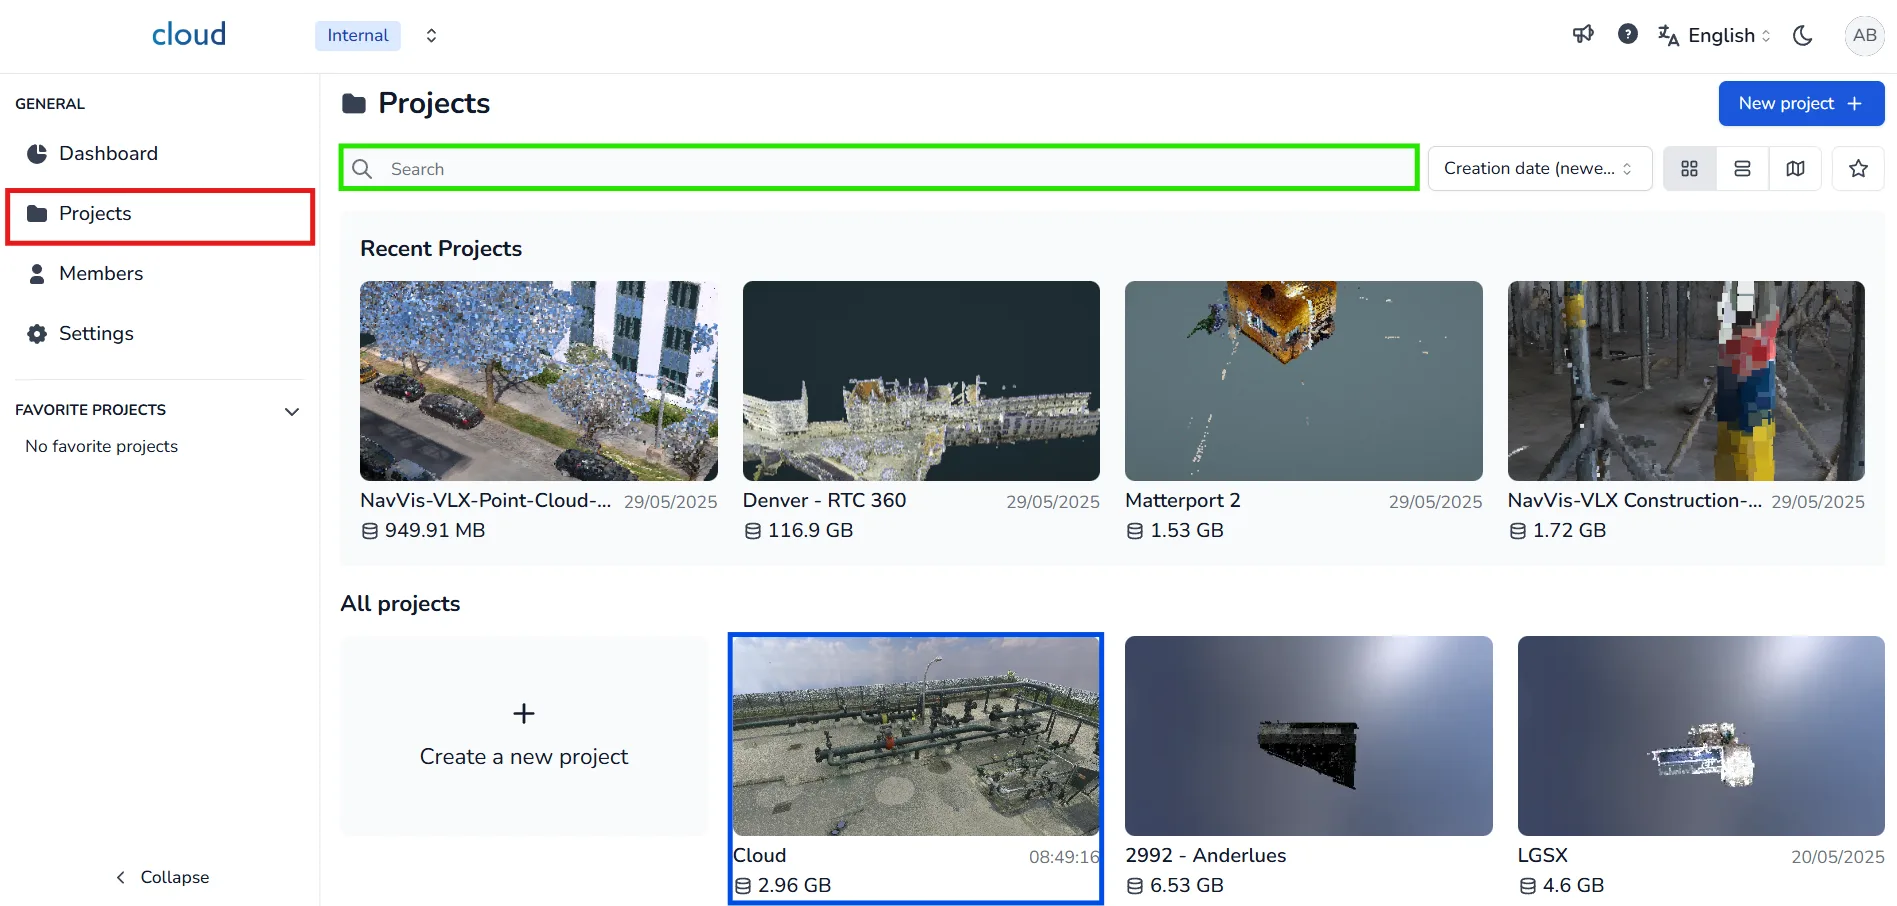
To begin, click on the Projects tab in the left panel. Use the search bar to find the project to which you want to add files. Then, click on the project's thumbnail or title to open its workspace. If you have just created the project, you will be redirected automatically to its edit page.
Once you are on the project page, go to the Files tab at the top. Then, click the Add files + button located in the top right of the file list. A modal window will appear, allowing you to upload the files you want to add to the project.
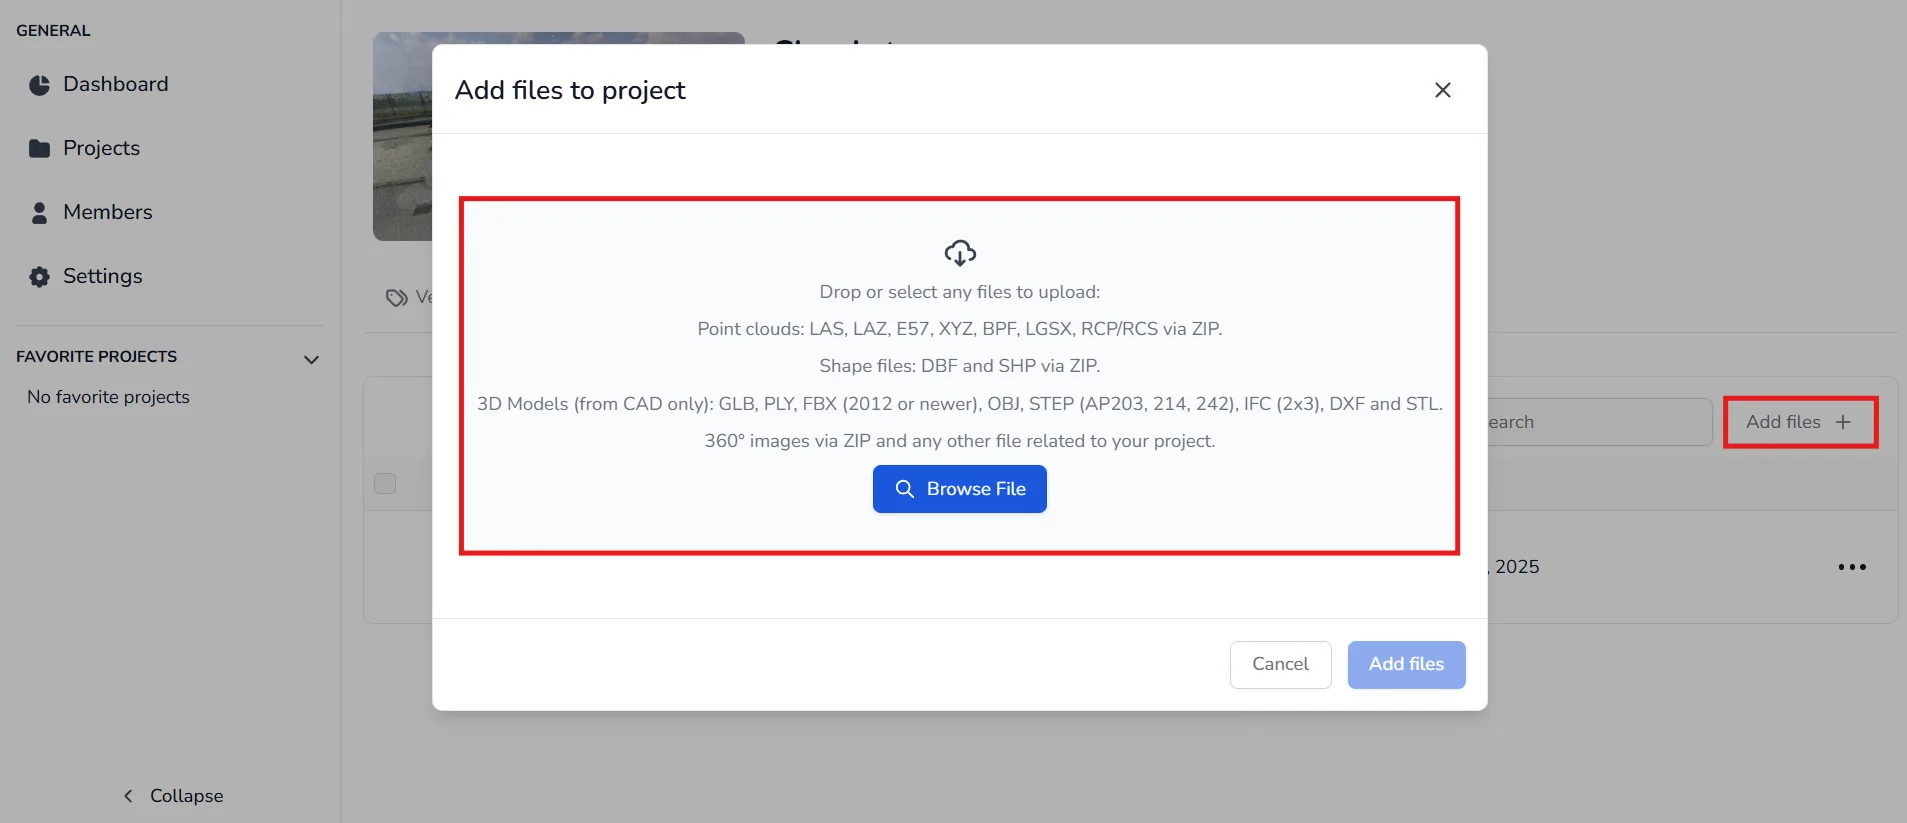
You can upload the following file types:
- Point clouds: Supported formats include LAS, LAZ, E57, XYZ, BPF and RCP/RCS (ZIP format).
- RCP / RCS files (ZIP format): To import an ReCaP project, compress the files in a ZIP archive. For more details, follow this article
- LGSx files: To upload LGS files, convert them to LGSx format beforehand. Password-protected LGSx files are not supported. See the dedicated article
- Shape files (ZIP format): Add all related files (SHP, SHX, DBF) into a ZIP with matching filenames. The system will detect them as a shape file set.
- 3D Models (CAD only): Supported formats include GLB, PLY, FBX (2012 or newer), OBJ, STEP (AP203, 214, 242), IFC (2x3), DXF, and STL. For more information, check the accepted formats article
- 360° Images (ZIP format): You can upload 360° image sets in ZIP format. If your point cloud does not include them natively, import them separately. Please refer to the dedicated article for instructions.
Upload Settings
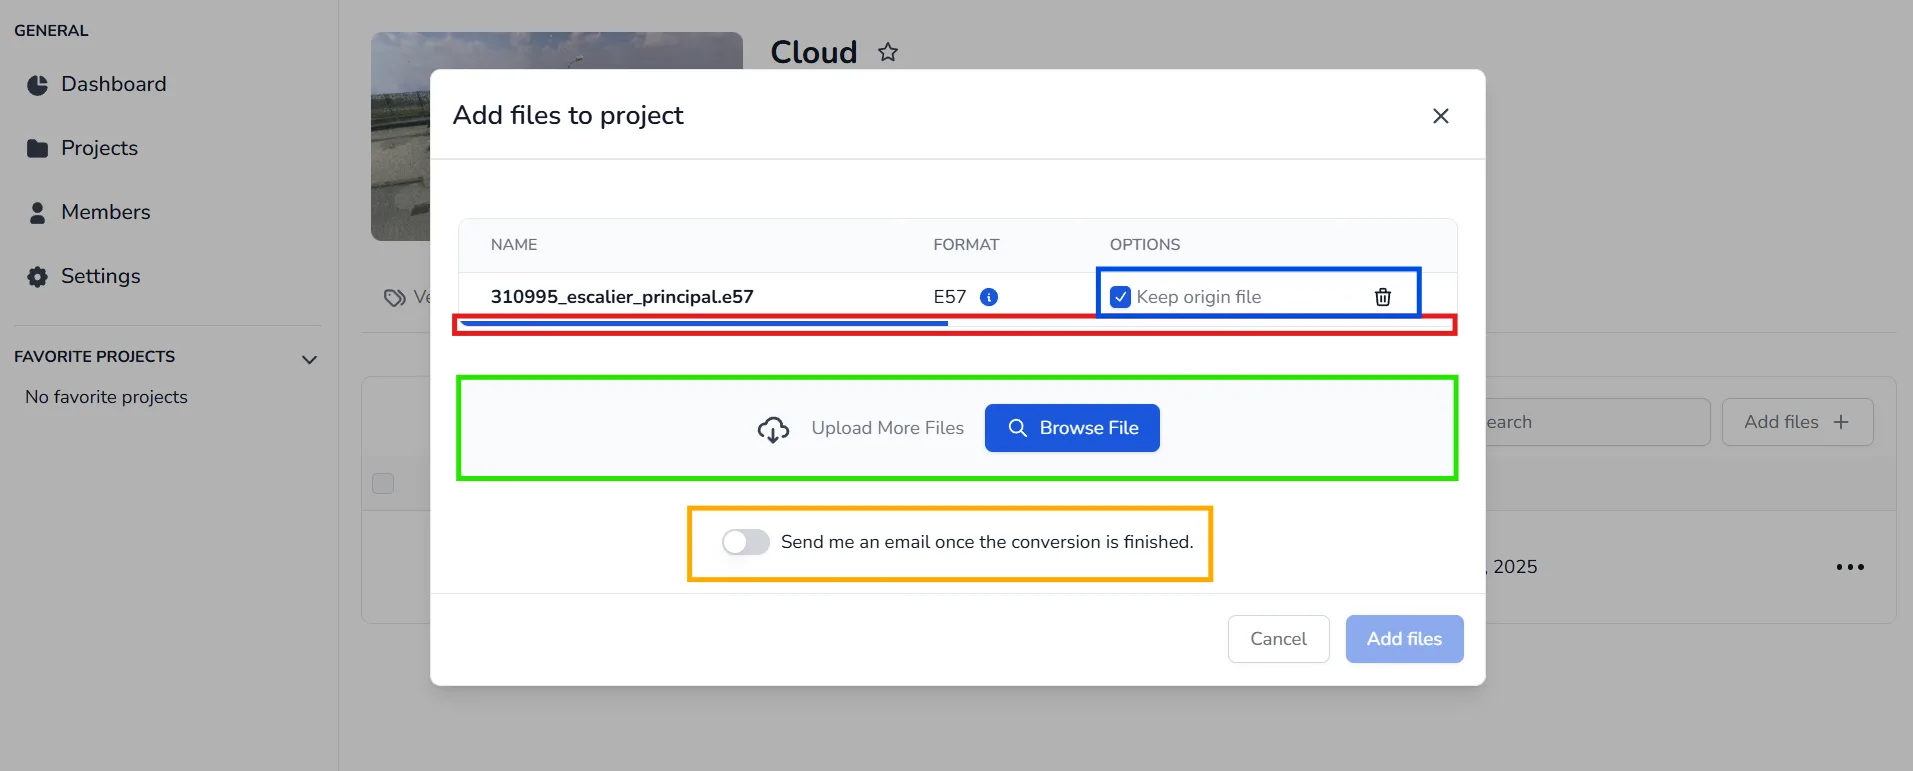
Once the files are selected, you will see a few configurable options:
- Keep origin file: Enabling this will preserve the original file, making it downloadable later.
- A blue progress bar will appear while the file uploads - do not close the window until it finishes.
- You can upload multiple files at once by dragging them into the box or using the Browse File button again.
- If you want to be notified by email when the conversion is done, activate the email alert option at the bottom of the modal.
Once uploaded, you will be redirected to the Files tab.
- If conversion is still in progress, you'll see a File being converted status.
- When conversion is done, the status changes to Converted.
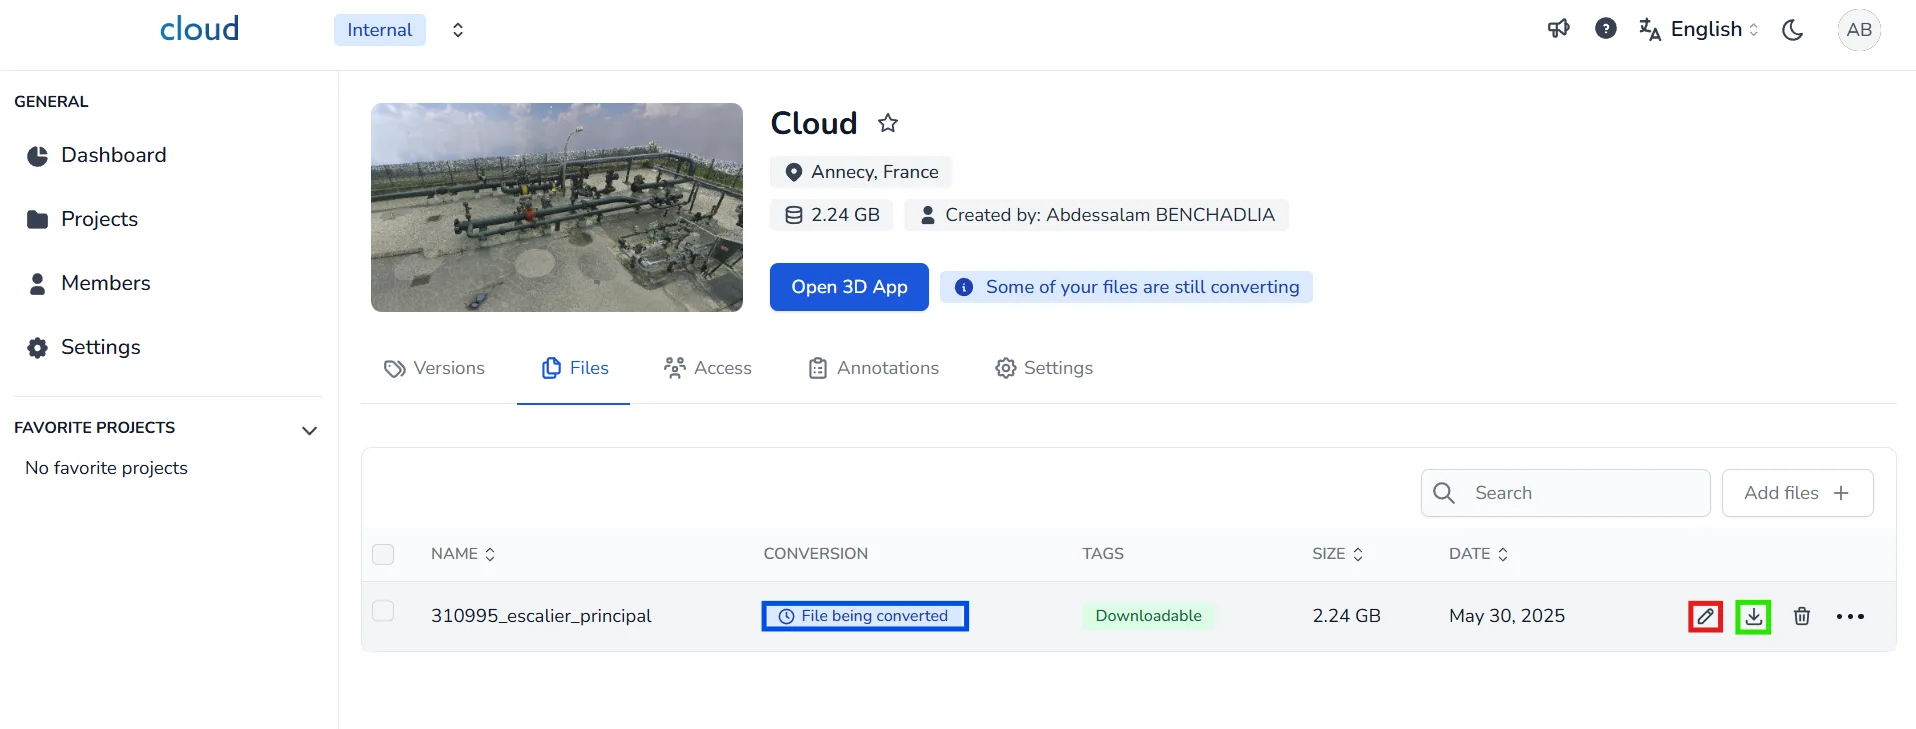
You will then be able to:
- Edit the file name
- Download the original file (if saved)
- Open 3D App to visualize and work with your data
If you have any problem or difficulties, please do not hesitate to contact the platform's team.