Site Configuration
A site describes the structure of the places captured in your point cloud. It is organized in three levels: buildings, the floors inside each building and the rooms on each floor. Once your site is configured, the map shows where you are and lets you jump from one floor to another, and every building, floor and room gets its own entry in the project tree.
Before you start:
-
The site is configured in the Site configuration window, which needs at least one visible point cloud. Without one, the window displays No visible pointcloud and the creation buttons stay disabled
-
The window is not available from a public share link. Sign in and open the project from your workspace
-
Saving the site creates a new version of the project, see Save and exit below
Open the Site configuration window
Click the building icon in the right-hand bar to open the Site configuration window.
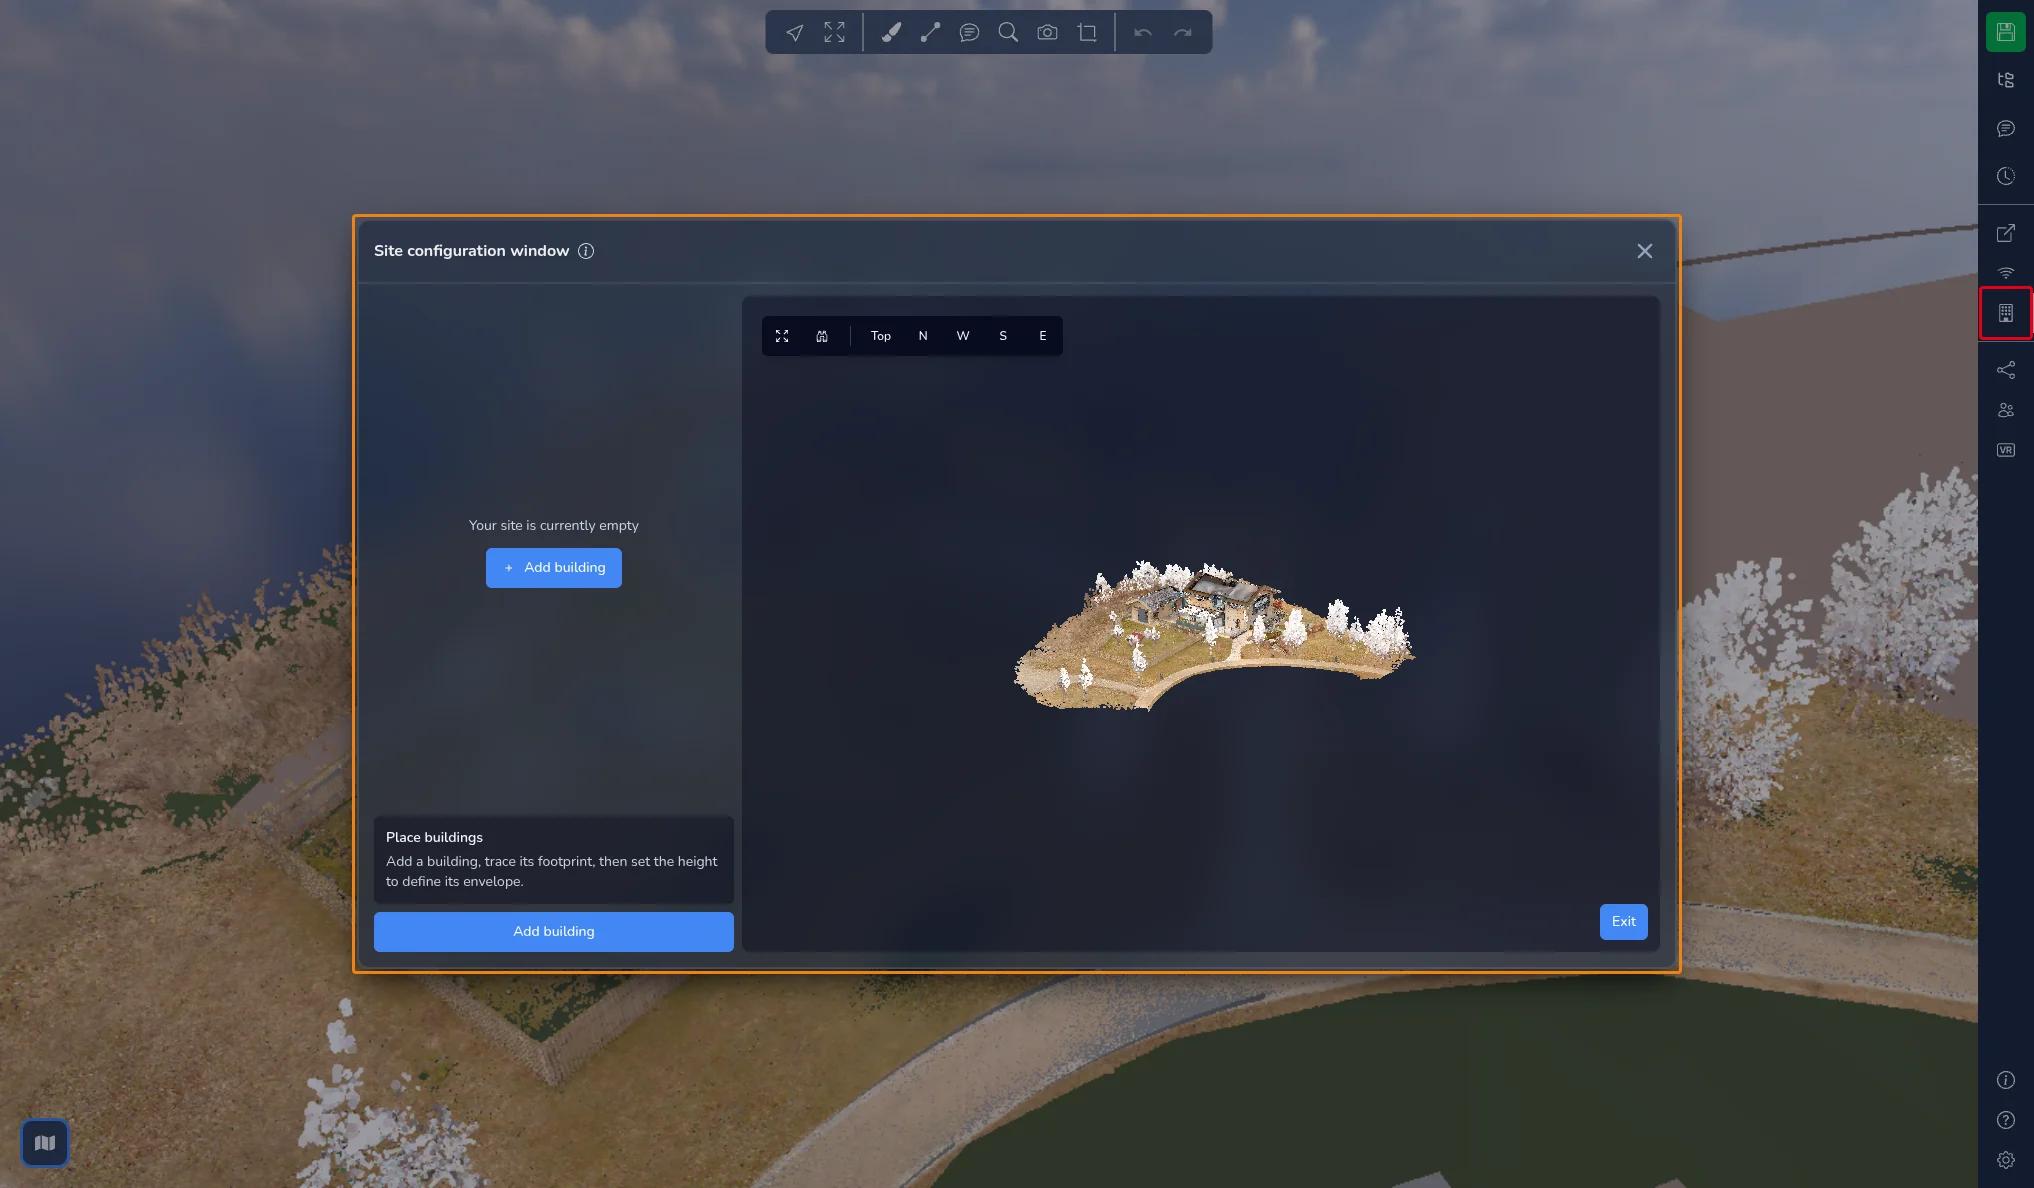
The window has three areas:
-
On the left, the Site Map tree, which lists your buildings, floors and rooms
-
Below the tree, the settings of the selected item, a short guide to the current step and the main action button
-
On the right, a 3D view of your point clouds, where you draw the outlines
A built-in tutorial walks you through the whole workflow. Start it from the (i) icon next to the window title.
While the window is open, the rest of the 3D Application is paused and the map is hidden. After closing the window, click the map button in the bottom left corner to display it again.
Navigate in the 3D view
The buttons in the top left corner of the 3D view help you frame your work:
-
Fit visible pointclouds: frames all visible point clouds
-
Switch to orthographic / Switch to perspective: toggles the camera projection
-
Top, N, W, S and E: switches to the top view or to the north, west, south or east elevation
Outlines are easier to draw in the Top view. Heights are easier to adjust in an elevation.
Step 1: Place buildings
-
Click Add building. A Building 1 entry appears in the tree and the 3D view gets a colored border.
-
Click in the 3D view to place the corners of the building footprint. A hint at the top of the view shows how many points you have placed. An outline needs at least 3 points.
-
To finish the outline, click the first point again, right-click or press Enter. Press Escape or click Cancel creation to abandon it.
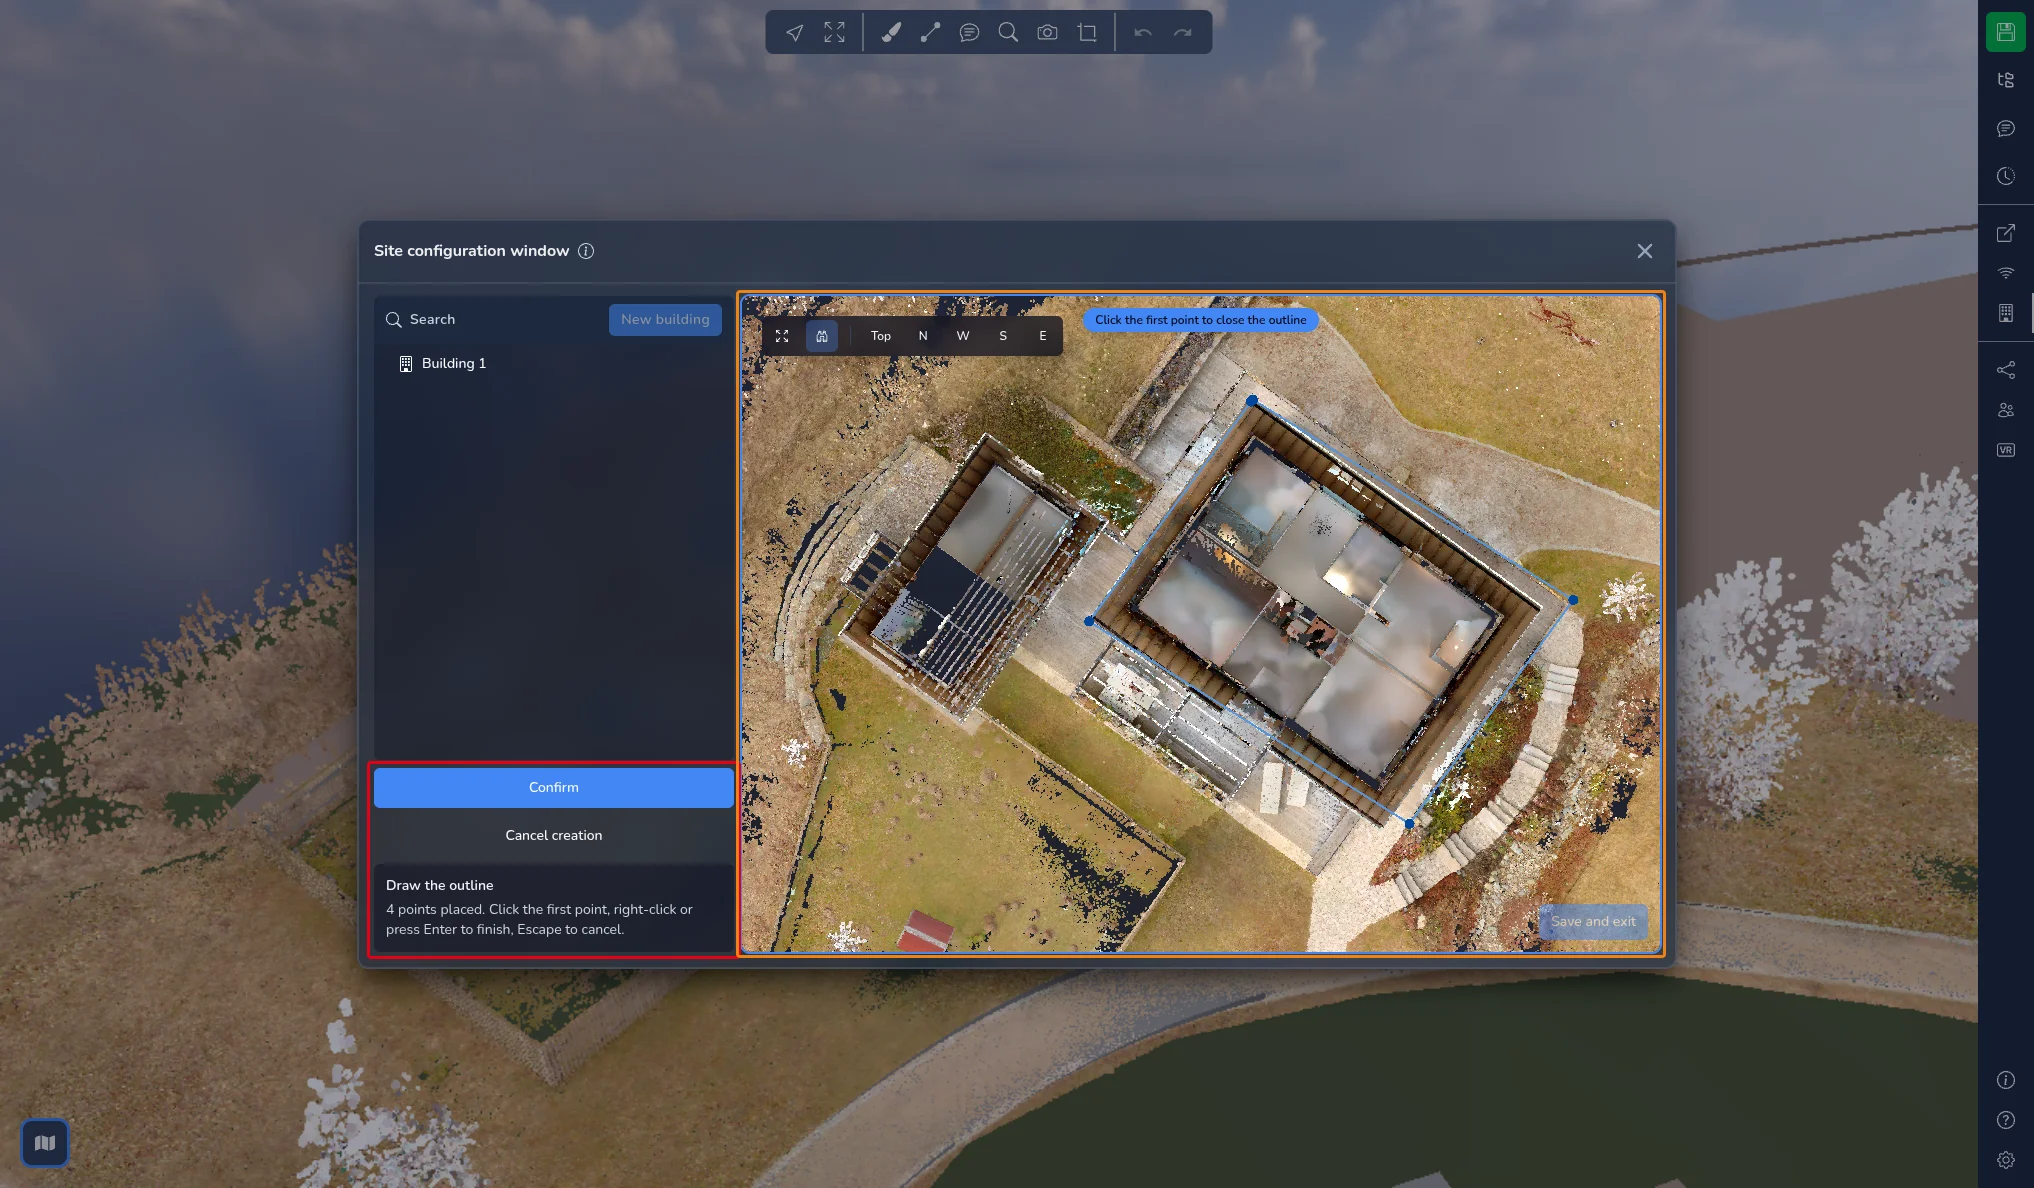
When you place a point near an existing outline, it snaps to it and the hint displays Snapped to the outline.
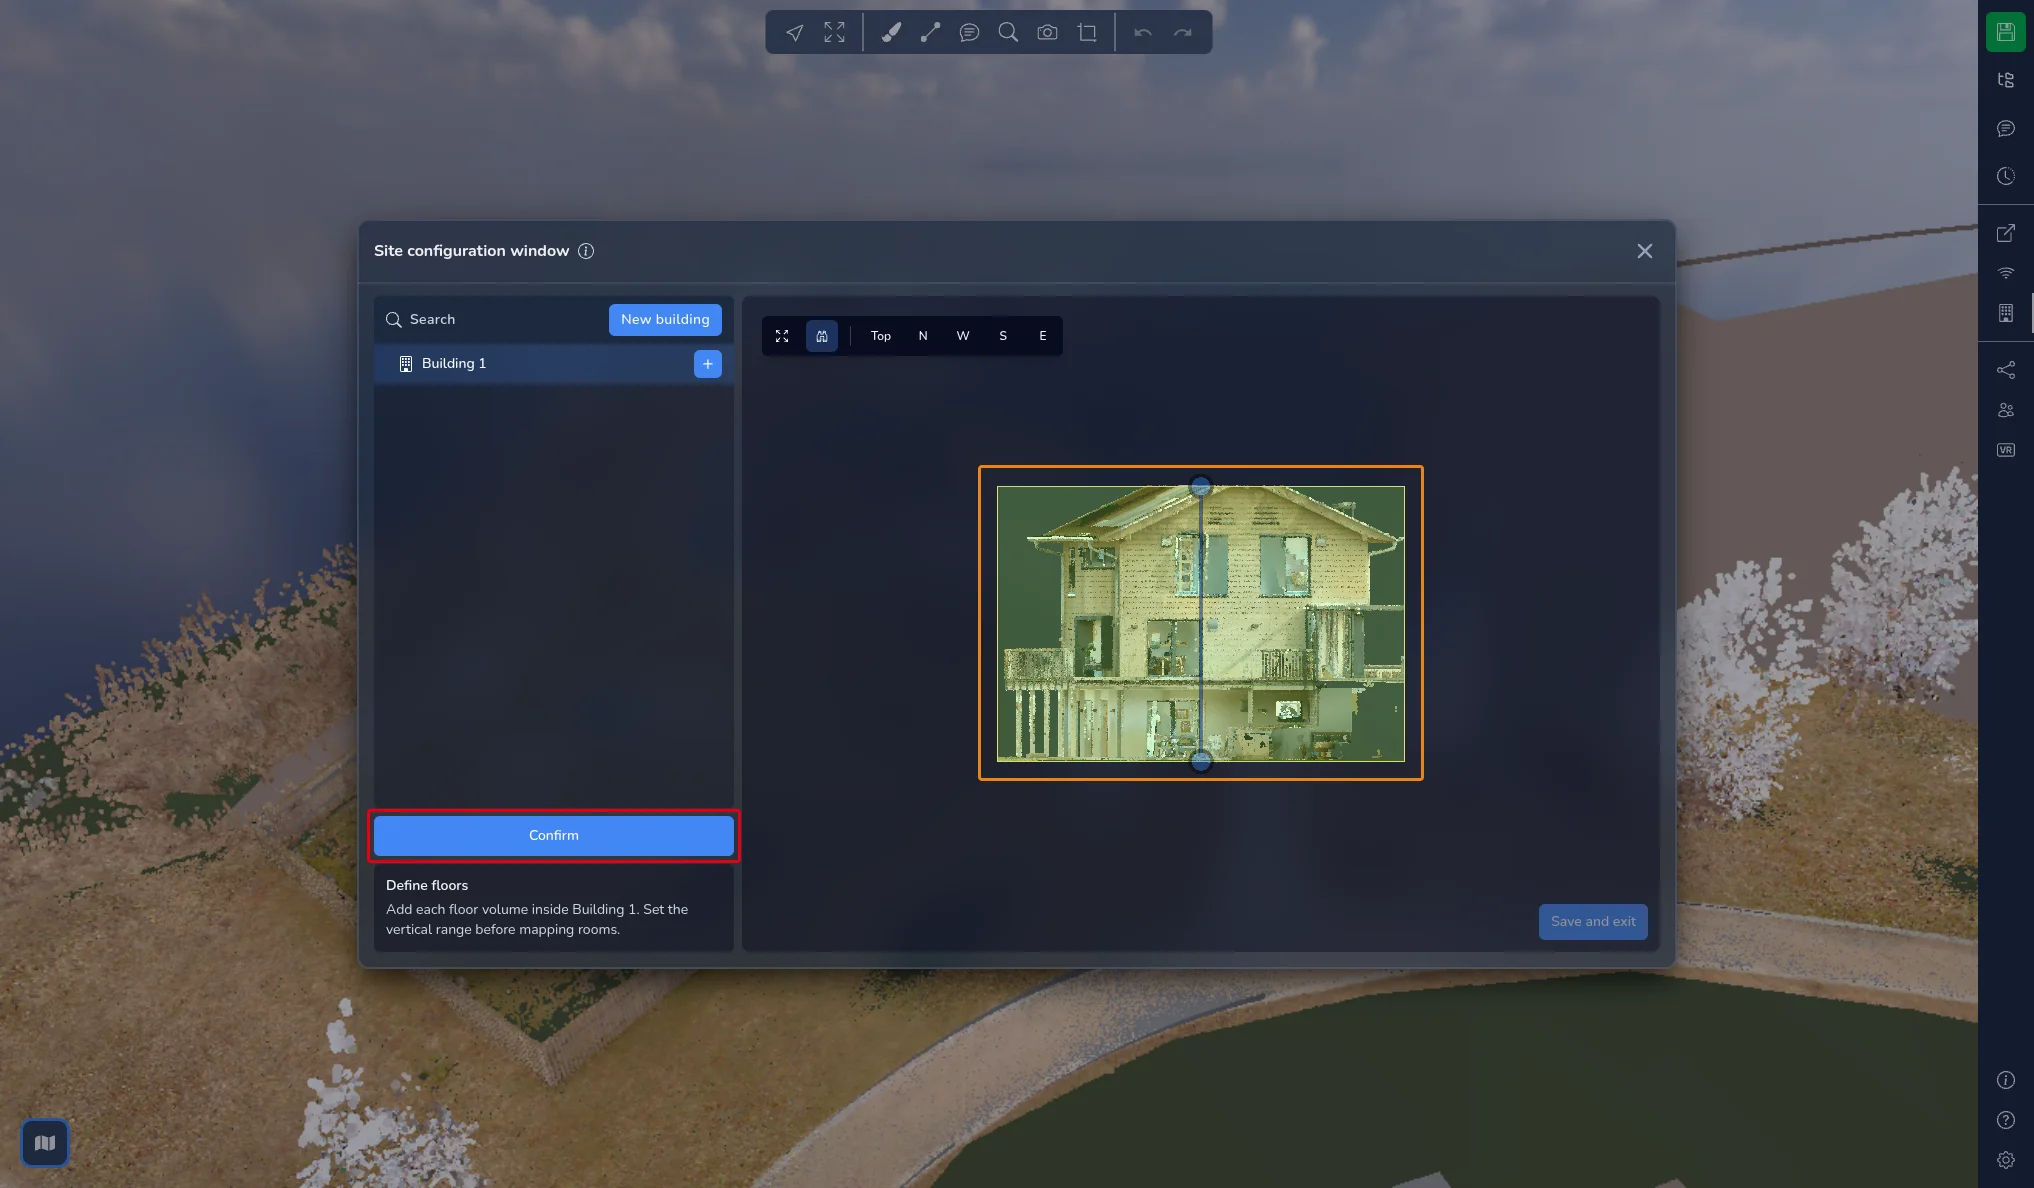
As soon as the footprint is closed, the 3D view switches to an elevation so that you can set the height of the building. Drag the two handles to move the ground and the top of the box, then click Confirm.
Step 2: Define floors
Select a building in the tree, then click Add floor. The button stays disabled until the height of the building is set.
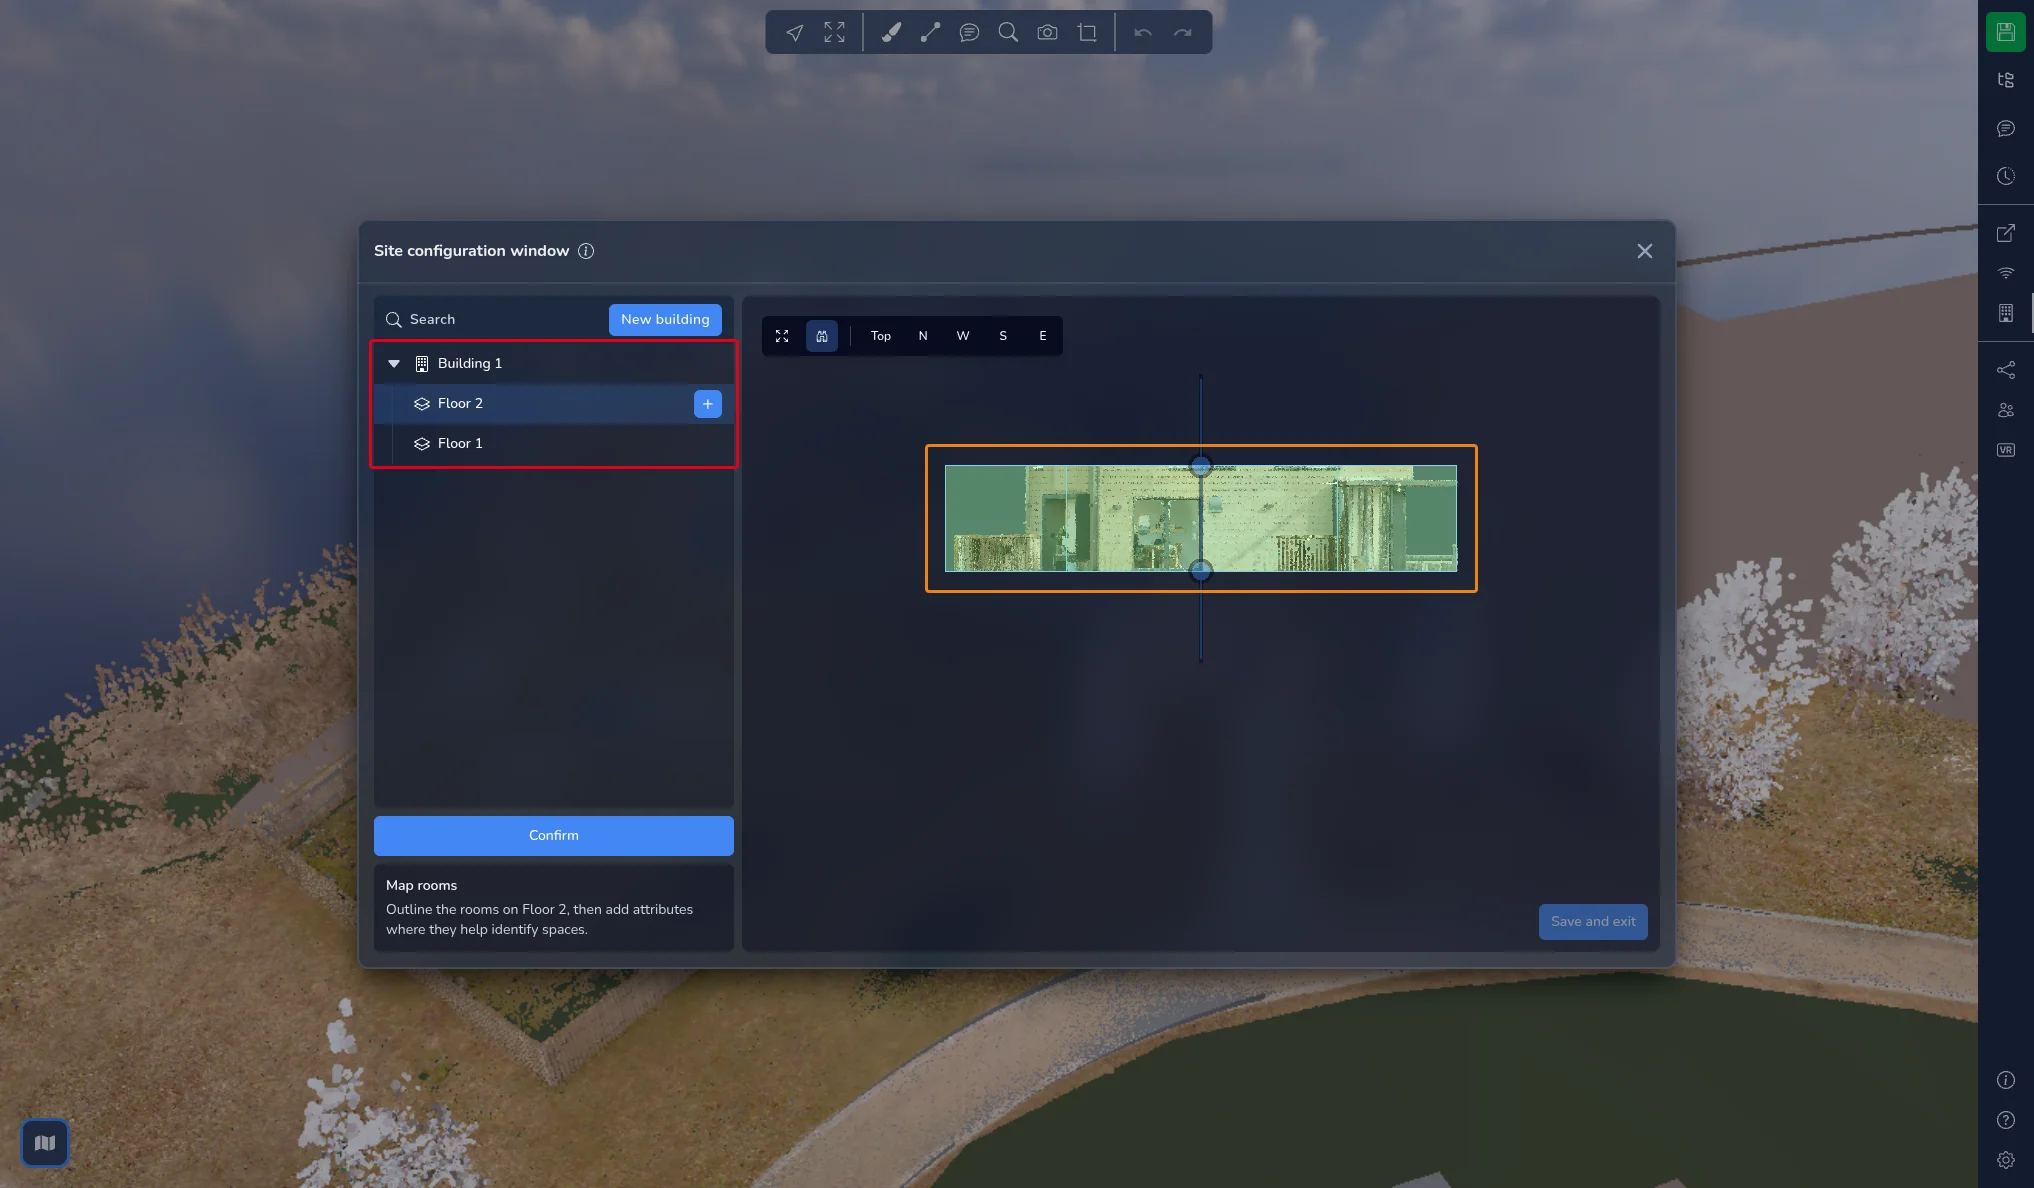
A new floor is created as a 3 m high volume, stacked on top of the previous floor. Drag its handles in the elevation to match the real floor level, then click Confirm. Repeat for each level of the building.
In the Site Map tree, floors are always listed from the top of the building to the bottom. The volume of the selected floor is highlighted in the 3D view.
When a floor is selected, open Settings to find:
-
Edit shape: by default, a floor uses the footprint of its building. Change its outline when a level is smaller than the building, for example for split-level or adjacent layouts
-
Edit height: adjusts the volume of the floor again
-
Ceiling height, described in Hide the ceiling below
Step 3: Map rooms
-
Select a floor in the tree, then click Add room.
-
The point cloud is cut at the level of the floor. Switch to the Top view and click the corners of the room, as you did for the building. Points snap to the outline of the floor and to the rooms already drawn.
-
Close the outline by clicking its first point, right-clicking or pressing Enter.
Select the room in the tree, then open Settings to describe it:
-
Room color: pick a color in the palette or type its hexadecimal code. The color is displayed on the room in the 3D view and next to its name in the tree
-
Attributes: type a label, such as Bedroom, Kitchen or WC, and press Enter. Labels already used elsewhere in the site are suggested as you type. Click the cross on a label to remove it
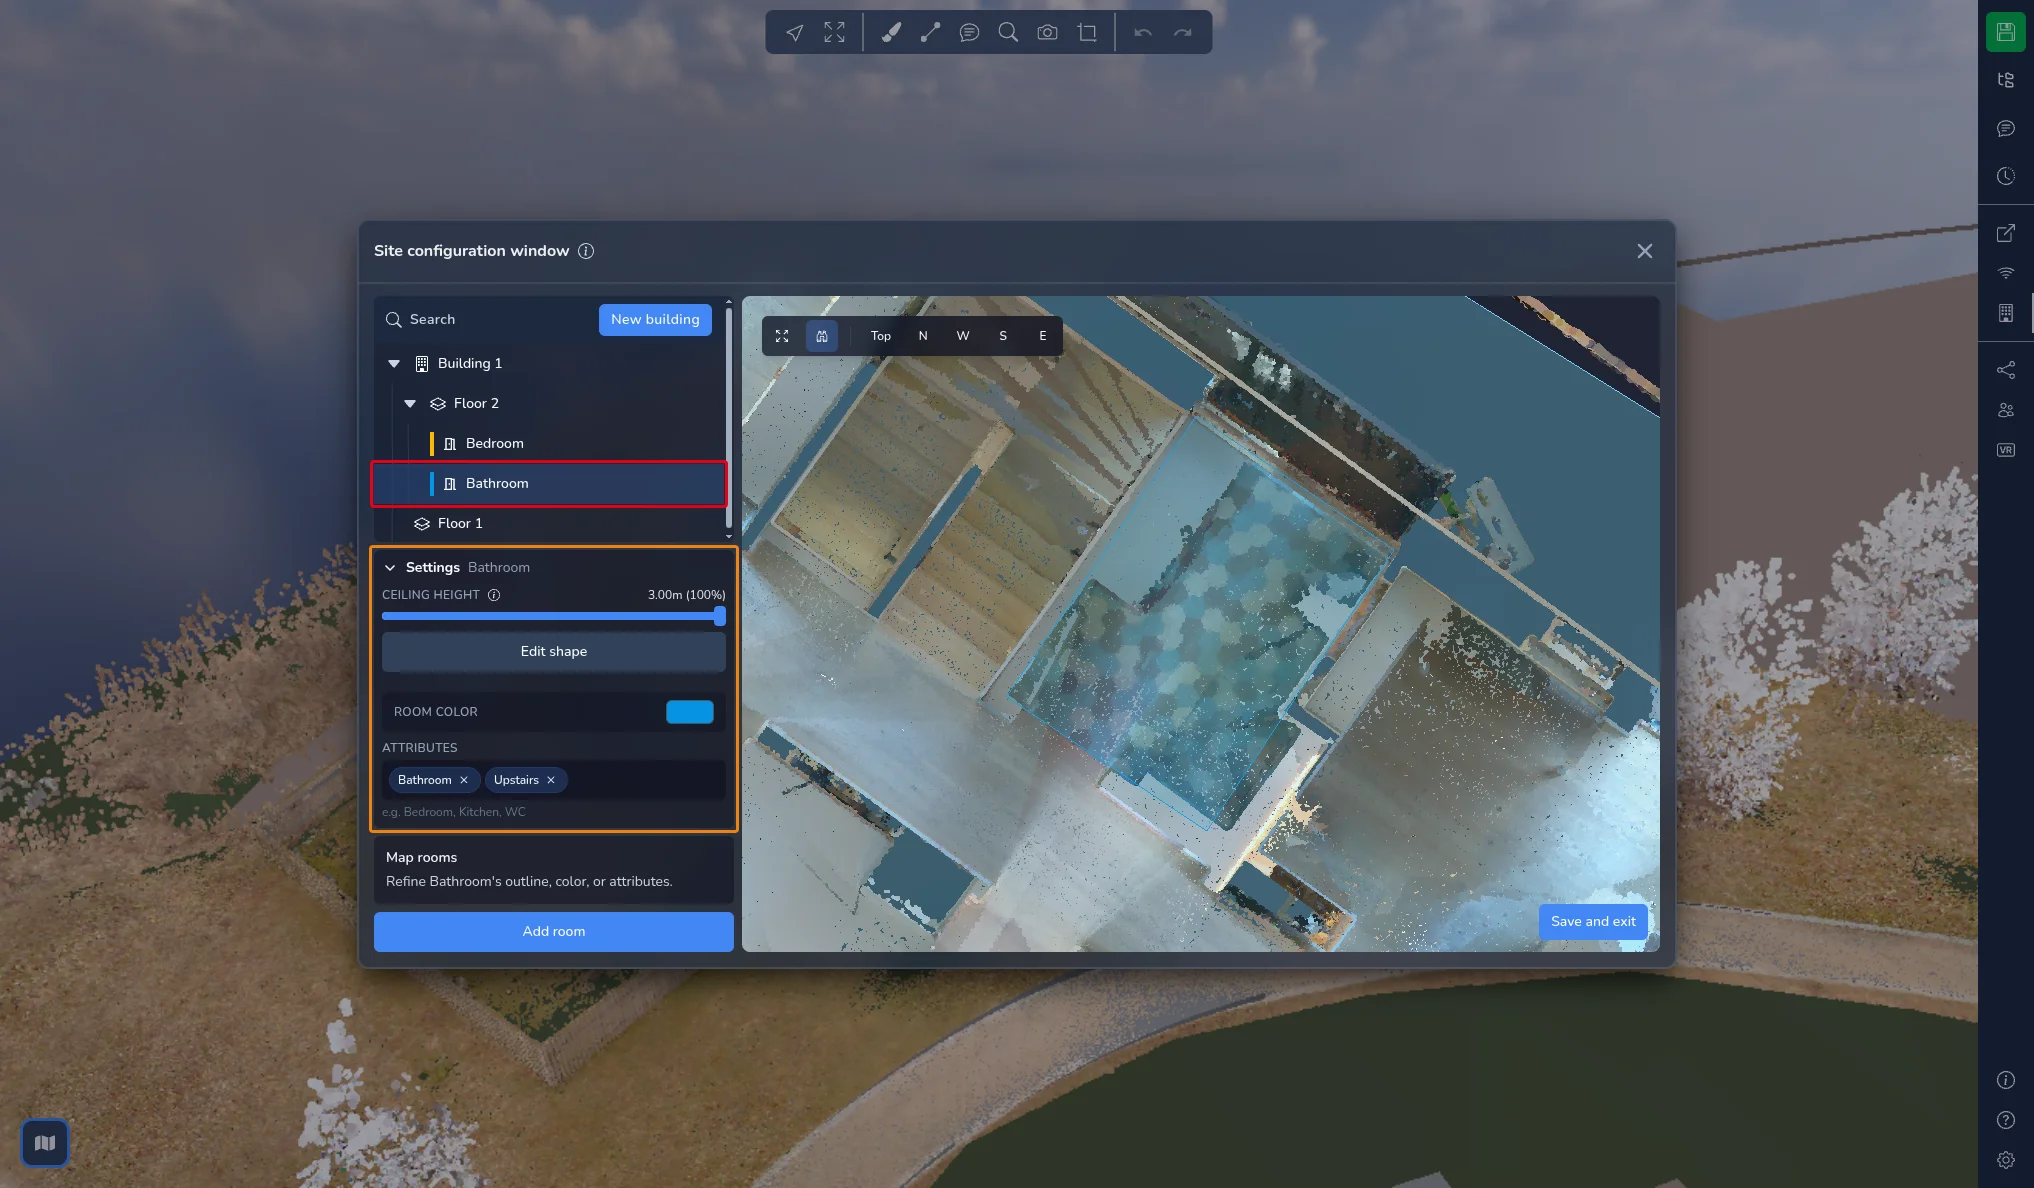
Buildings and floors can have attributes too. Select them and use the same Attributes field.
Manage the Site Map tree
Once you know the workflow, you can work directly from the tree:
-
New building, at the top of the tree, starts a new building
-
Hover over a building or a floor and click the + button to add a floor or a room inside it
-
Hover over any item and click the pencil to Rename it, or the bin to delete it. You can also right-click the item. Deleting asks for a confirmation and cannot be undone
-
Search filters the tree to find a building, a floor or a room by name
-
Drag a building or a room to change its position in the list
Adding and editing are disabled while an outline is being drawn. Finish or cancel the creation in progress first.
Edit a shape
Select a building, a floor or a room, open Settings and click Edit shape. The points of the outline appear in the 3D view:
-
Drag a point to move it
-
Click a segment to add a point
-
Select points and press Delete to remove them
To select several points at once, click Select points with brush. The button turns into Stop brush selection and a circle follows your cursor:
-
Drag over the outline to select the points under the brush
-
Hold Shift and drag to deselect points
-
Use the scroll wheel to change the size of the brush
-
Right-click to leave the brush
The number of selected points is displayed below the button. Click Delete selected points or press Delete to remove them. An outline always keeps at least 3 points: if you try to delete more, only part of the selection is removed and a message tells you how many points were deleted.
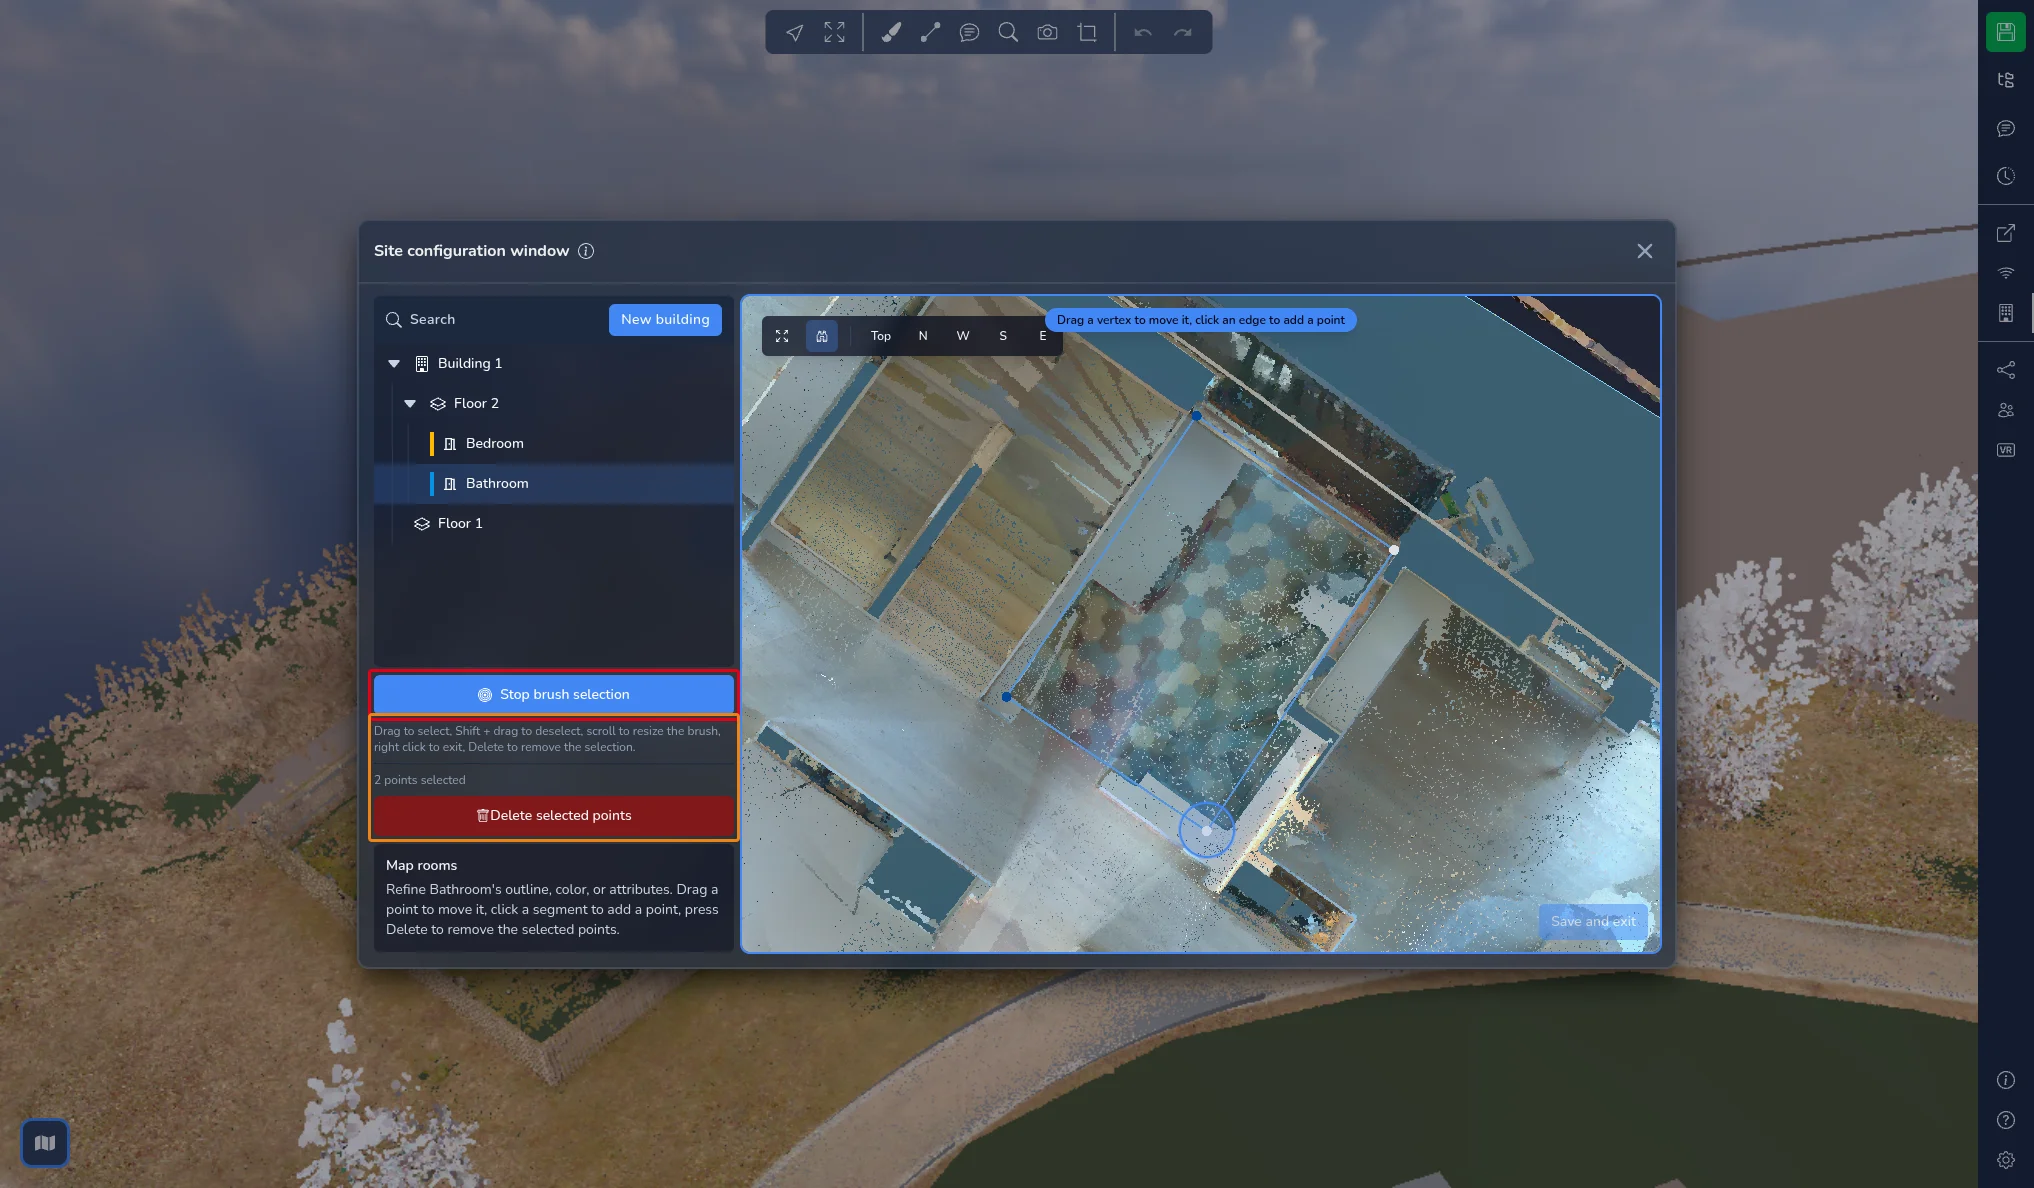
Click Stop brush selection to leave the brush, then Confirm when the outline is right.
For a building, Edit height adjusts its height box again.
Hide the ceiling
Select a floor and open Settings. The Ceiling height slider hides everything above a given height, so that you can look inside the floor from above without the ceiling and the overhead fixtures in the way. The value is shown in the units of your project, with the percentage of the floor height next to it, from 50% to 100%.
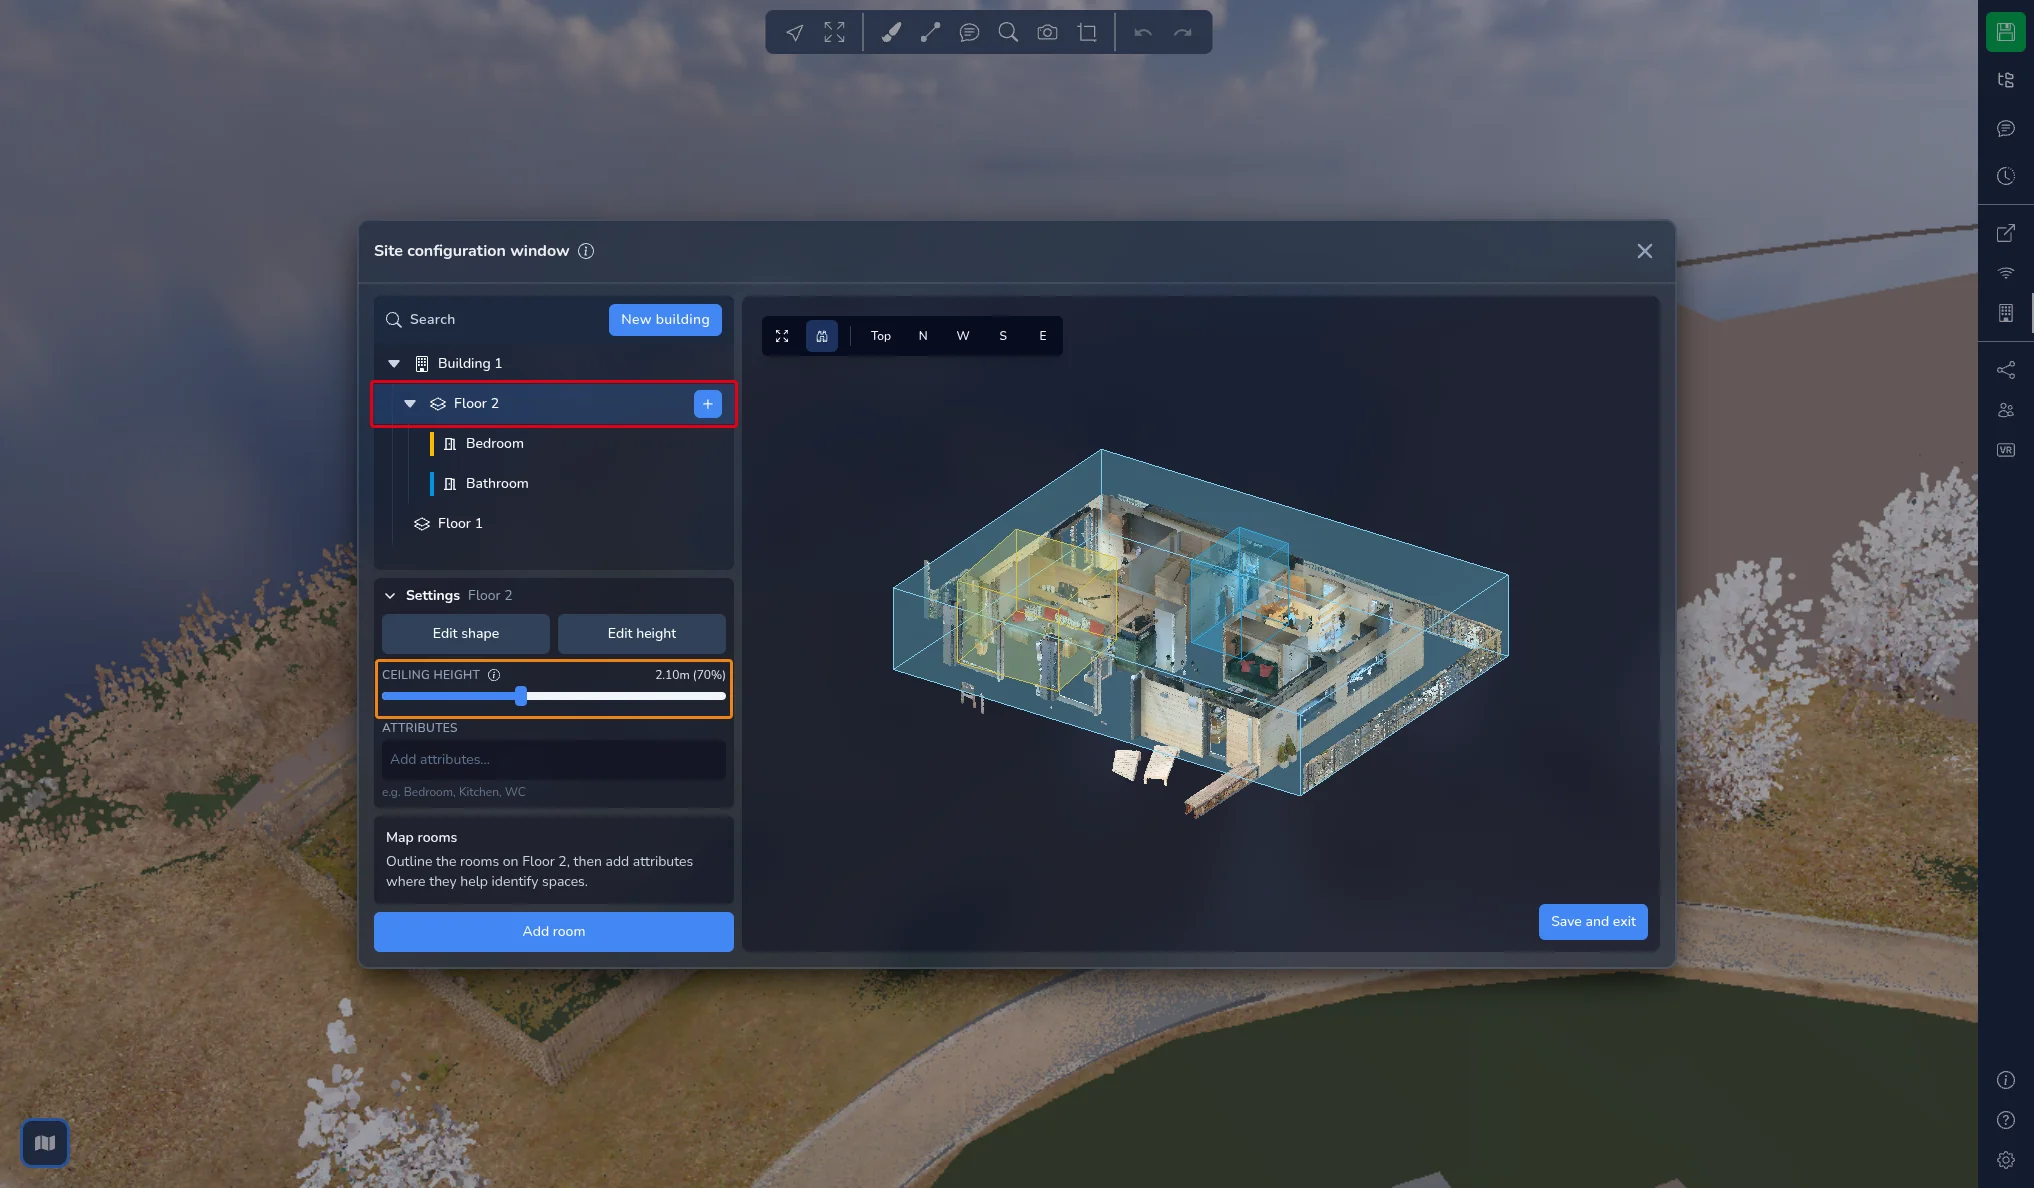
This setting is purely visual: it does not change your point cloud or the volume of the floor.
Save and exit
The button in the bottom right corner of the 3D view closes the window:
-
Exit when nothing has changed
-
Save and exit when you have made changes. The site is saved straight away and the window closes
When you close the window with its cross while changes are pending, the Save before exiting? dialog opens:
-
Cancel returns to the window
-
Exit without saving closes the window and discards your changes
-
Save and exit saves the site and closes the window
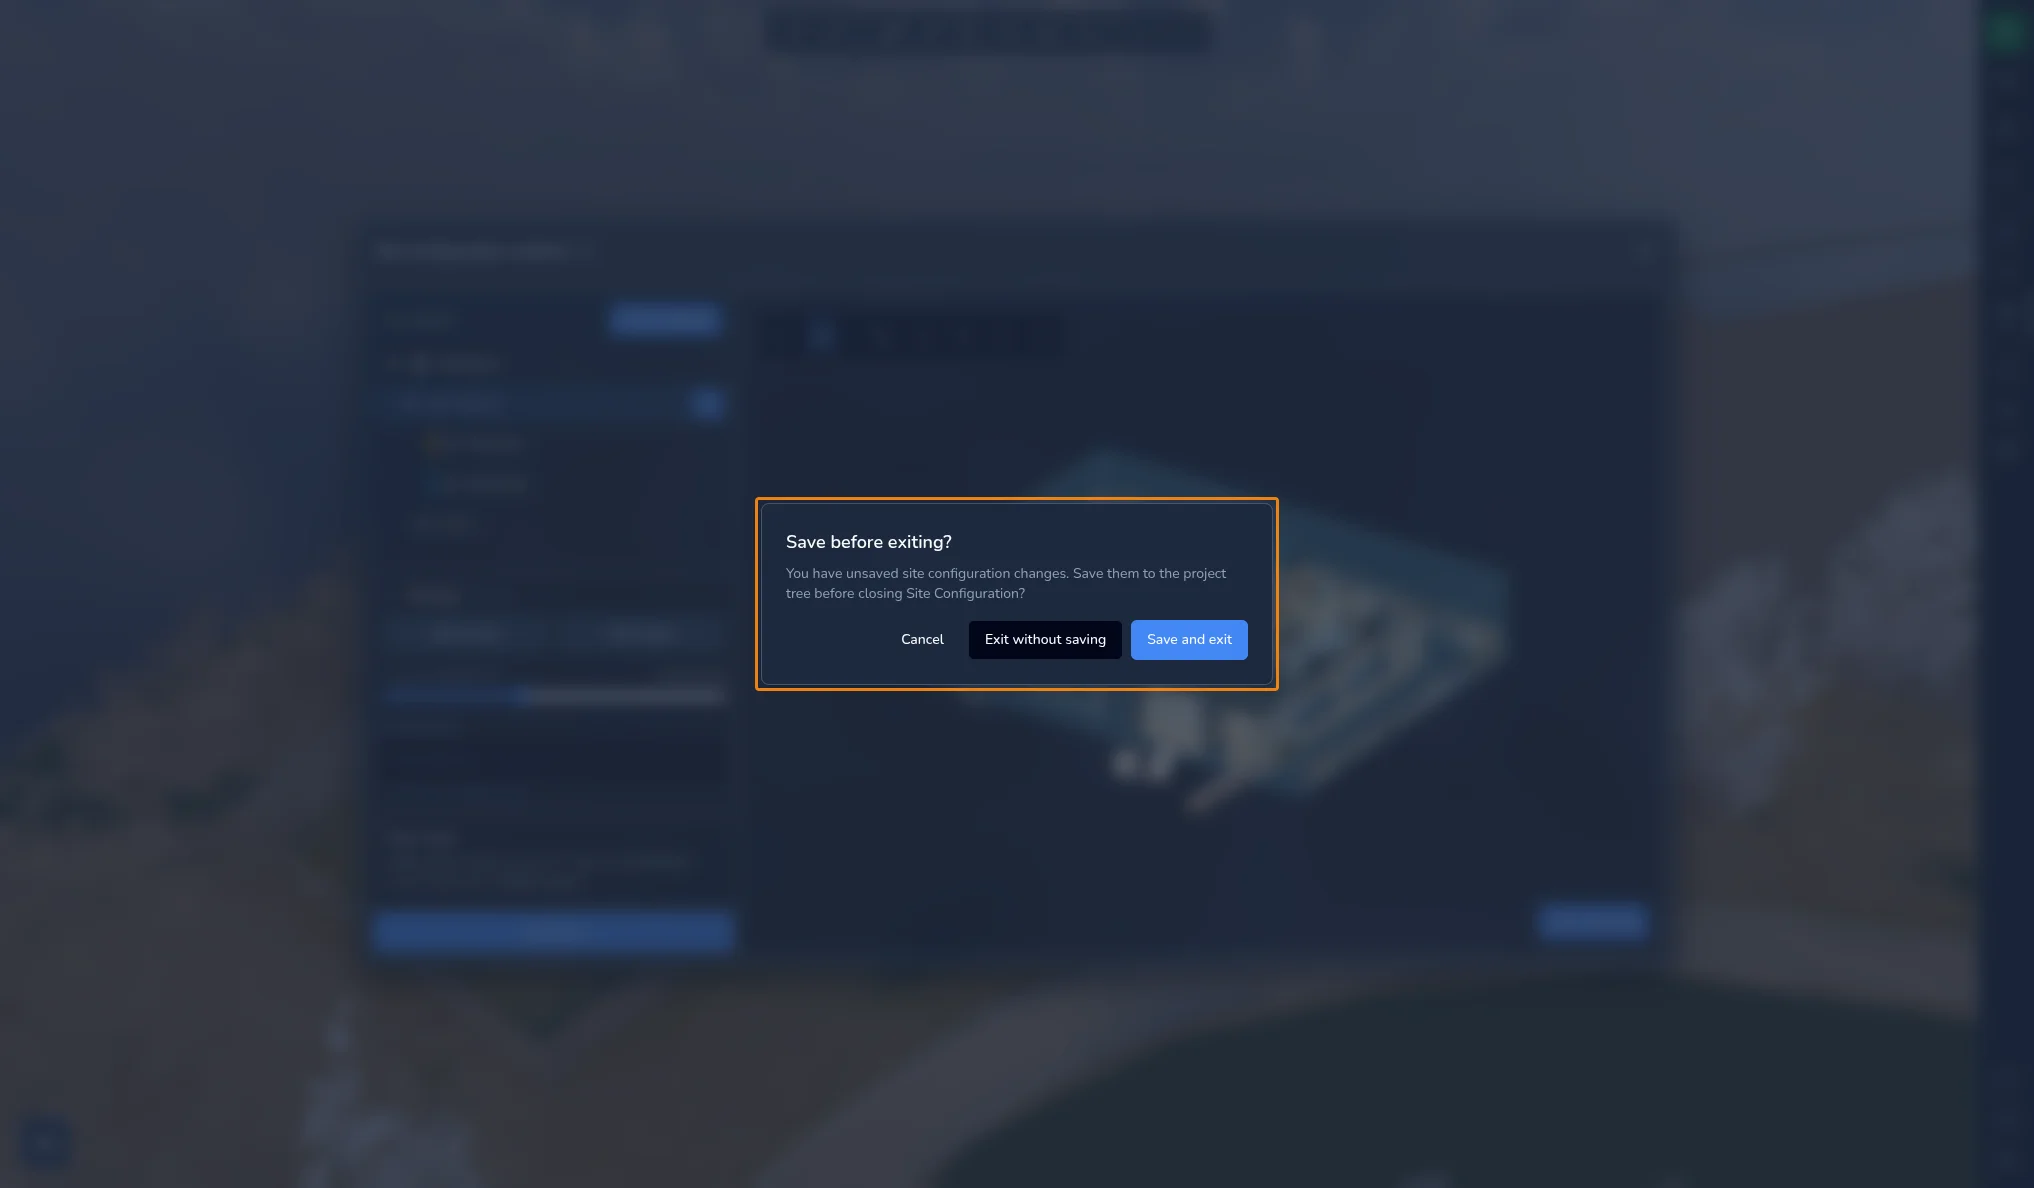
Saving adds the site to the project tree and creates a new version of the project, named after the current version followed by Site configuration. Find it in the version history, see the Version System article. In a collaborative session, the site is also sent to the other participants.
Use your site in the 3D Application
On the map
When the map is displayed, a Current site location label in its top left corner shows the building your camera is in, followed by the floor. Outside every building, it displays Out of bounds.
When you are inside a building, the floors of that building are listed on the right side of the map, from top to bottom. Click a floor to cut the view at that level and move the camera to eye height on that floor. If you are inside a 360° image, you are taken to the closest 360° image of that floor instead. Click the selected floor again to remove the cut. On a mobile device, the floors are listed behind a layers button in the bottom right corner of the map.
In the project tree
The saved site appears in the project tree as a Site Map folder, with a folder for each building, floor and room. These folders are managed from the Site configuration window: their position cannot be changed from the project tree, but you can add other project content under them.
Select one of them to see its properties:
-
Focus moves the camera to look at the item
-
Visit places the camera inside the item
-
For a building, Show all floors displays the floors it contains
-
For a floor, Show all rooms displays its rooms
-
For a floor or a room, Ceiling height hides what is above a given height
-
For a room, Room color changes its color
-
The Attributes of the item are listed when it has any
Projects with floors from the former Floors tool
Floors created with the former Floors tool are converted automatically when you open the project. They become a single Building 1 with one floor for each former floor, each with a rectangular outline. A Floors converted to a site map message appears: save a version of the project to keep the conversion. Floors that were rotated are not converted.
In the event of a problem or difficulty, do not hesitate to contact the platform team.