Assign a Rank to a User
First of all, know that there are 4 ranks, the Owner rank being automatically assigned to the creator of the workspace. These ranks are global to your workspace, if you wish to only change permissions for a specific project, visit this article instead.
The ranks are:
| Rank | Description |
|---|---|
| Owner | Automatically assigned to the workspace creator and cannot be reassigned. Has the same permissions as the Administrator. As the founder, the Owner cannot leave the workspace. |
| Administrator | Full visibility over all projects in the workspace. Can manage all projects, invite new members, manage members' ranks, and access company information and data. Can also spend tokens across all company projects, modify the workspace's subscription, update the bank card, and view and download invoices. |
| Collaborator | A standard member who can also create projects. Automatically becomes project manager on the projects they create (and only those). Can spend tokens on the projects they created. |
| Guest | Only sees the projects they are assigned to and cannot create projects. Can spend tokens only if granted the "Spend tokens" role on a project. |
Permissions at a glance
The table below summarizes what each rank can do across the workspace.
| Permission | Owner | Administrator | Collaborator | Guest |
|---|---|---|---|---|
| See all projects in the workspace | ✅ | ✅ | Own & assigned only | Assigned only |
| Create projects | ✅ | ✅ | ✅ | ❌ |
| Invite and manage members | ✅ | ✅ | ❌ | ❌ |
| Spend tokens | ✅ | ✅ | 🟡 | 🟡 |
| Access company information and data | ✅ | ✅ | ❌ | ❌ |
| Manage subscription and billing | ✅ | ✅ | ❌ | ❌ |
| Leave the workspace | ❌ | ✅ | ✅ | ✅ |
✅ full access, 🟡 partial access, ❌ no access. For token spending, Collaborators are limited to the projects they created, and Guests only to projects where they were granted the "Spend tokens" role.
To assign or change a user's rank in your workspace, go to the Members section from the left-hand menu. This page lists all the users in your workspace along with their email, current rank, and last connection date.
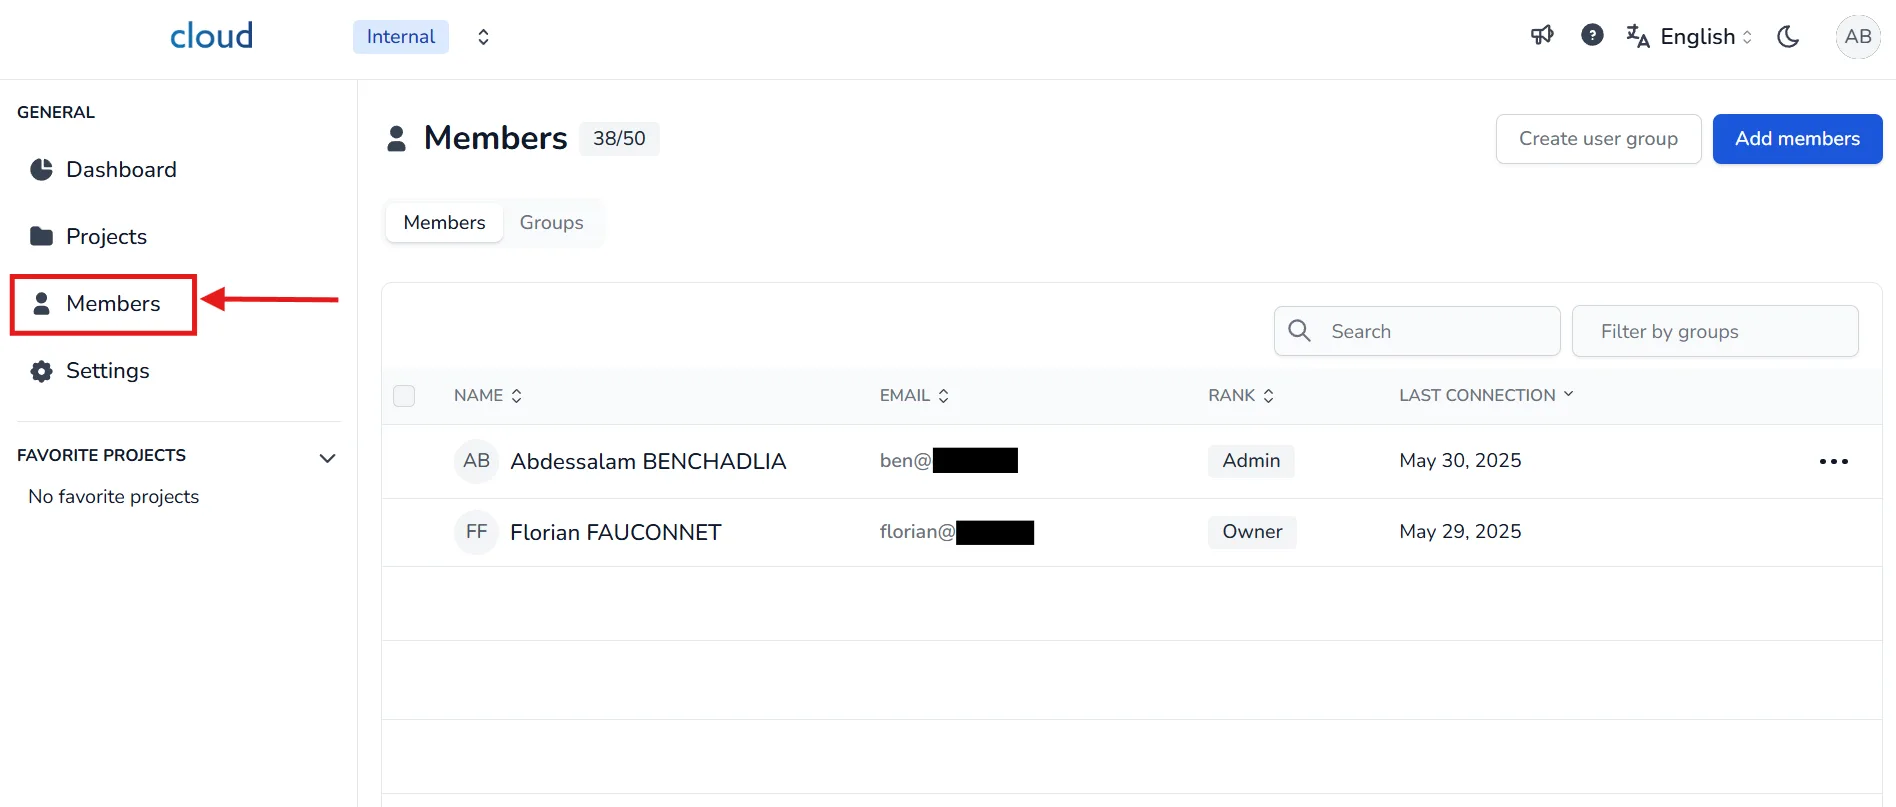
To change a user's rank:
- Find the user you want to modify in the list.
- Click on the edit icon at the end of the row.
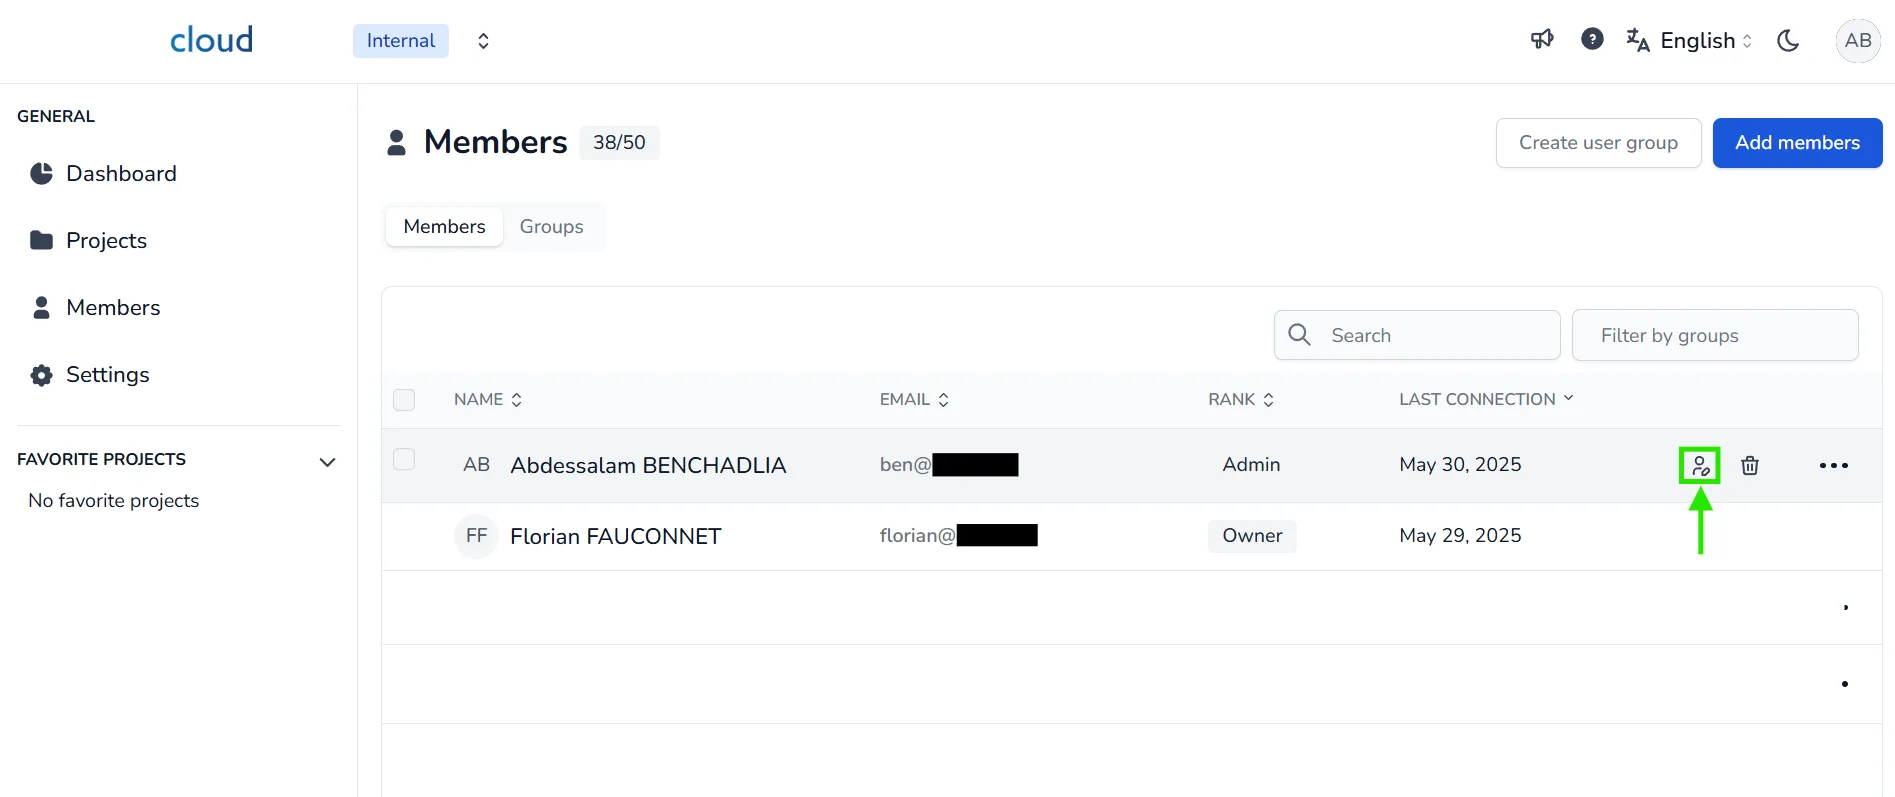
This will open the assignment window.
Inside the pop-up:
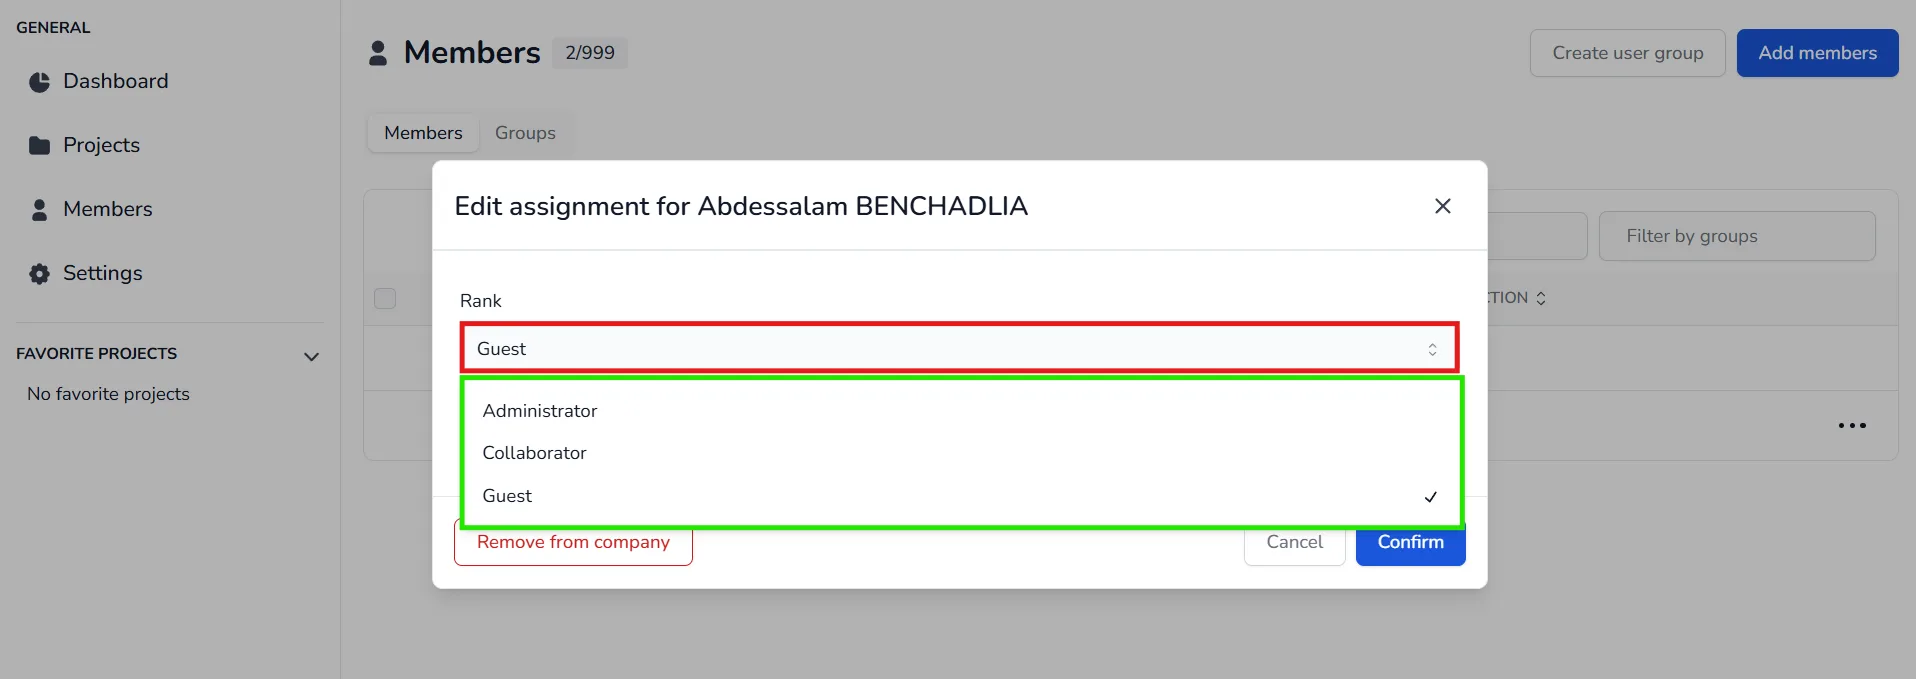
- Click on the Rank dropdown menu.
- Select the new rank you want to assign (e.g., Administrator, Collaborator, or Guest).
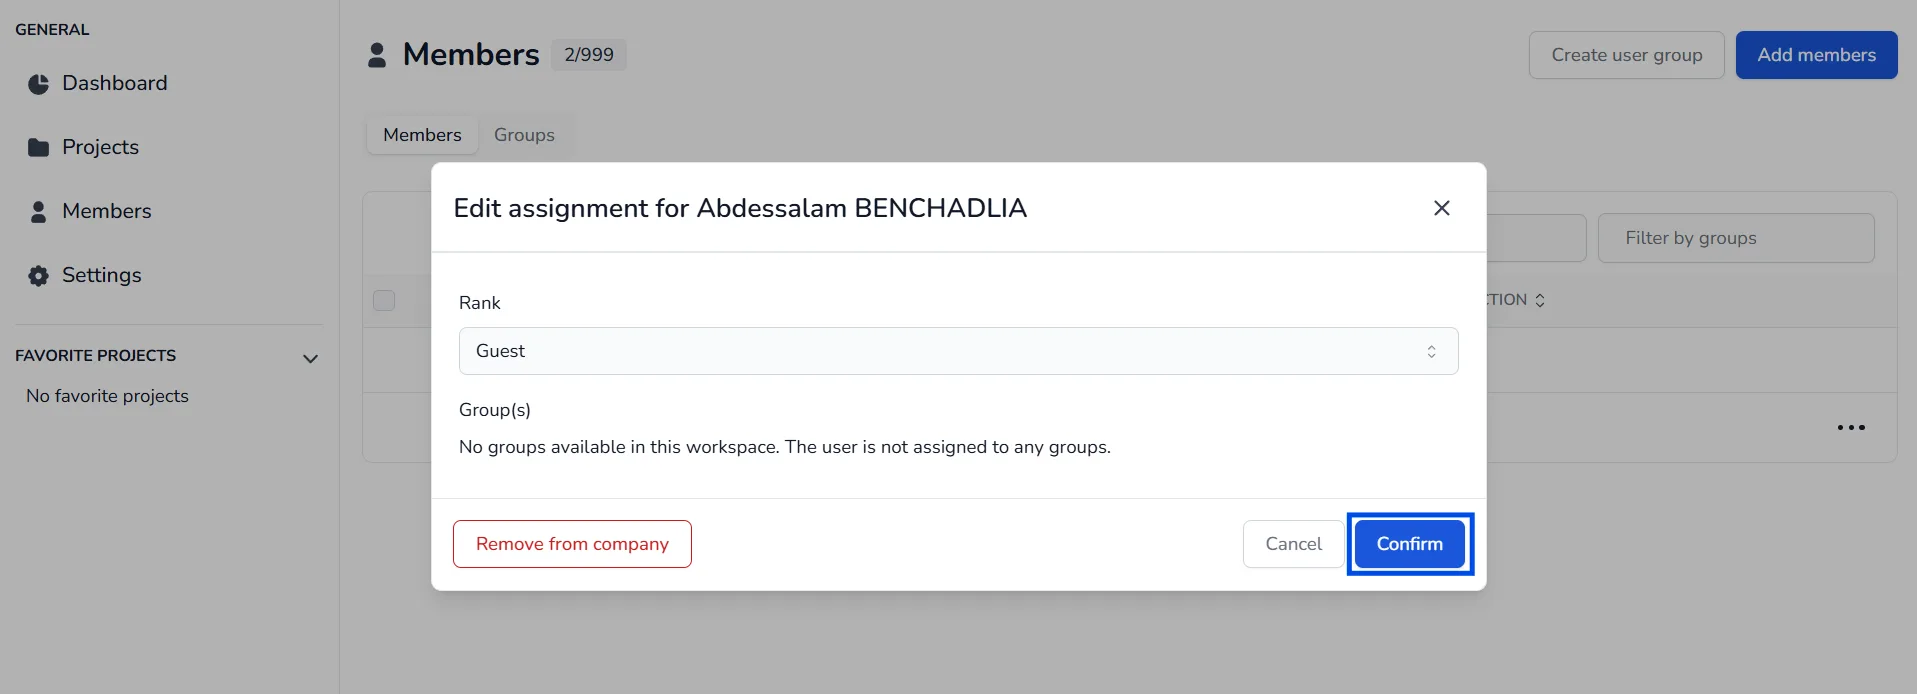
- Once selected, click Confirm to apply the change.
The user's rank will be updated immediately after confirmation.
Also note that giving a user a rank will always remove the old one, as a user can only have one rank at a time.
In case of problem or difficulty, do not hesitate to contact the platform team.