Automatic level detection
Instead of guessing storey elevations from the scan, let the editor measure them.
- Load the point cloud (see Load point clouds).
- In the Levels panel, click Automatic level detection.
The cloud's height distribution is analyzed in the browser, and the detected storeys come back in a dialog:
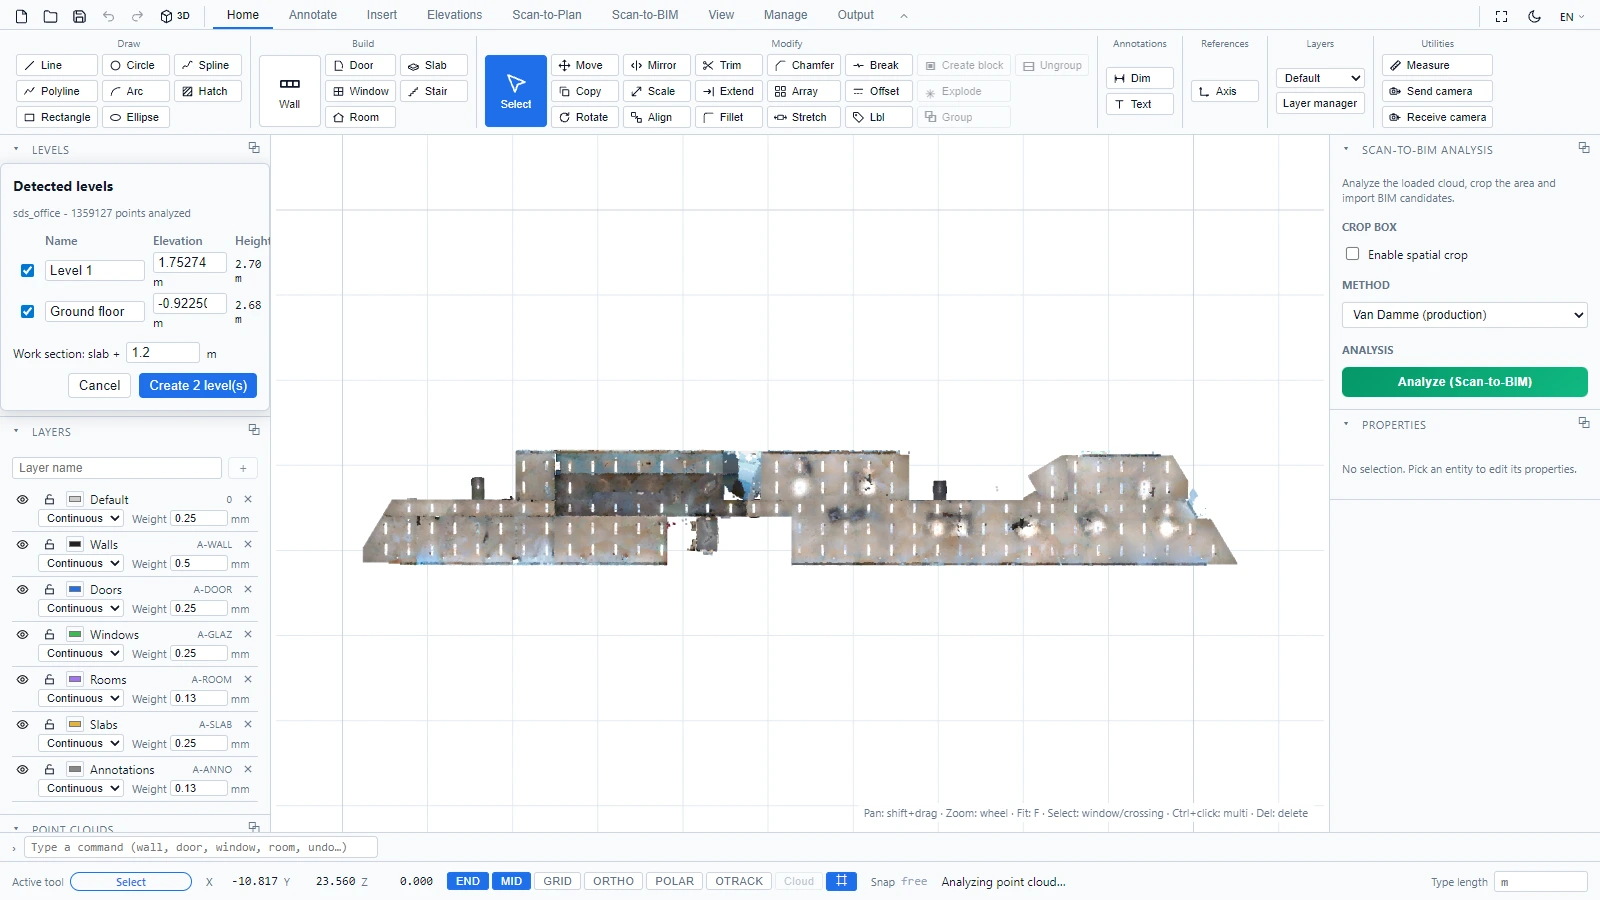
For each candidate level you get:
- An editable name and elevation, with the computed height to the next level.
- A confidence score and the number of supporting points, so you can spot noise: uncheck the rows you do not want.
- The work section offset, the height above each slab used for the working slice (see Crop box, work sections and cloud snapping).
Click Create N level(s) and the storeys land in the Levels panel, ready for level-by-level tracing or analysis (see Levels).
To analyze only part of a large scan, enable the crop box first and keep Detect levels in the zone checked.
If you have any questions or need further information, please contact the technical team.