Crop box, work sections and cloud snapping
The crop box
A scan usually covers more than you need. The crop box keeps the analysis and the display focused on one zone.
- Open the Scan-to-BIM Analysis panel (from the Scan-to-BIM tab or View > Palettes).
- Check Enable spatial crop.
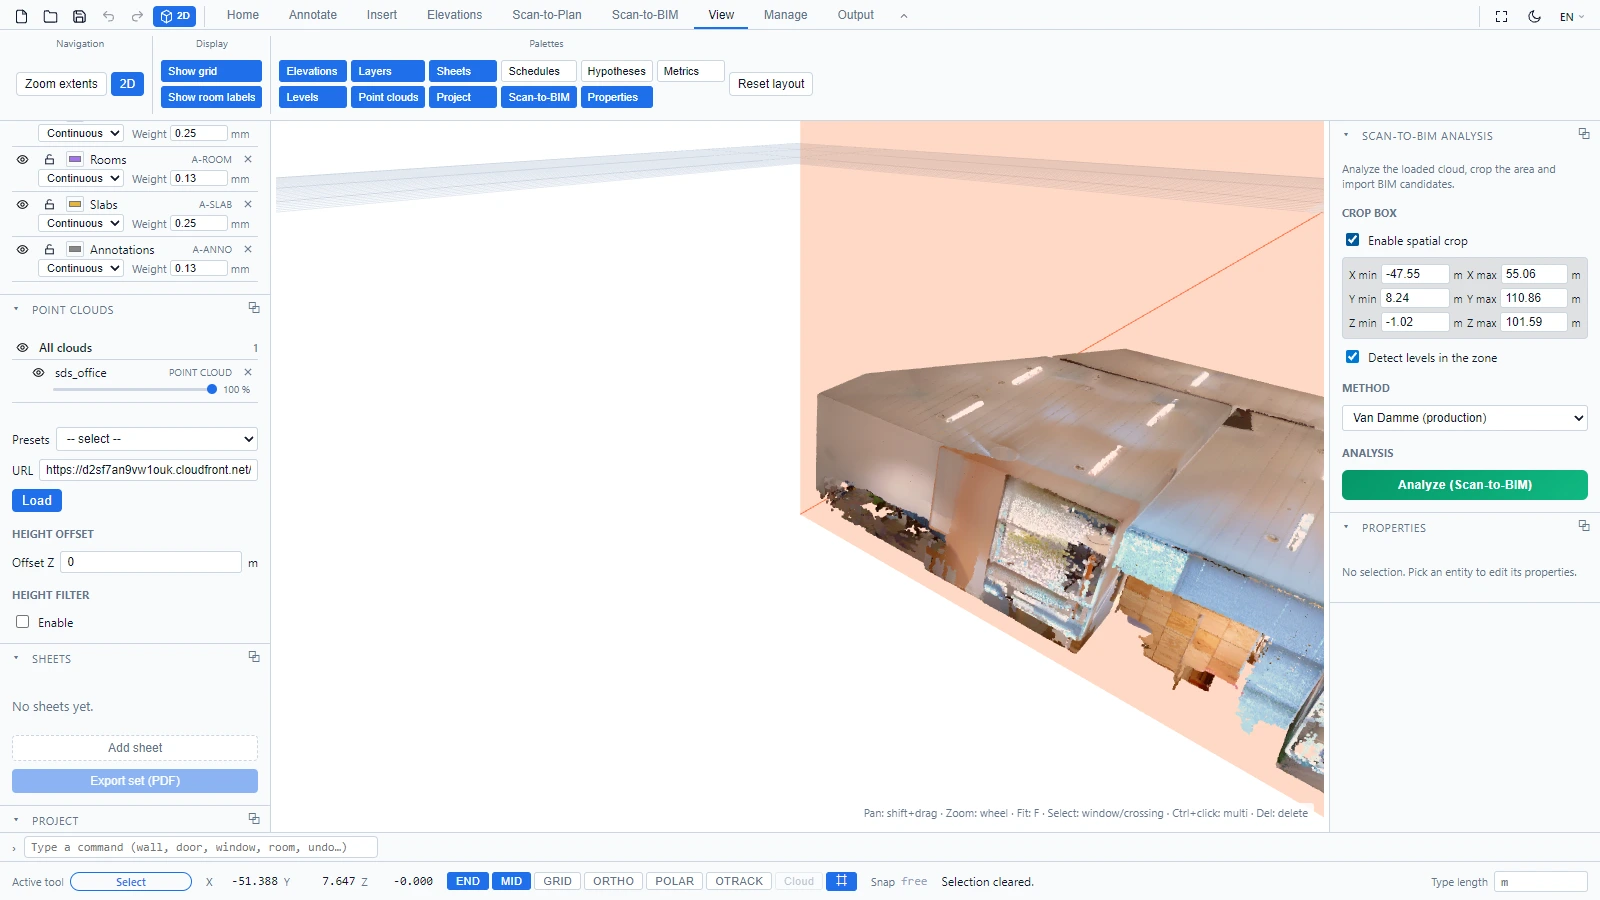
The orange box materializes the zone. Adjust it by editing the X, Y and Z min/max fields in the panel, or by dragging the faces of the box directly in the view, in 2D as well as in 3D. The Detect levels in the zone option restricts the level detection to the same zone.
Work sections
A work section is a horizontal slice of the cloud at the height of the active level. Enable it with the Work section checkbox in the Levels panel: the 2D view then shows only the points of that slice, which turns the scan into a readable floor plan to trace over.
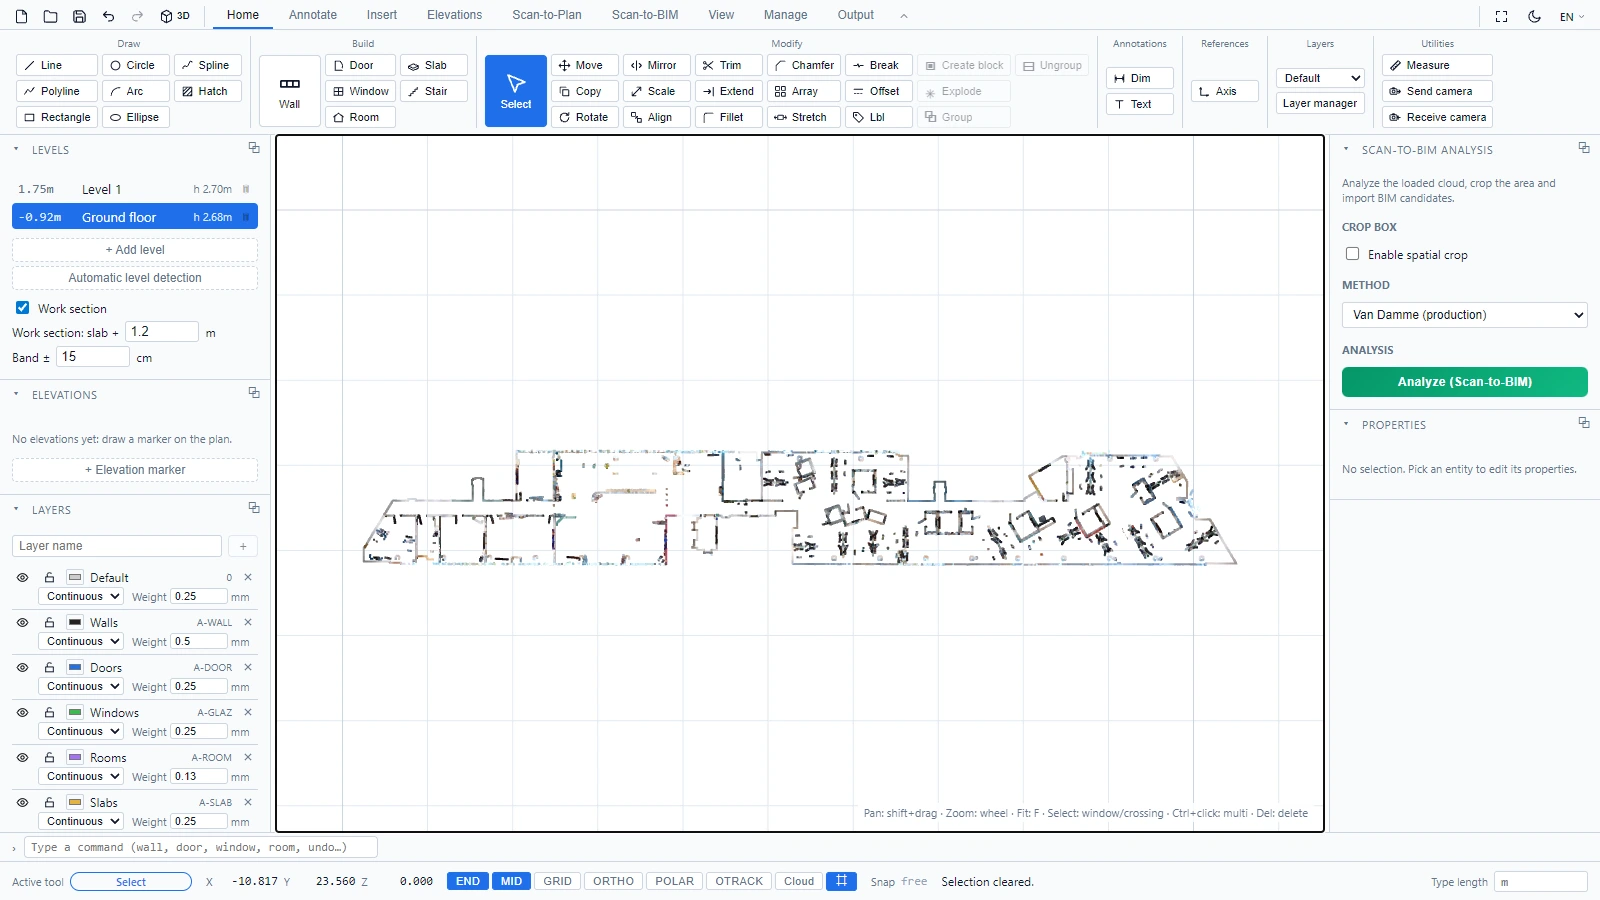
Snap to the points
With a work section active, the Cloud toggle in the status bar becomes available:

Turn it on and your drawing tools snap to the nearest scan point in the slice, with a crosshair marking the caught point. CAD snapping (END, MID) keeps priority when both apply: press Tab to flip the priority at the cursor. Tracing walls over a scan becomes exact instead of approximate.
If you have any questions or need further information, please contact the technical team.