Floor Navigation
To interact with the different levels of a building in your 3D scene, use the Floors feature. This tool allows you to detect, organize, visualize, and navigate across different floors.
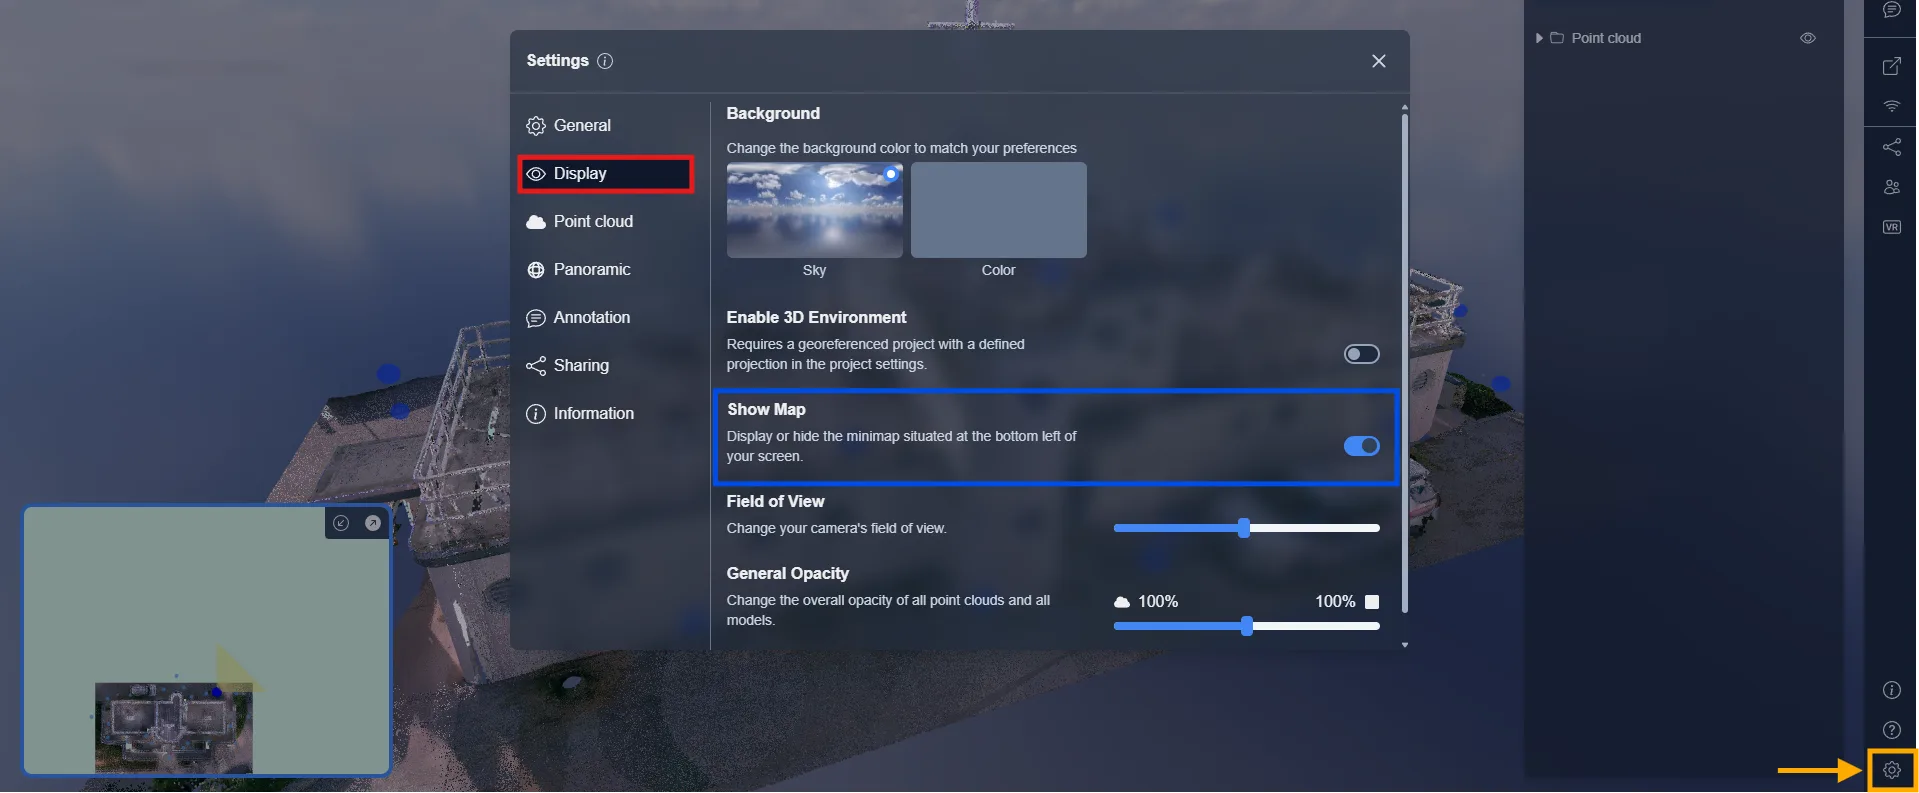
Enable the Minimap
To start using floors efficiently, activate the map to display your project floors structure:
-
Go to Settings
-
Under the Display tab, enable the option Show Map
Once activated, a minimap appears in the bottom-left corner, showing clickable floor labels and navigation points.
Detect and Create Floors
To detect floors in your project:
-
Click on the Tools icon (🔍)
-
Choose the Floors tool
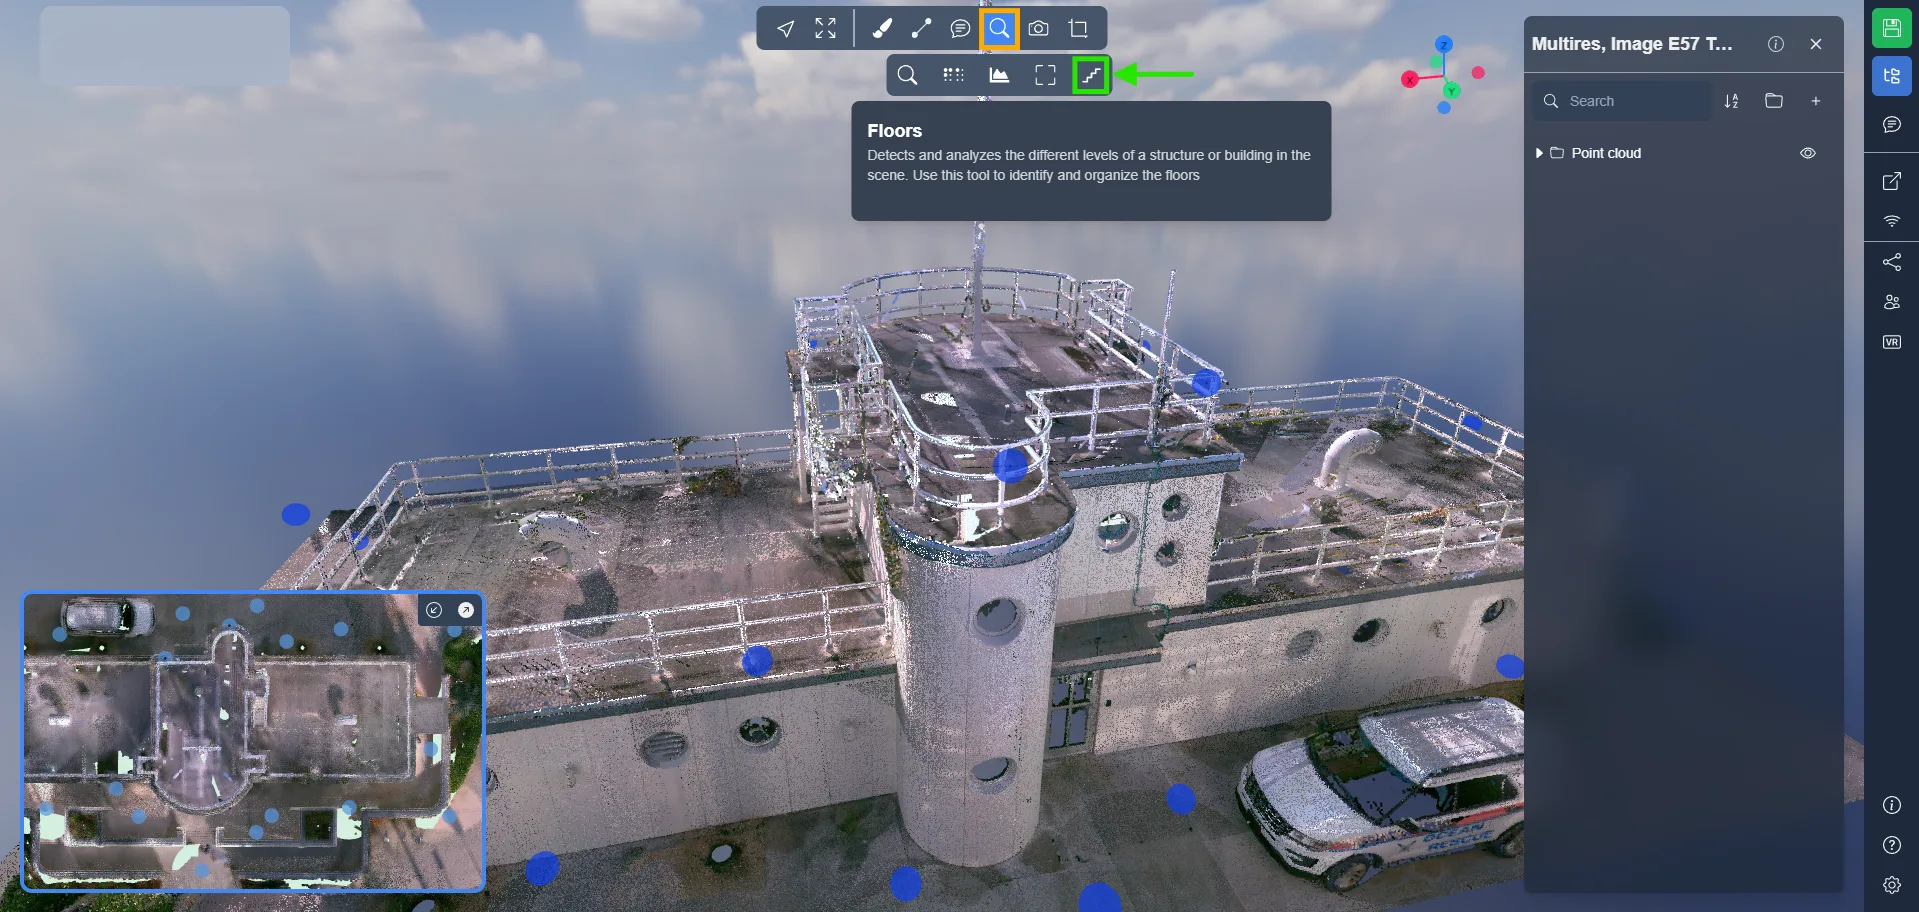
This will generate a Floors folder in your object list, with individual levels like Floor 1, Floor 2, etc.
Each detected floor is displayed:
-
As a 3D box (clipping volume)
-
As a clickable label in the minimap
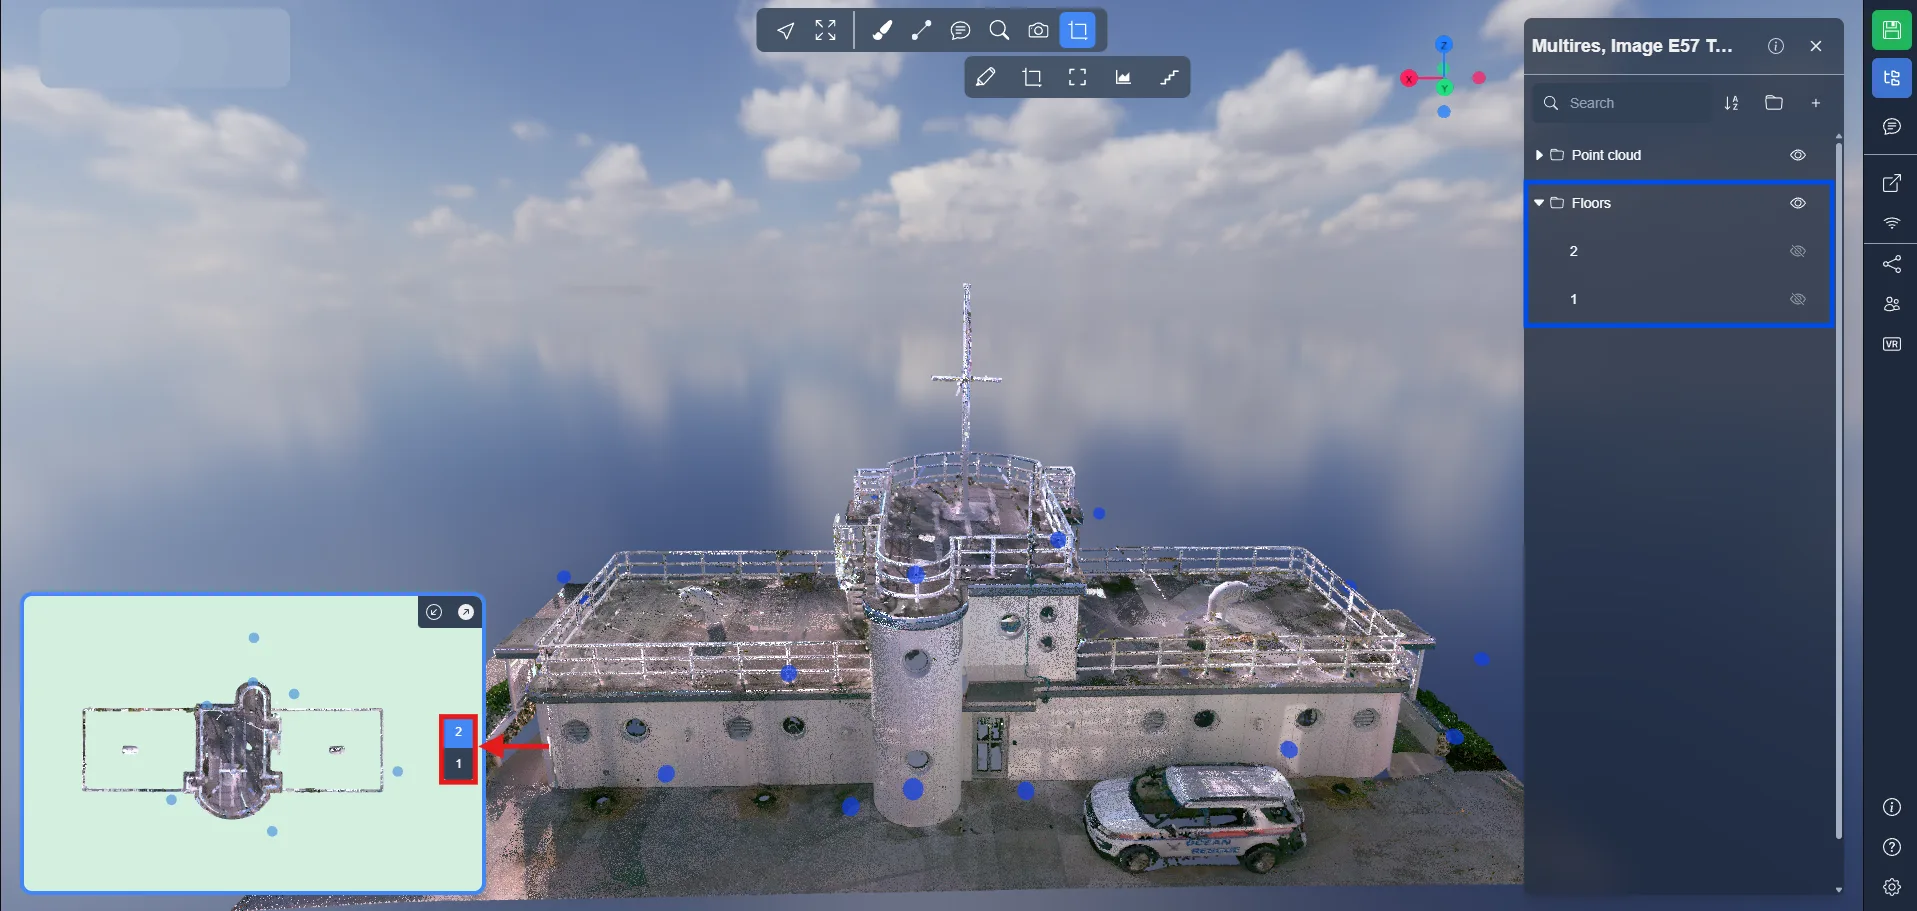
Manage Your Floors
Once the floors are detected, you can fully manage them from the Floors folder in your object list. Each floor can be customized or reorganized to better suit your navigation and presentation goals.
Here’s what you can do:
- Toggle visibility to show or hide a specific floor. Ideal for isolating a level and analyzing its structure or content individually.
- Zoom to a floor to focus your view on that level.
- Rename a floor to match your project context. Helps collaborators instantly understand which level they’re working on.
- Duplicate a floor to test variations (e.g. different clipping heights)
- Delete a floor if it was created by mistake or is no longer needed.
- Drag & drop floors to reorder them in the list. The order is reflected in the minimap and impacts your navigation flow
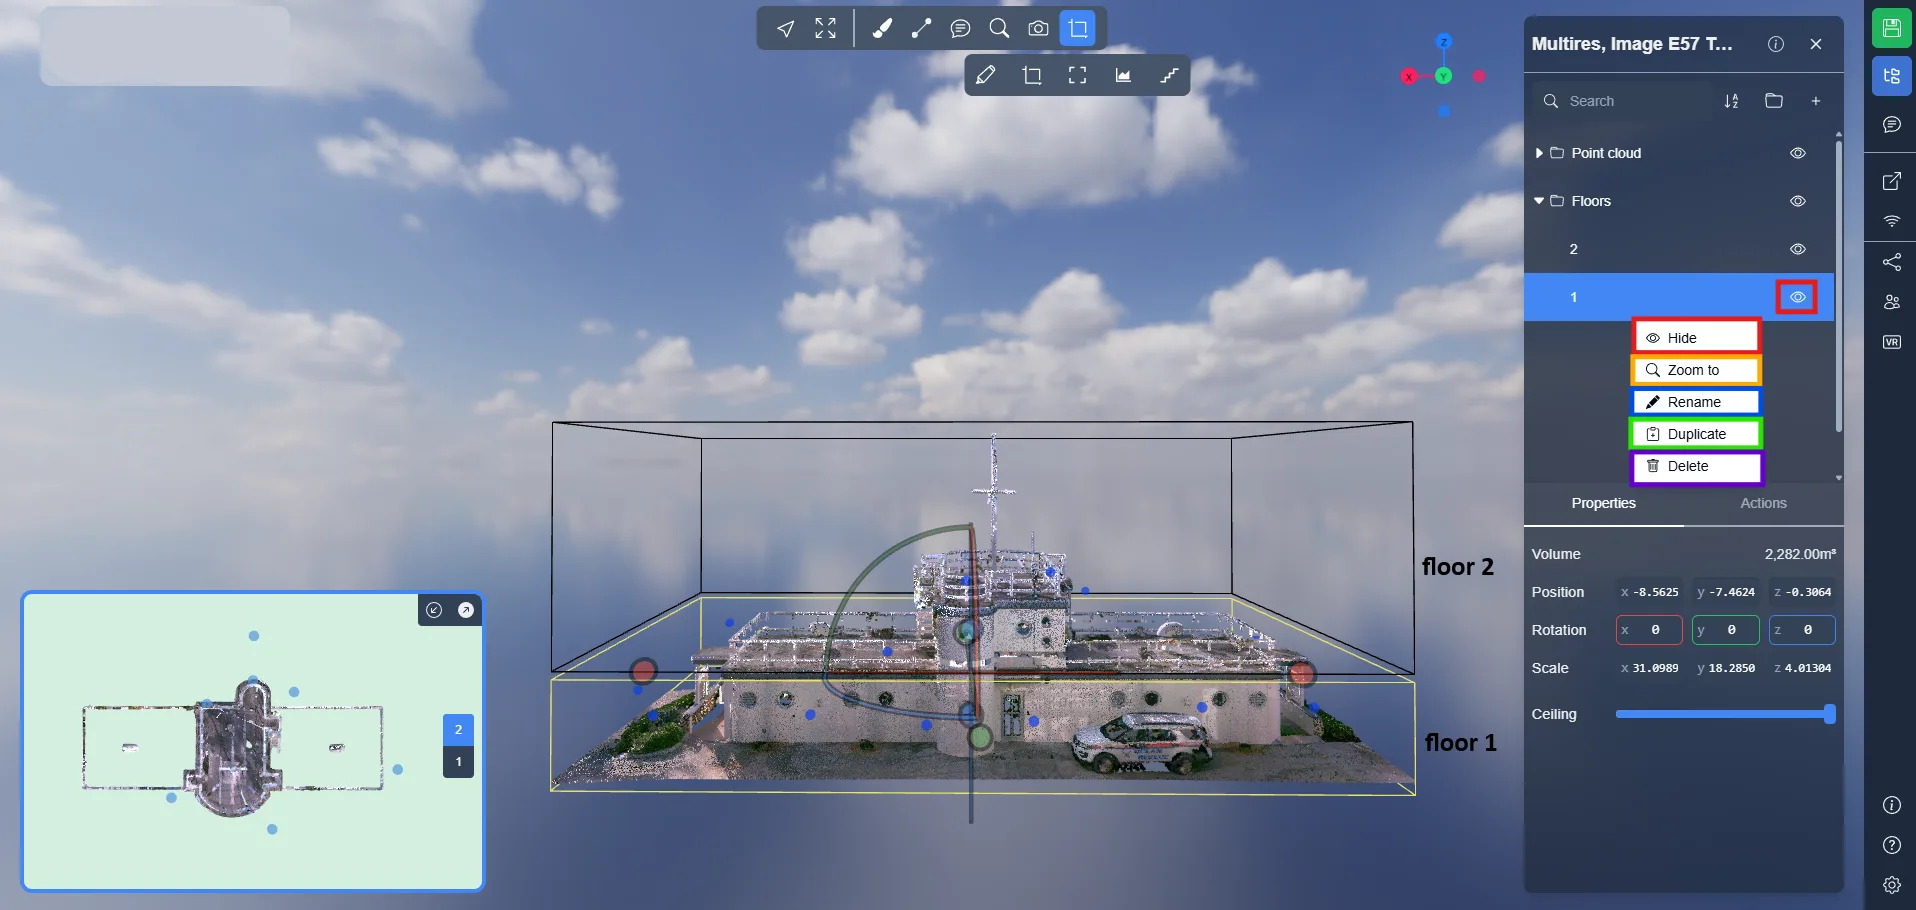
All edits update the minimap and 3D scene instantly.
Navigate Between Floors
Once your floors are created and properly managed, navigating between them becomes seamless using intuitive controls:
-
Double-click on the floor area directly in the 3D view → You’ll be instantly moved (dragged) to the location you clicked, at the corresponding height of the selected floor
-
Double-click on a blue 360° image bubble from the current floor → You will be redirected inside the 360° image selected.
If you are already inside a 360° image on a specific floor and you select another floor from the map, → You will be automatically redirected to the 360° image located on the floor you selected, if one is available nearby.
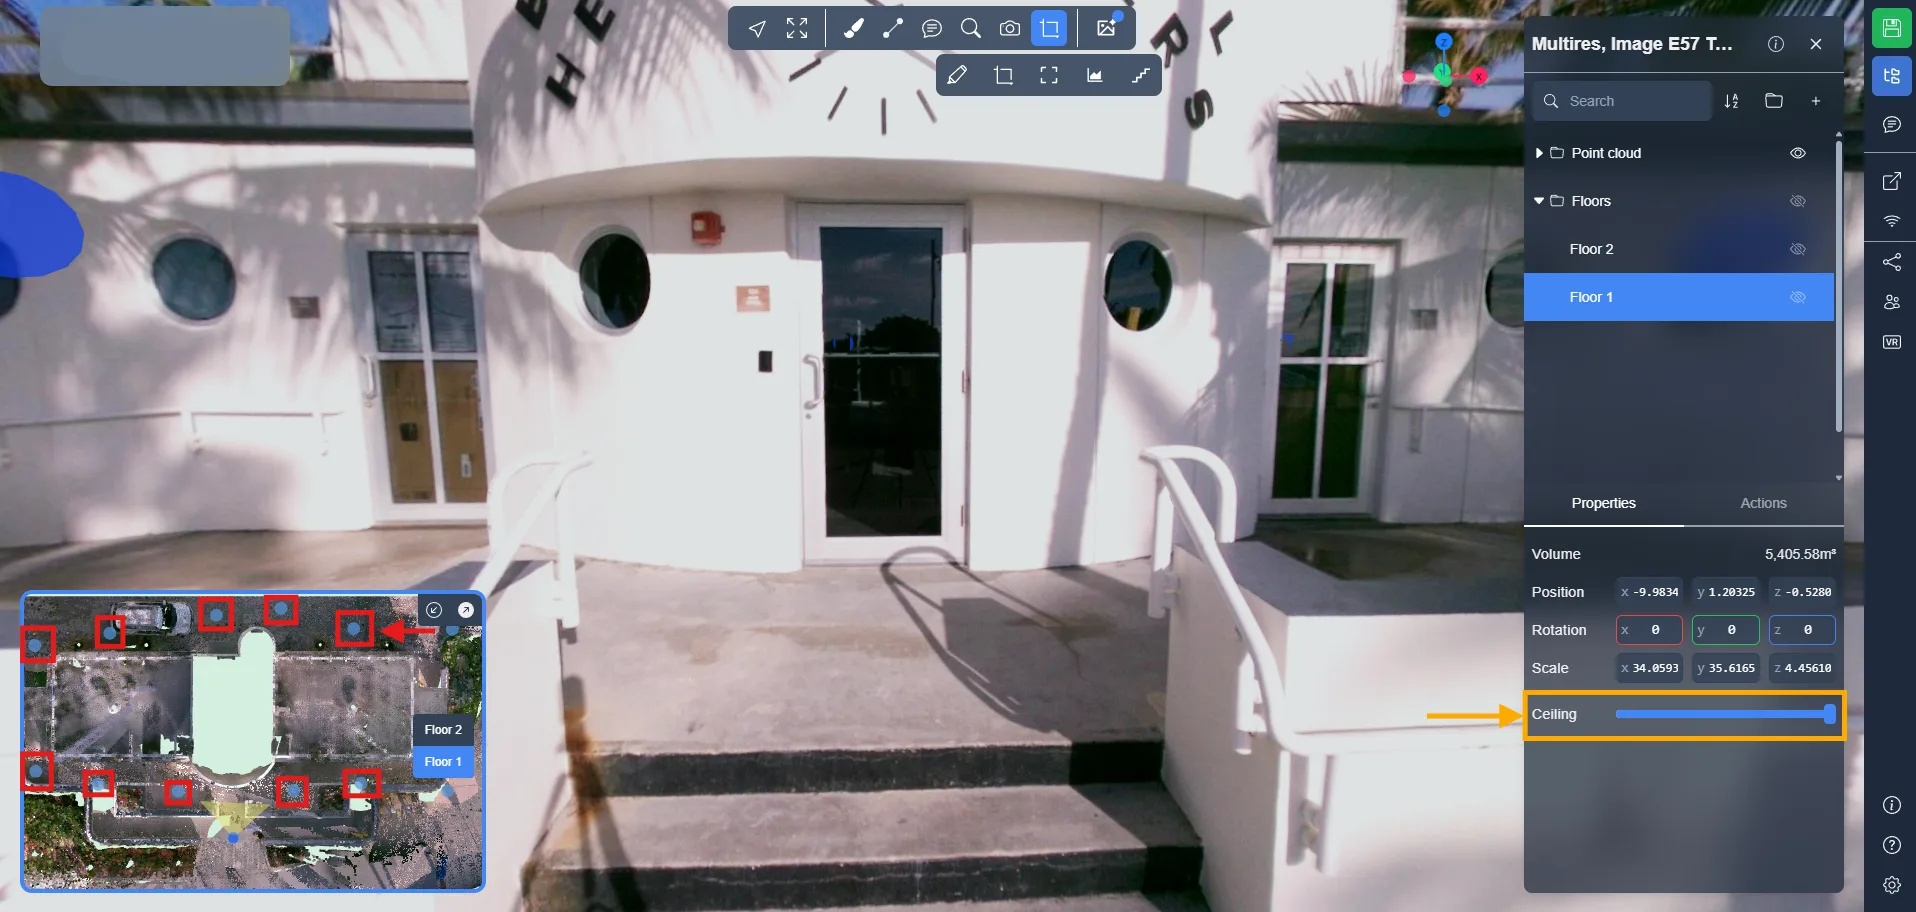
In some cases, a floor’s ceiling might block the visibility of 360° bubble. To fix this:
- Select a floor.
- Use the Ceiling slider in the Properties panel.
- Lower the ceiling until the blue bubbles are visible again.
Save Your Floor Setup
Once everything is configured, save your version to keep the floors persistent across sessions:
-
Click the Save version button (top right)
-
Name your version (e.g. Floors Navigation)
-
Click Create a new version
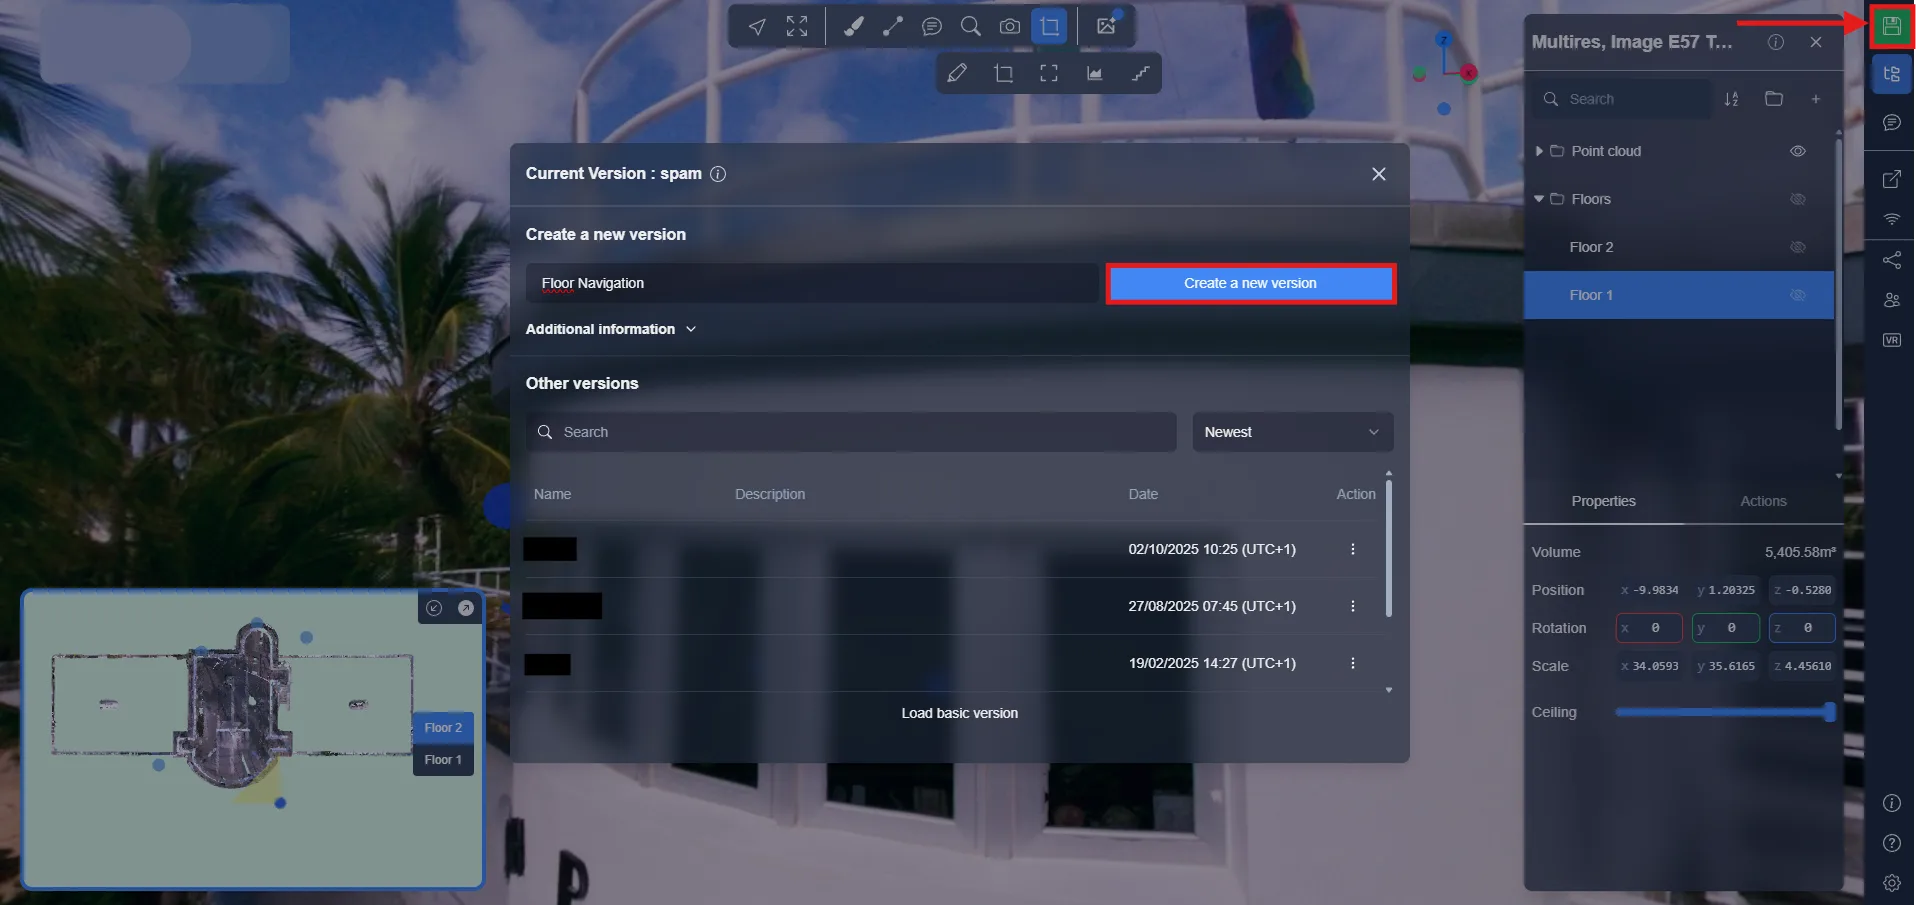
The position and visibility of floors are stored in the version. Learn more in the Version System article .
In case of problem or difficulty, do not hesitate to contact the platform team.