Export a point cloud with 360° images from CoPre CHCNAV
CoPre by CHCNAV is a point cloud processing and analysis software for 3D laser scanning professionals. This guide will help you ensure your panoramic images are properly integrated and readable when exporting from CoPre.
General Information
With CoPre by CHCNAV, you will be able to export:
- LAS file
- LAZ file
- E57 file
- PTS file
- 360 panoramic images along with their adjusted positions and orientations for accurate visualization on the platoform
To better understand the accepted file formats, please make sure to read the article "Accepted File Types".
Export Process
Follow these steps to export your point cloud and 360° panoramic images:
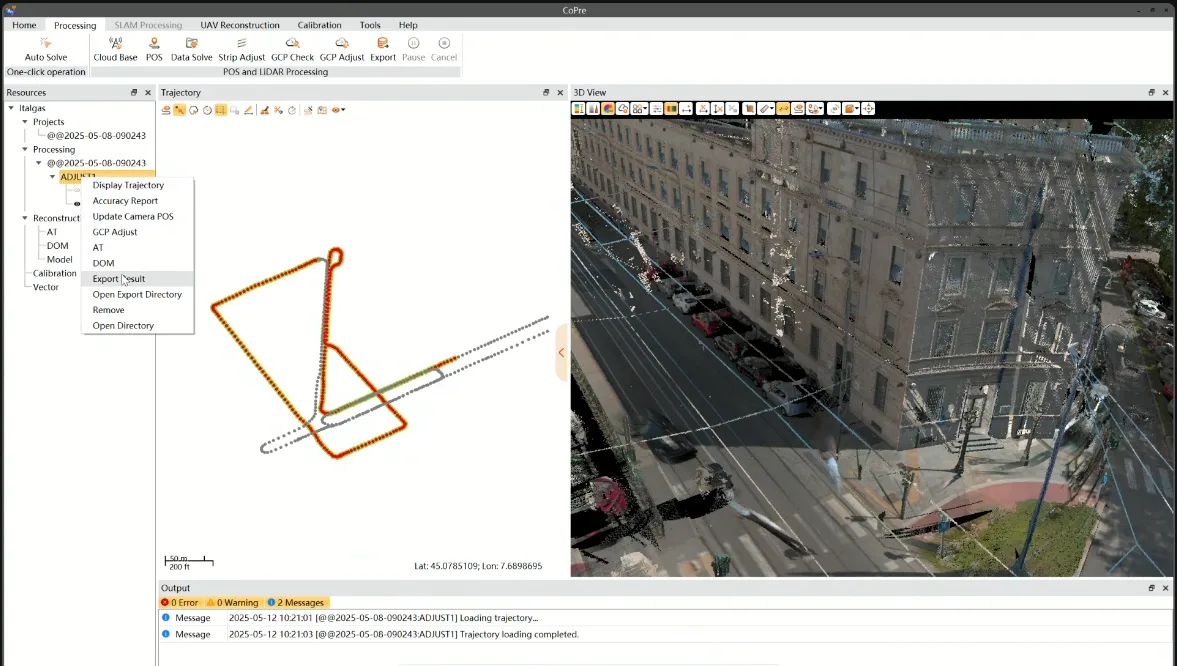
- In the CoPre project, go to the Resources menu and right-click your processed data and select Export Result from the dropdown menu.
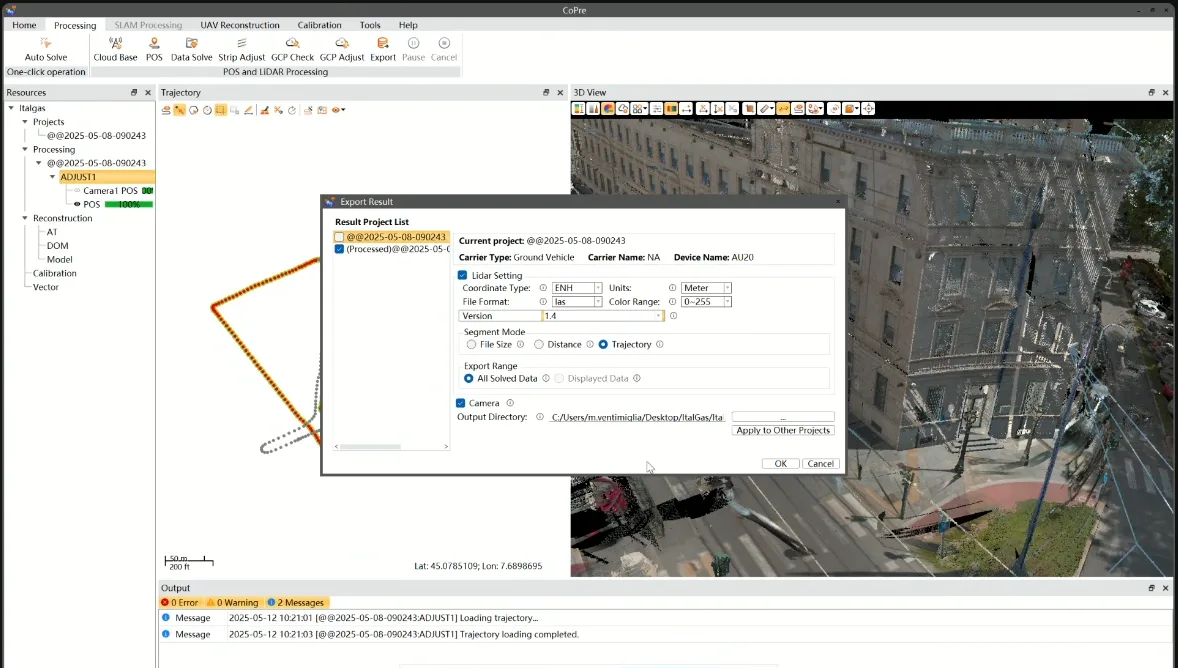
- In the Export window, choose the appropriate project from the Result Project List, select your desired file format and set the Export Range to "All Solved Data" to ensure all relevant data is included. Check the "Camera" box to include panoramic image and camera details.
-
The exported data will be organized into subfolders based on your CoPre version and project configuration.
- Camera1/ - Contains metadata and panoramic images (if exported).
- Scanner1/ - Contains the point cloud file in the format you selected during export. Once you have the point cloud file in the Scanner subfolder, you can add it to a project on the platform and wait for the upload and conversion to complete before uploading the images.
-
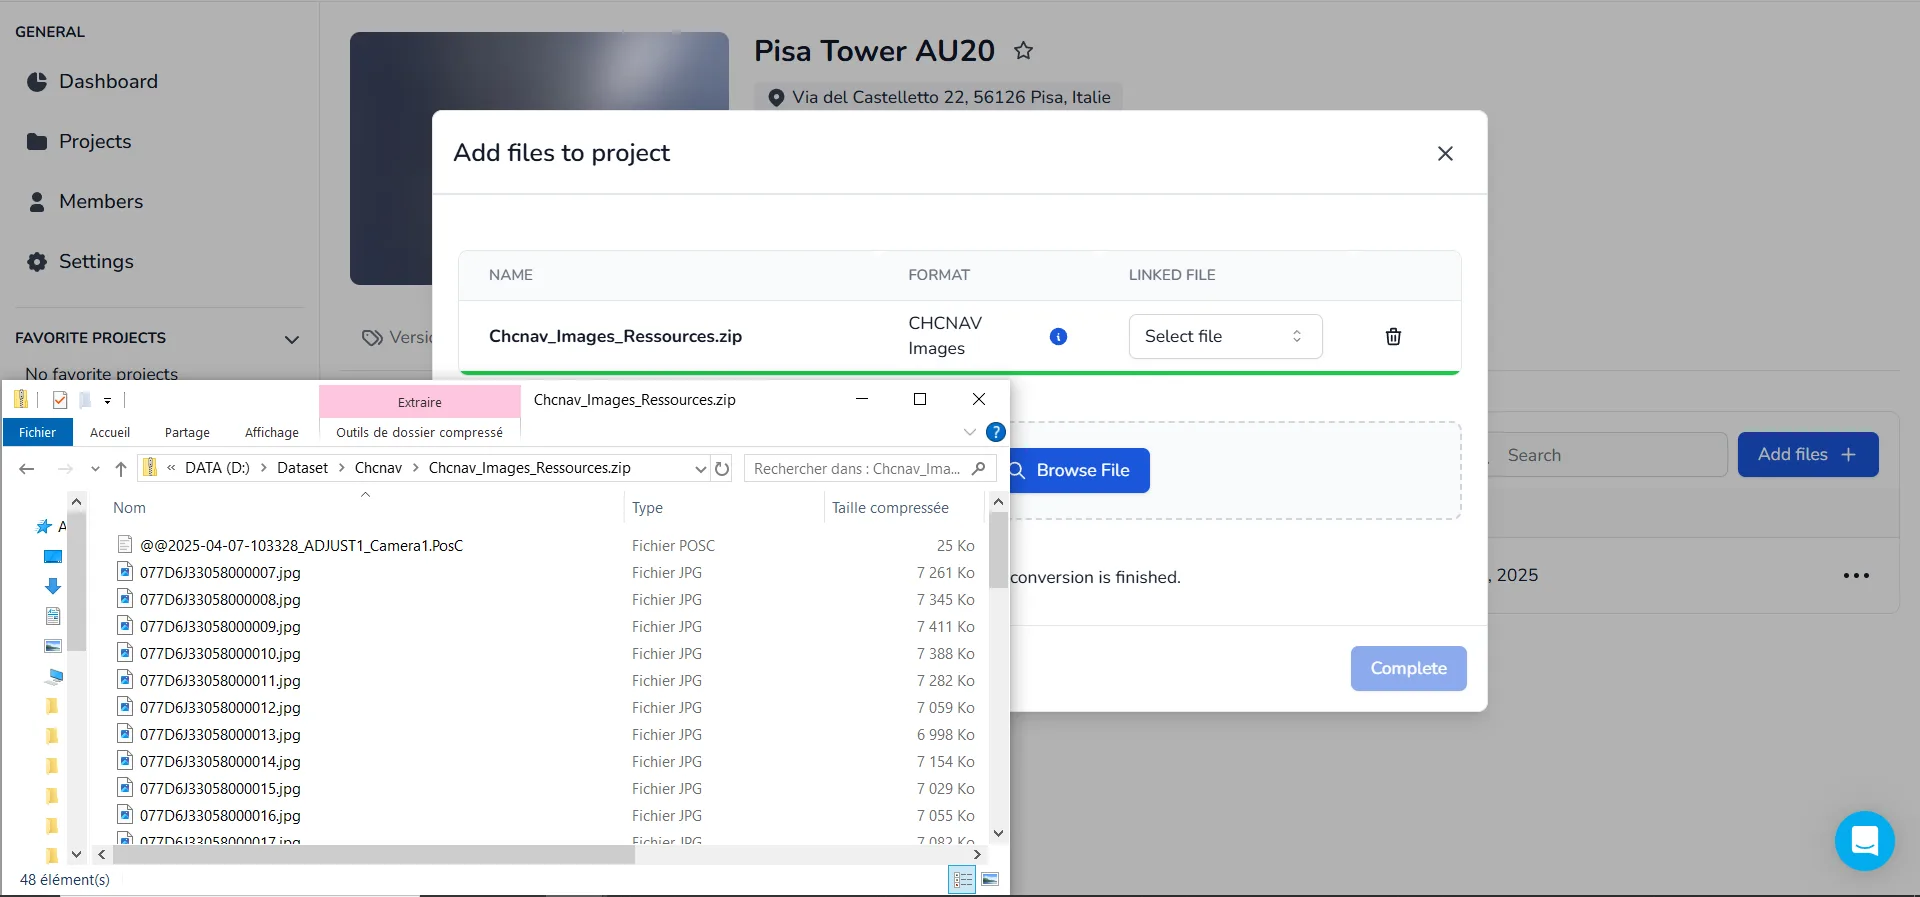
To prepare panoramic images for upload, navigate to the Camera1 subfolder, and look for a file with a .PosC extension, usually named following this format: @@yy-mm-dd-id_ADJUST1_Camera1.PosC or your custom project name. If the images are not found in this folder, check the original project location. Select all images along with the PosC file, then ZIP them together. To verify the PosC file, open it using any text editor, browser, or IDE.
-
Once the point cloud has finished converting and is viewable, upload the ZIP file to the project and select the point cloud in the linker box. The system automatically detect whether it originates from CHCNAV📥. After the panoramic images are processed, the point cloud will include all scan positions and their associated panoramic views, allowing seamless navigation between scan stations within the application.
If you have any questions or need further assistance, please contact the technical team.