Importing a HERON dataset with Panoramic Images
Prerequisites
- Heron Desktop software for processing the HERON trajectory and Reconstructor software for direct export in the format compatible with the platform
- Internet connection required for uploading to the platform.
General information
HERON is supplied with Reconstructor, a software for managing LiDAR data from multiple sensors. For the specific use of HERON data, Reconstructor offers a direct exporter to the platform of a single unstructured .e57 file that includes both the processed HERON point clouds and the 360° equirectangular panoramic images.
During a HERON survey, the user can choose between two modes for image capturing: single shots at 8K resolution in user-defined positions (Single Shots) or video at 24 fps, 4K resolution (Streaming). Both types of panoramic images can be exported to our platform together with 3D point clouds.
Exporting from Reconstructor
Once the processing in HERON Desktop is completed and the data is sent to Reconstructor, you can view all the HERON surveys under the Project heading in the Project Window. Each HERON survey is organized in point clouds with associated trajectory and panoramic cameras, as well as a 2D nadir Blueprint map view.

The following outlines the steps required to export and upload HERON point clouds and panoramic images into the platform, using Reconstructor.
- From the “Heron” menu, under “Heron share”, access the “ATIS.cloud…” command.

-
First, you are asked to select the HERON survey you want to export from the list of surveys in the project.
-
Then, a dedicated dialog box opens with a list of steps to follow.
The first step indicated is choosing the saving folder. By default, the .e57 data is saved in the Exports folder of the Reconstructor project, in a subfolder that takes the name of the HERON survey you are exporting, but both can be modified as desired.
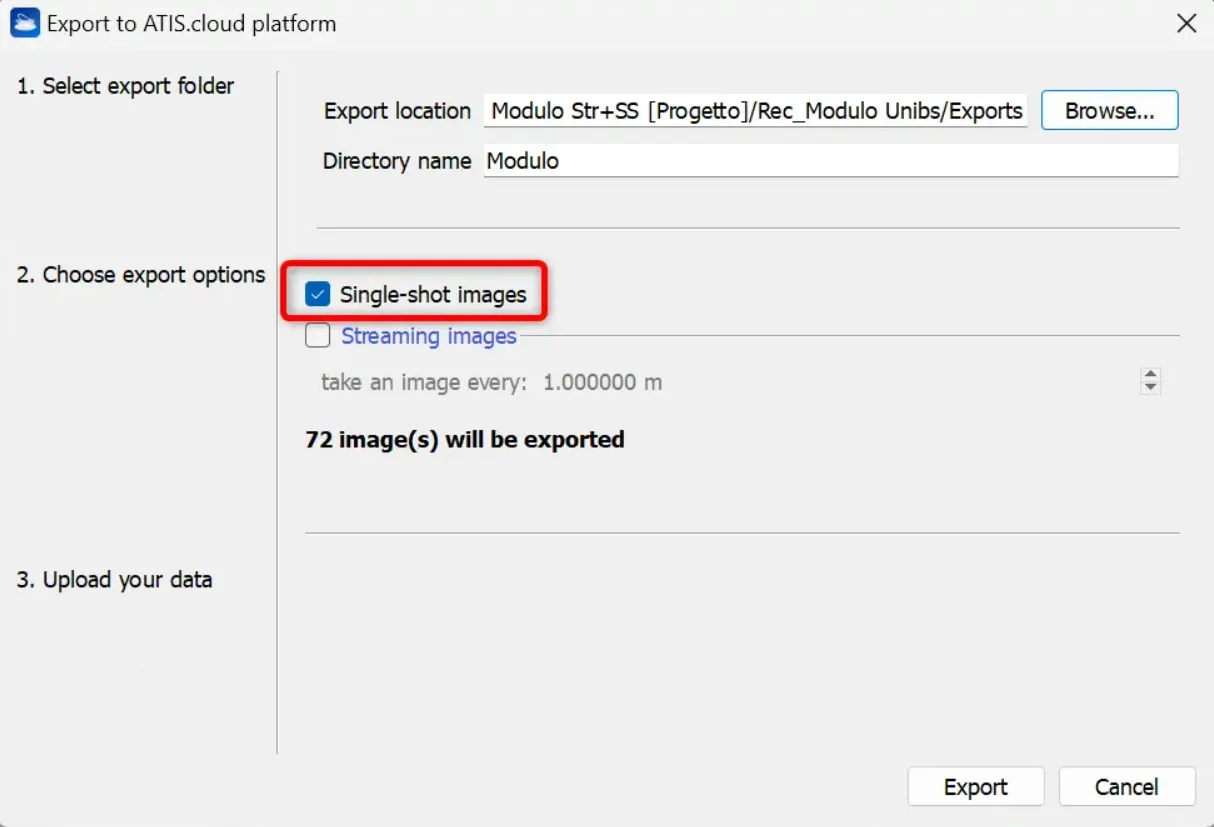
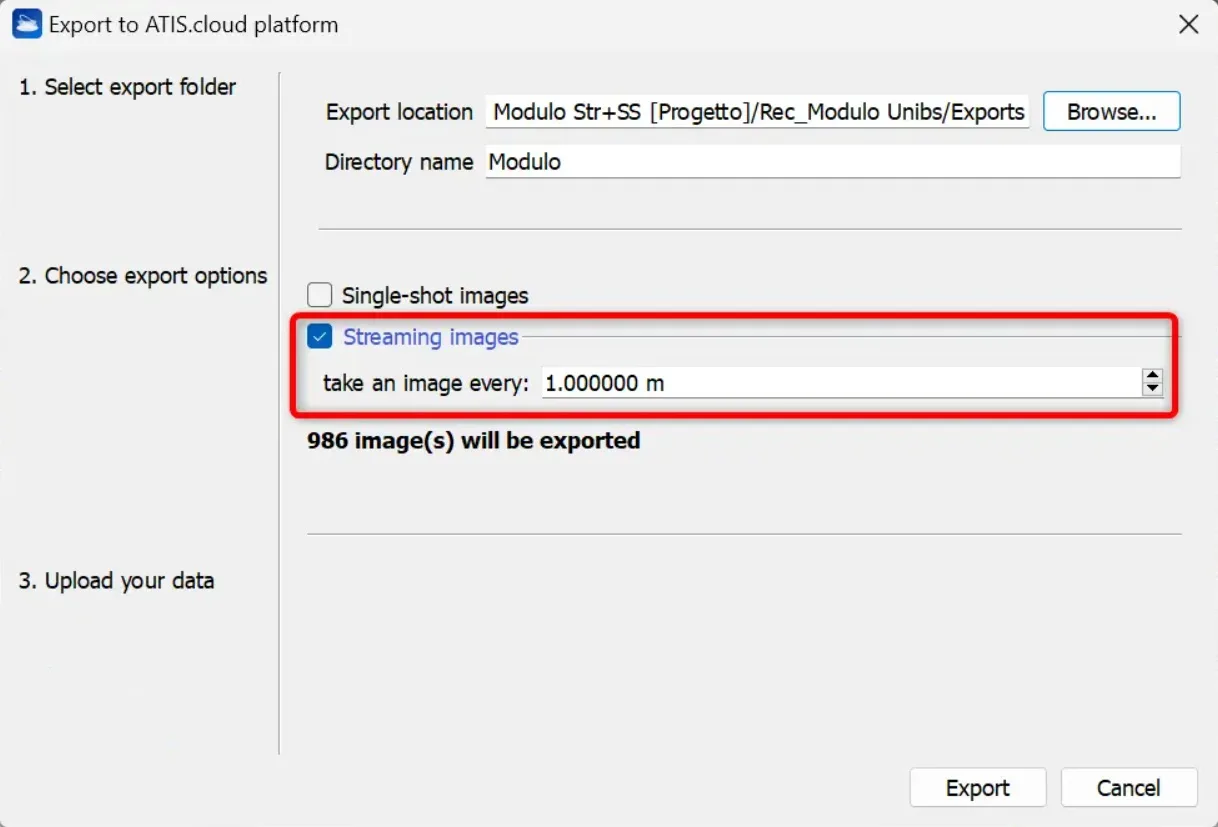
The second step is to choose the type of images you want to export.
- From Single Shots
Choose the "Single-shot images" option if the HERON survey was conducted in single shot mode. The amount of panoramic images that will be produced will show up instantly.
- From Streaming
Choose the "Streaming images" option if the HERON survey was conducted with video acquisition, and set the image sampling step performed along the HERON survey trajectory. The amount of panoramic images that will be produced will show up instantly, allowing you to evaluate the amount of data extracted.
- Once these steps have been completed, press the “Export” button at the bottom right of the dialog box.
The size of the point clouds and the number of panoramic images determine how long this process takes.
Note: The color of the exported point cloud corresponds to the color layer set in the cloud’s Properties Browser at the time of export.
- When the export is complete, a notification will show that everything went well and offer the option to click the "Open Folder" button to view the data's saved folder at once.
At this point the .e57 file is ready for sharing through our platform.
Importing into the platform
- Log in to your account on the platform.
- Create a new project or open an existing one.
- Select the “Add files” tab and upload the .e57 file exported from Reconstructor.
- Follow the upload process and monitor the import status.
- Once the import is complete, the point cloud and panoramic images will appear correctly overlapped in the project.
For a more detailed explanation, see this article.