Object Animation
The Object Animation tool allows you to animate objects in a scene by moving attached objects along a defined trajectory. This tool is particularly useful for visualizing movements or simulating dynamic scenarios. Here is a detailed explanation of how it works:
Adding an Animation
To animate your 3D model, follow these steps:
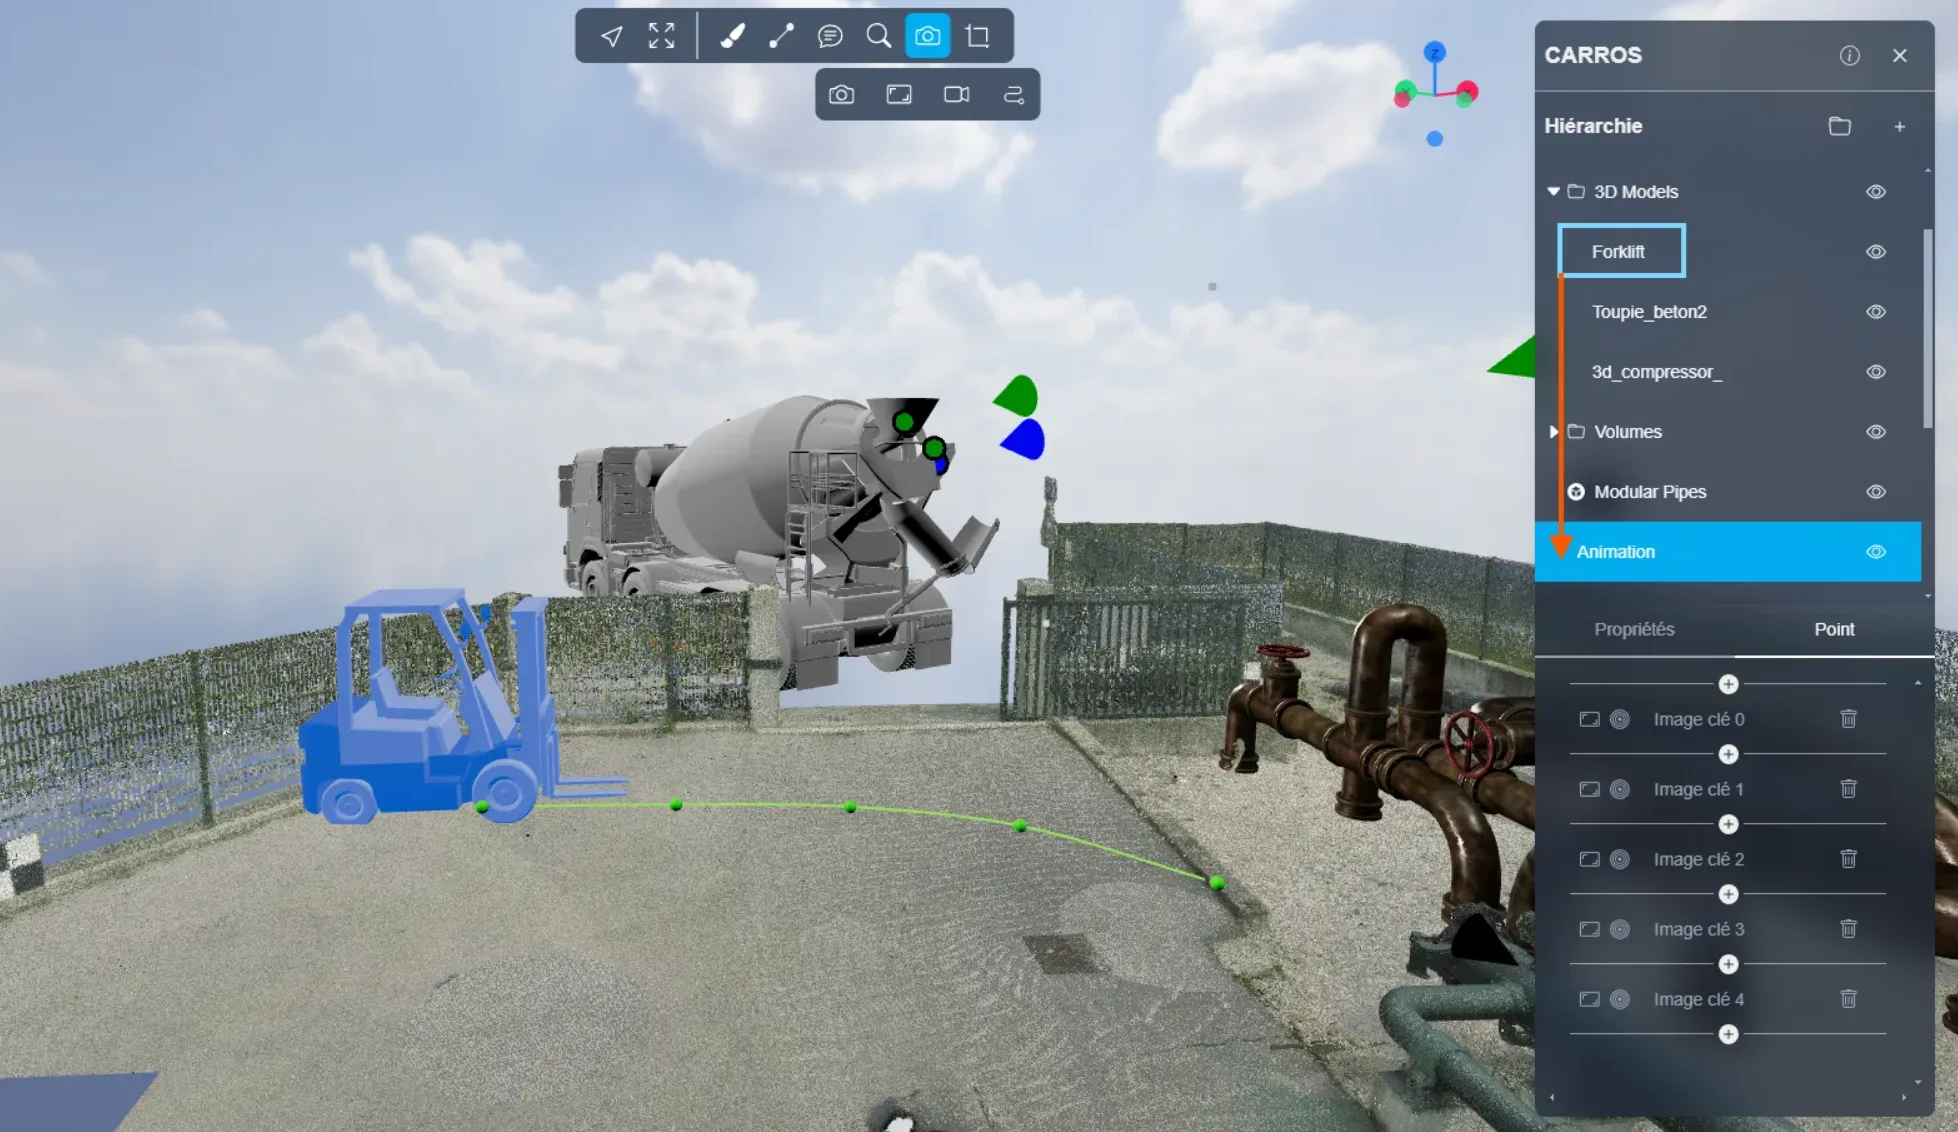
- Select the 3D model in the file hierarchy.
- Attach it to the animation.
Understanding the Trajectory
- The green line visible in the 3D Application represents the trajectory along which your 3D model will move.
- You can modify this trajectory by adjusting the control points (green points) to define the exact path your model should follow.
Animation Parameters
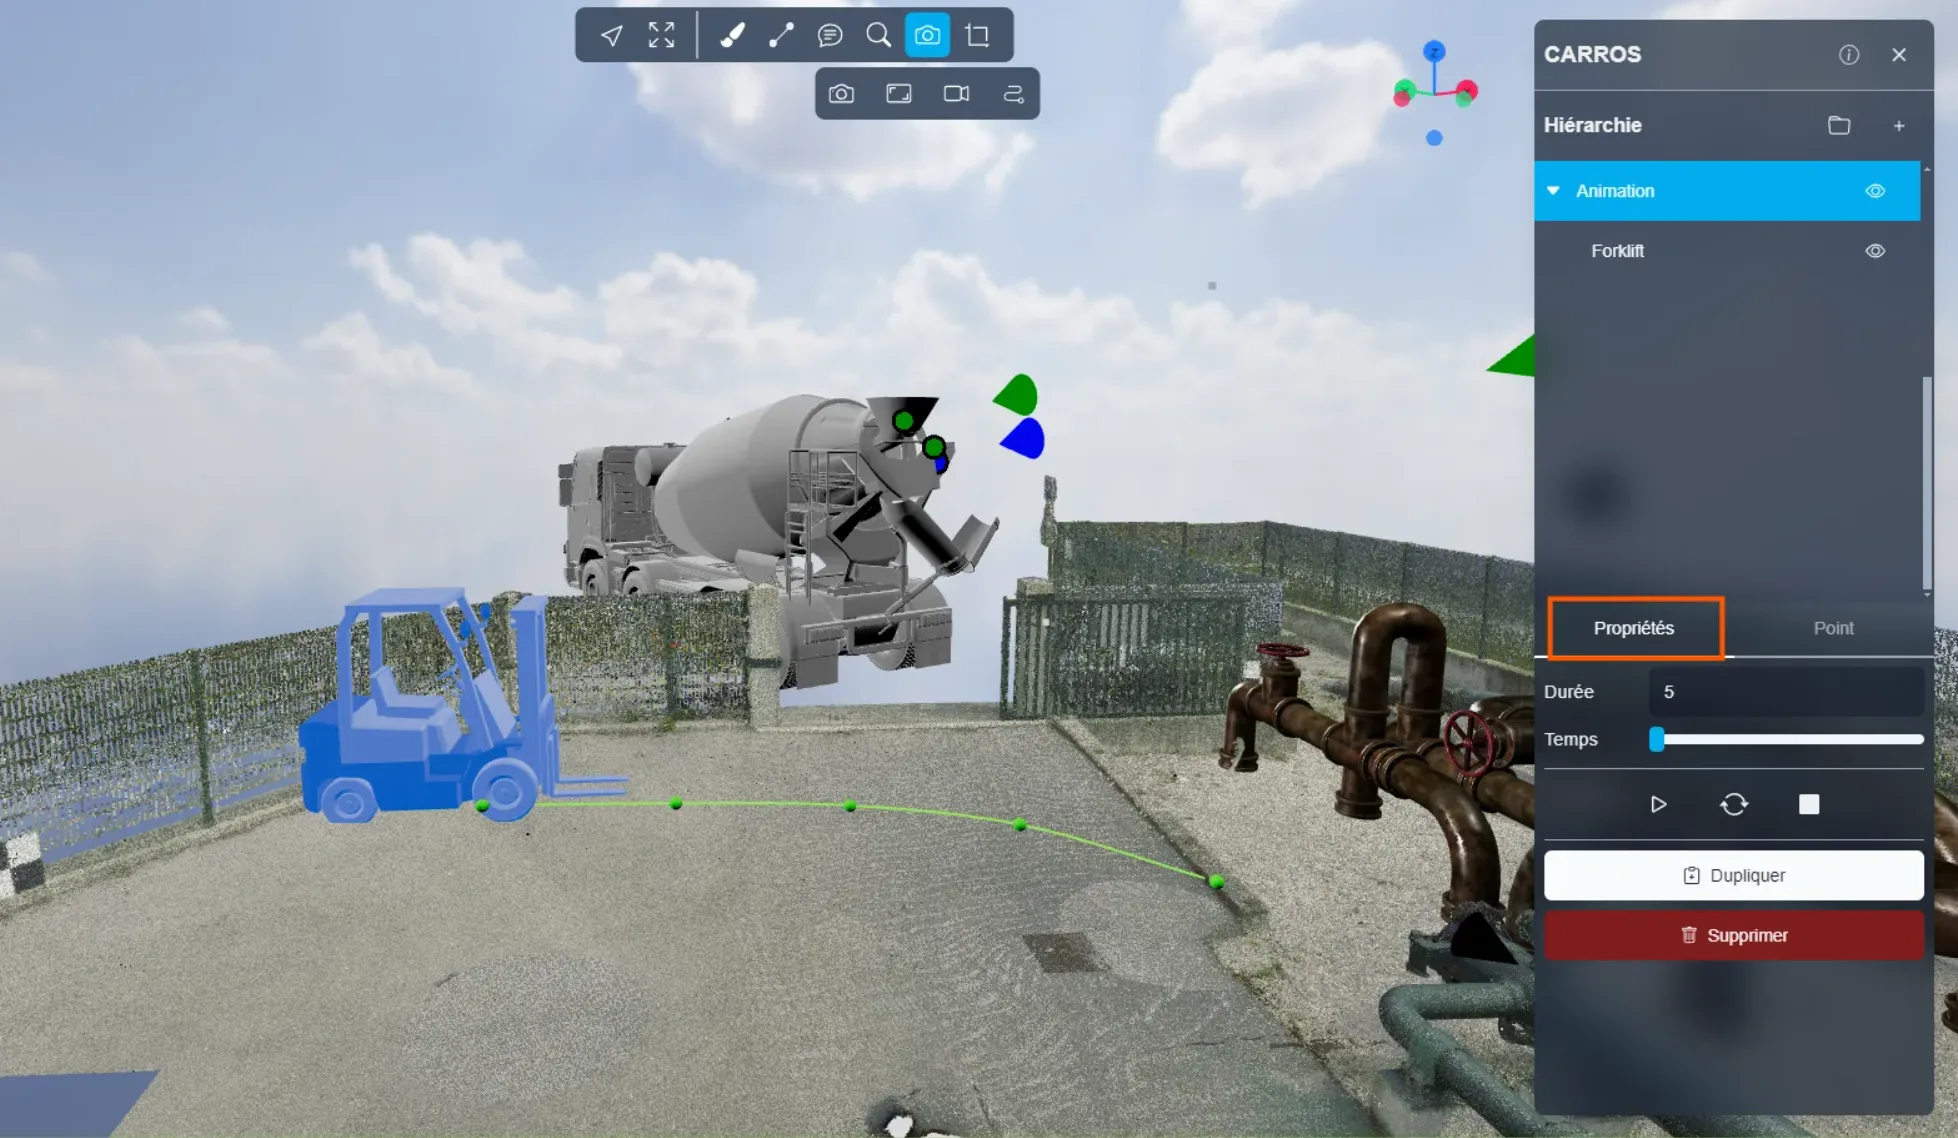
In the Properties tab, you have access to the following parameters:
- Animation Duration:
- A short duration results in a fast animation.
- A long duration slows down the animation.
Controlling the Animation
Use the following controls to manage the animation:
- Play: Starts the animation.
- Stop: Stops the animation (square icon).
- Loop: Enables automatic restart of the animation when it reaches the end (icon with two circular arrows).
Managing Points and the Trajectory
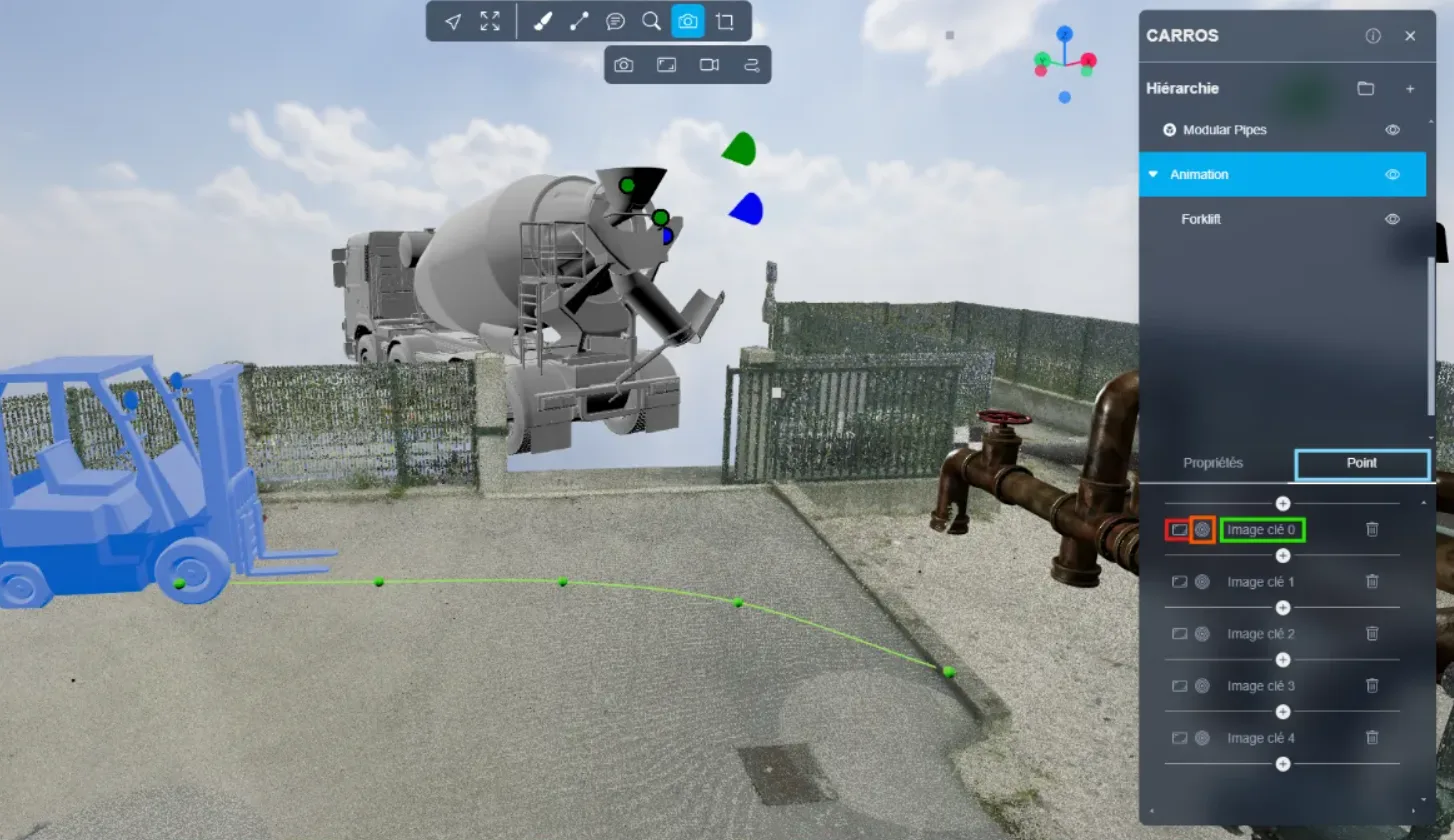
In the Points tab, you will find options for managing the green line:
-
Modify the trajectory:
- Select a green point on the line.
- Move it to adjust the desired trajectory.
-
Keyframes:
- The "+" button creates a new keyframe.
- The first button places a keyframe at your current position and orientation.
- The second button allows you to navigate between existing keyframes.
- The last button deletes a selected keyframe.
Example of use:
In an animation with two keyframes (0 and 1), clicking the "+" button while highlighted between these two keyframes will add a new intermediate keyframe.
If you encounter any issues, our support team is here to help.
Happy exploring!