Invite Members to Your Workgroup
To invite someone to a workspace, you must have sufficient permissions (Owner or Admin).
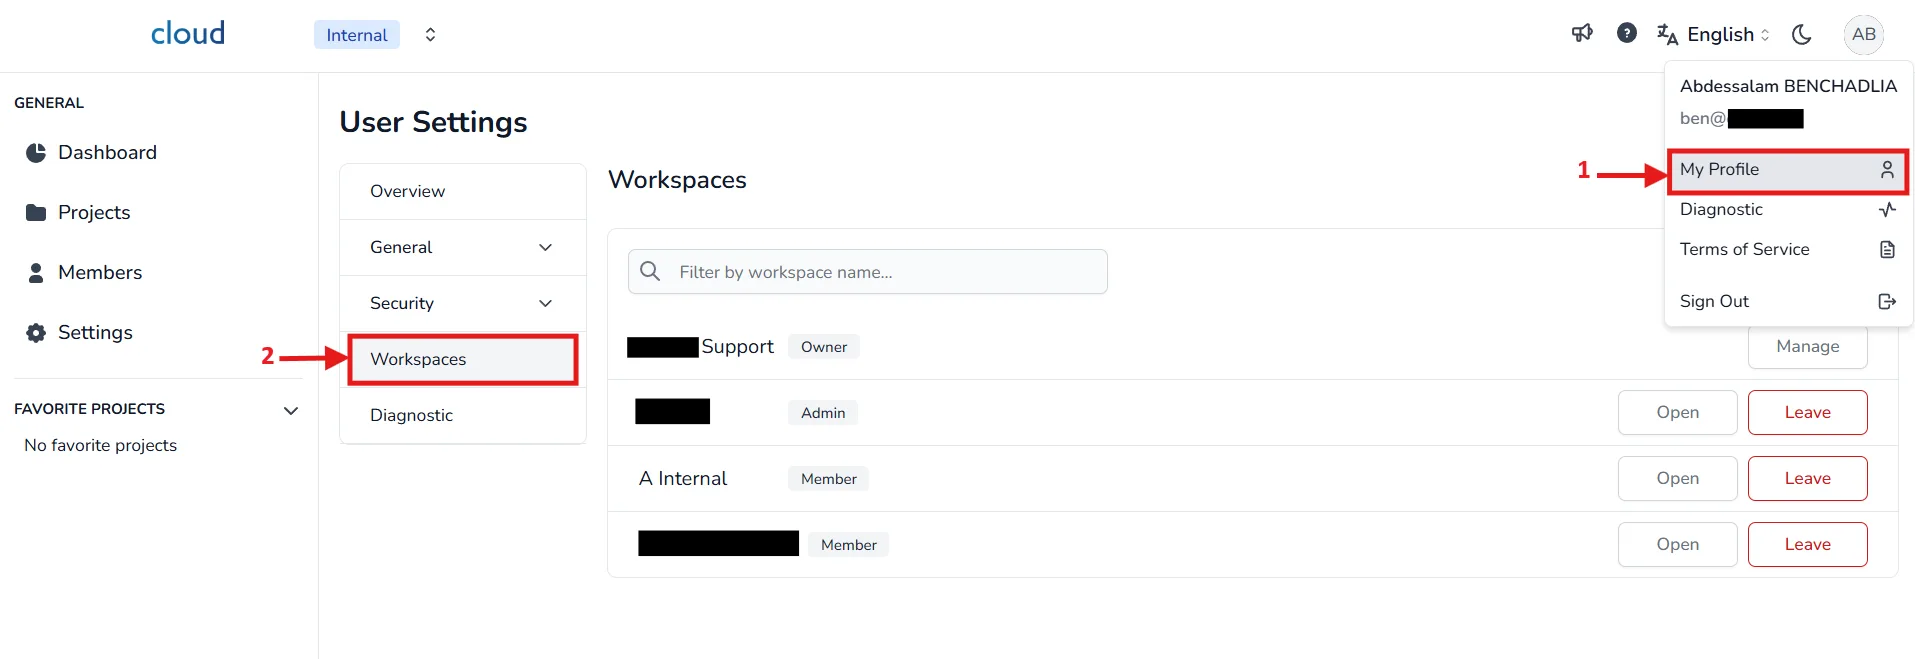
You can verify your role by going to Your Profile > Workspaces, where your current roles will be displayed for each workspace.
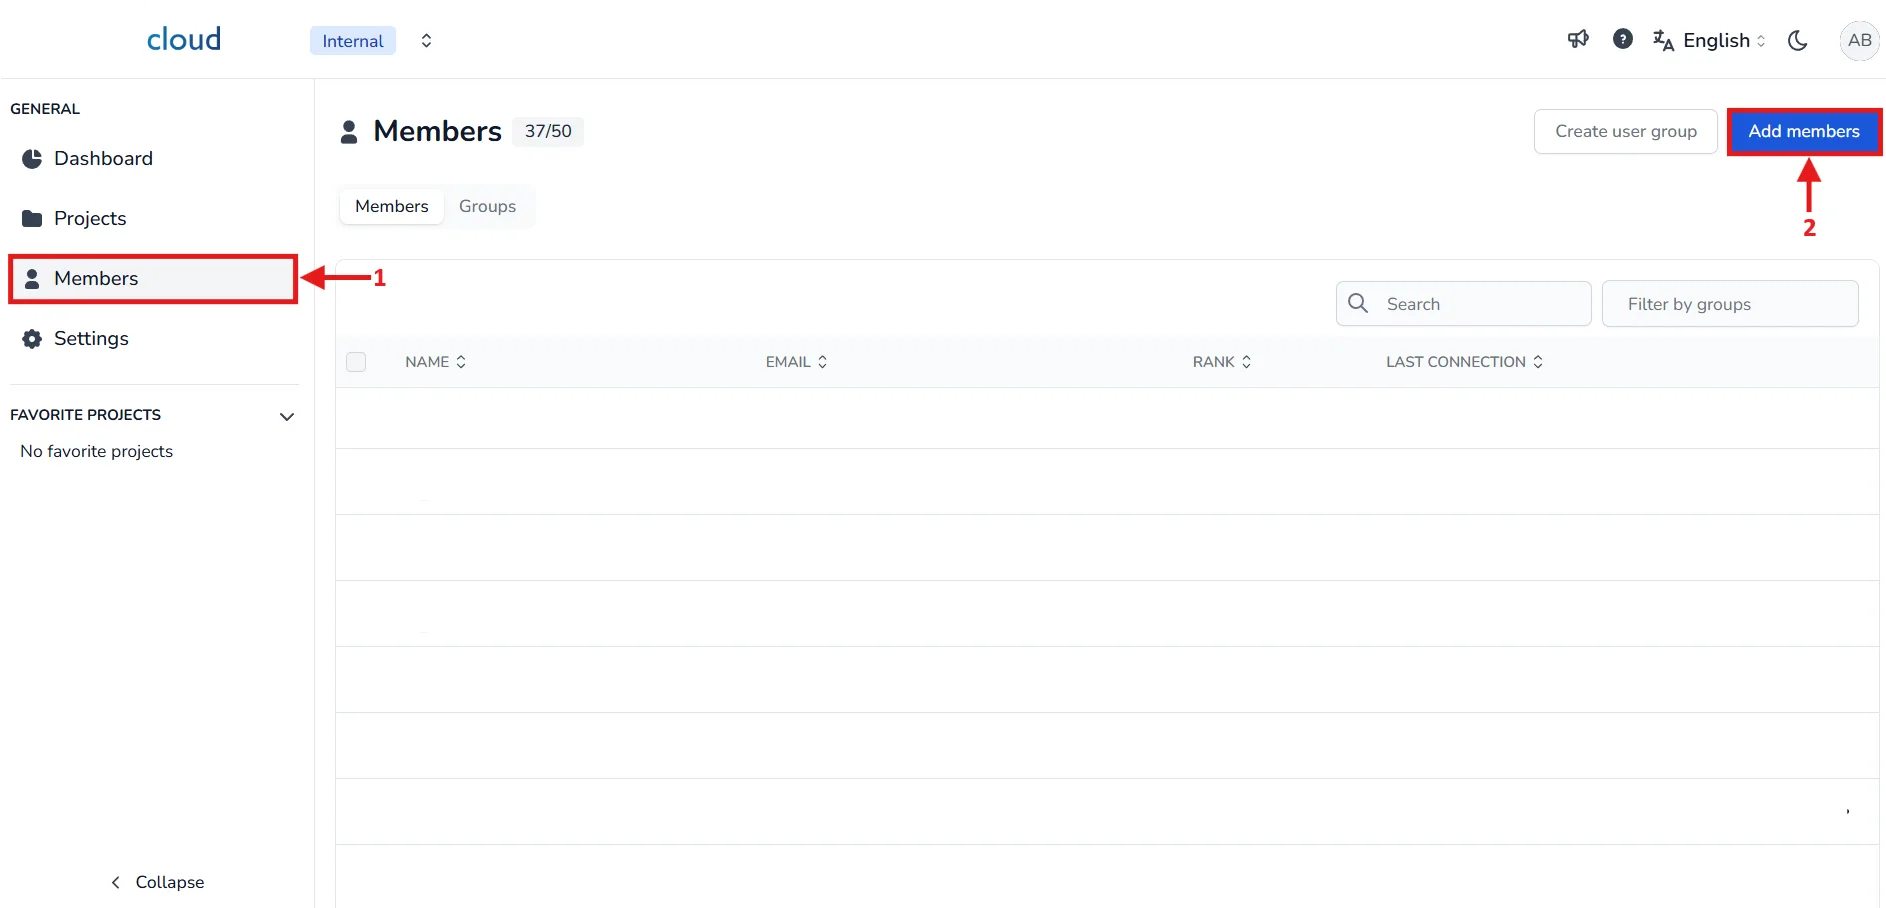
First, open the Members window from the side menu. Then, click on Add members to open the invitation window.
You have two ways to invite users:
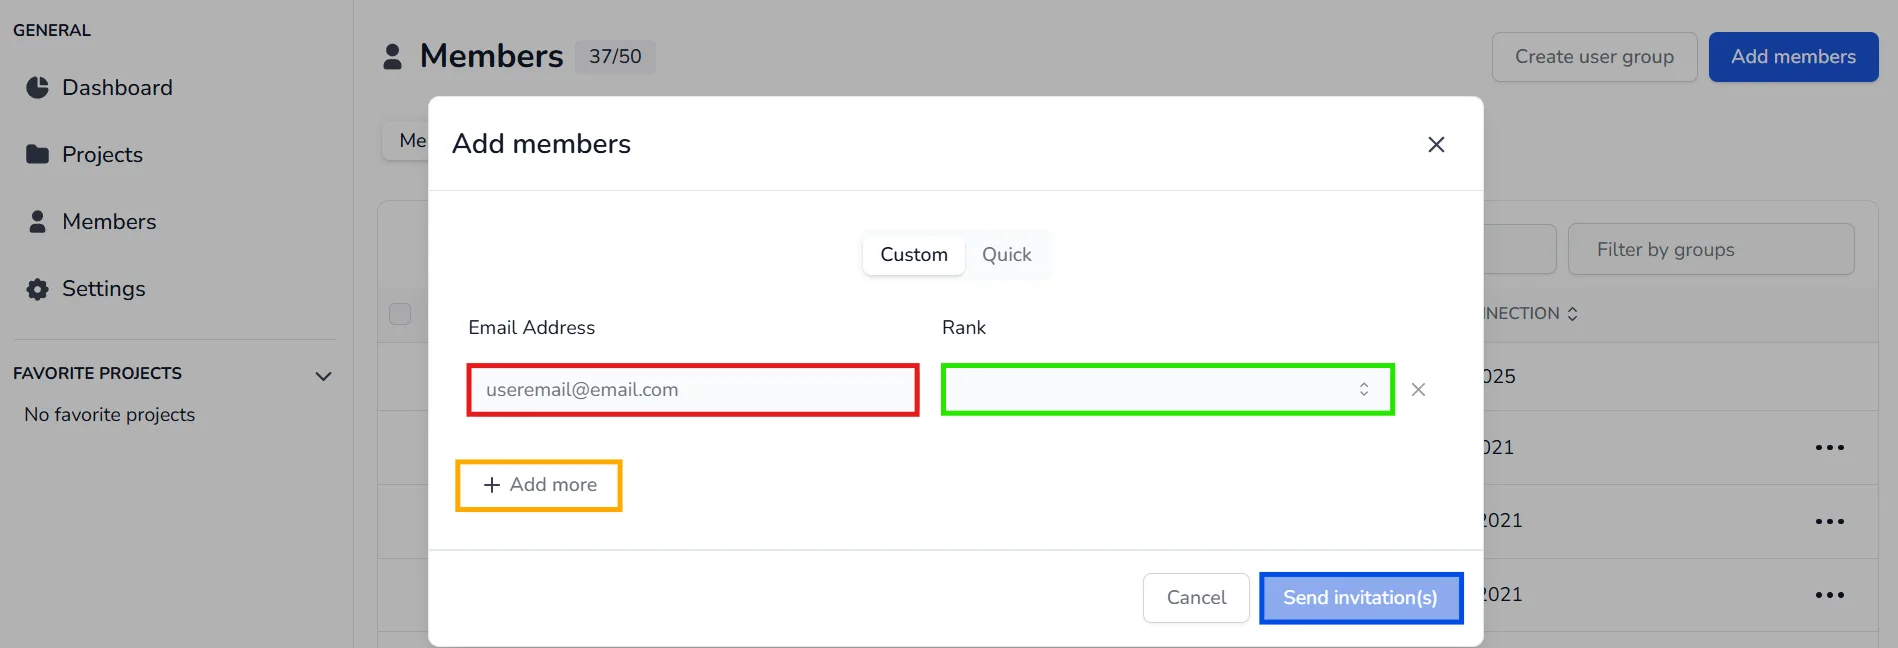
Option 1 - Custom Add
Enter each email address individually and select the rank (role) you wish to assign.
You can click on Add more to add additional email addresses.
Once done, click on Send invitation(s).
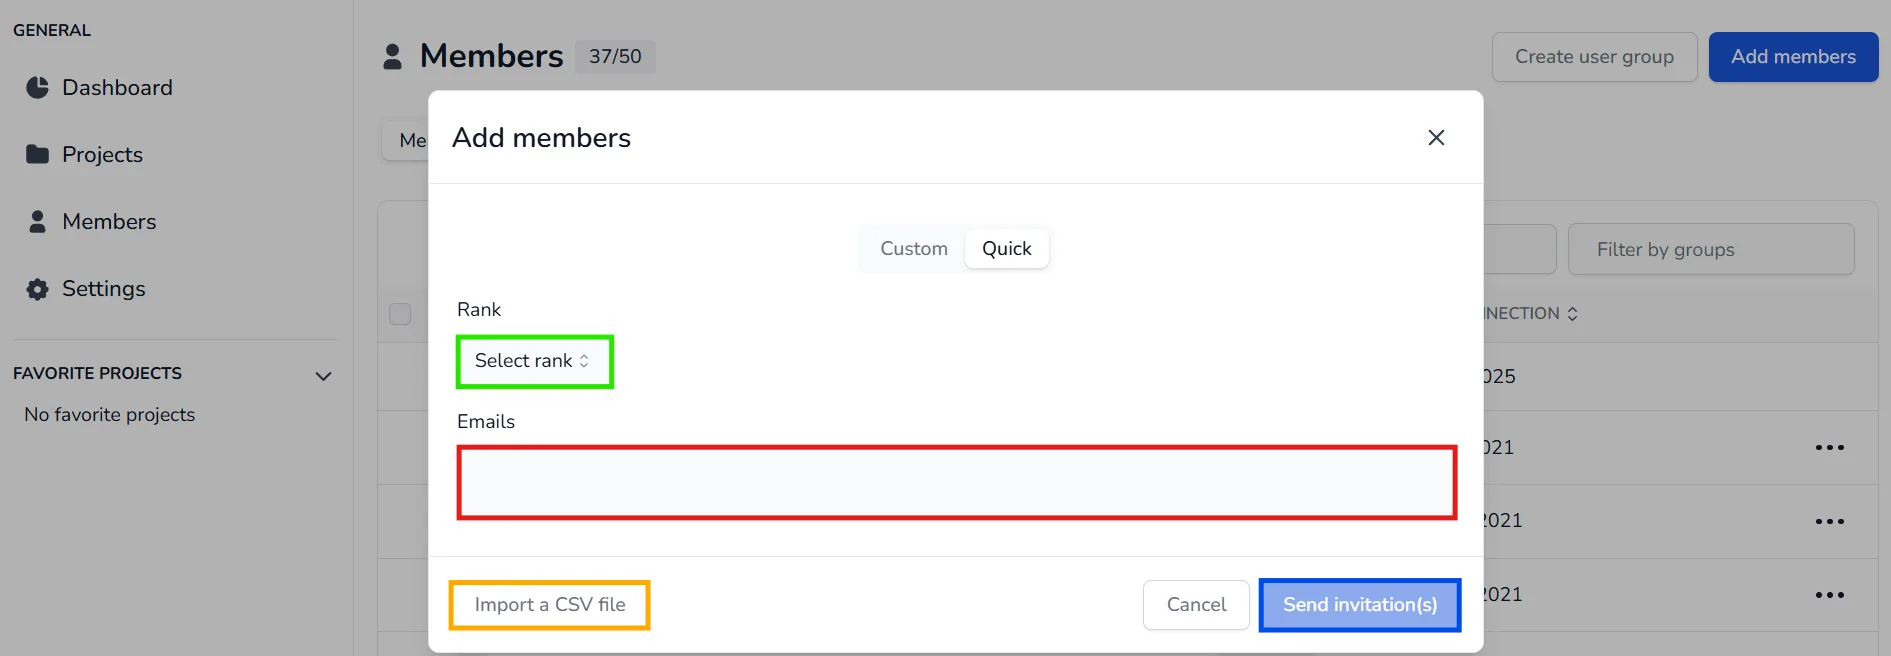
Option 2 - Quick Add
If you want to invite multiple users at once, switch to the Quick tab.
Enter all the email addresses , choose a rank to assign to all of them, and click Send invitation(s).
Alternatively, you can import a CSV file containing the emails, one row per email.
Invited members will receive an email and will need to complete their profile in order to use the platform.
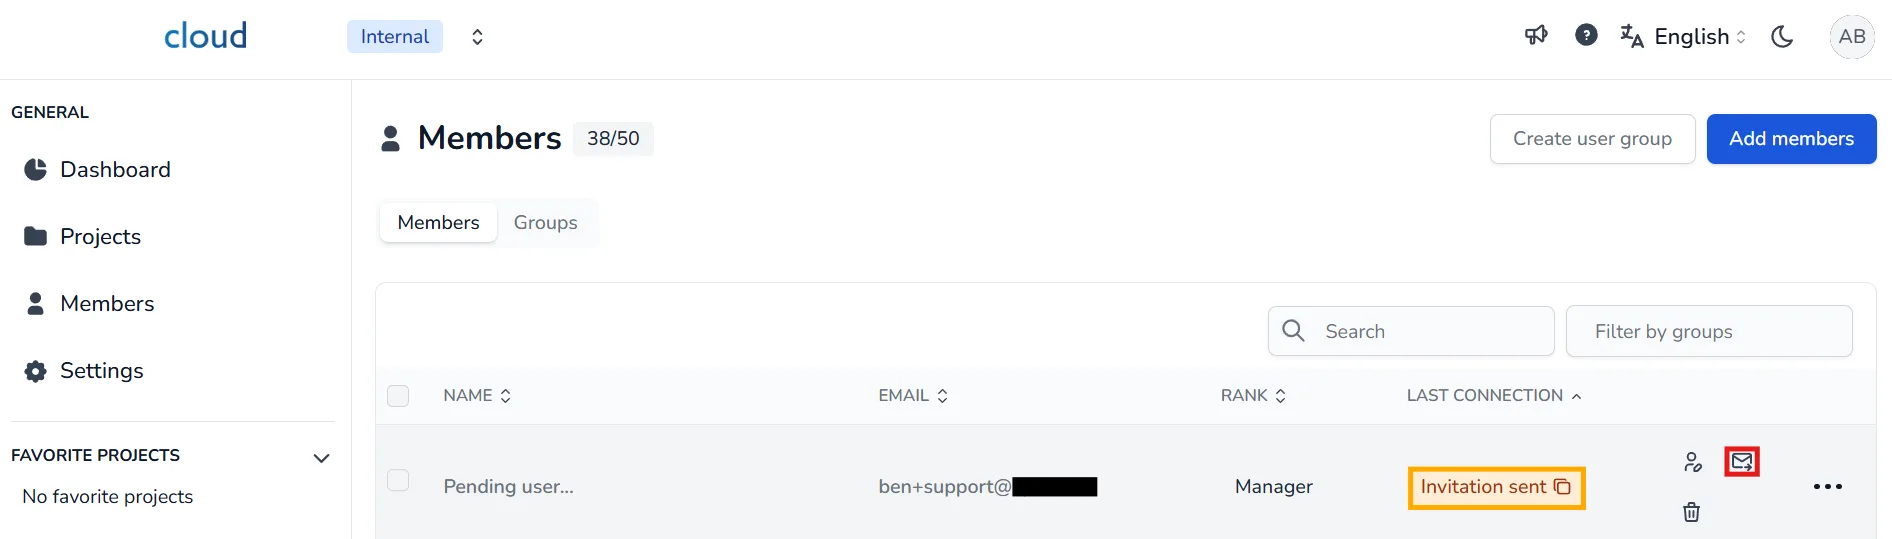
To see every member who has accepted the invitation or is still pending, go back to the Members window.
If a member has difficulty receiving the invitation email:
- You can click the envelope icon to resend the invitation.
- You can also click the link icon to copy the invitation link and send it manually.
You don't have to wait for a member to finish creating their account to start assigning them company roles and projects along with rights.
In case of problems or difficulties, do not hesitate to contact the platform team.