
The file
Before heading over to the platform. Let's make sure your file is correctly made.
The ZIP file should contain all the necessary files,
- Your texture files (JPG, PNG, TIFF, TGA, etc.)
- Your material file (MTL) format
- Your template file (OBJ)
Recommendations ⚠️
- Uncompressed OBJ file is recommended to be less than 500 MB.
- Maximum number of Texture Images : 12.
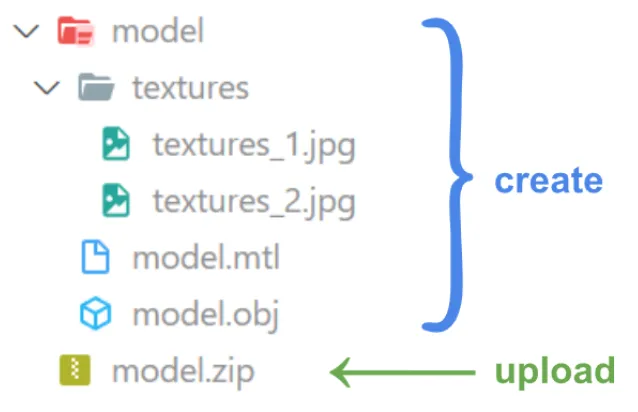
Textures can be in the root directory or in a subfolder, this depends on the MTL file ⚠️.
For an OBJ with MTL file that is looking for the textures files (JPG, PNG, TIFF, TGA etc.) in a folder “textures”, the ZIP file should look like the example below :
Adding to the project
Just like for regular files, you must first go to the project's edit page first.

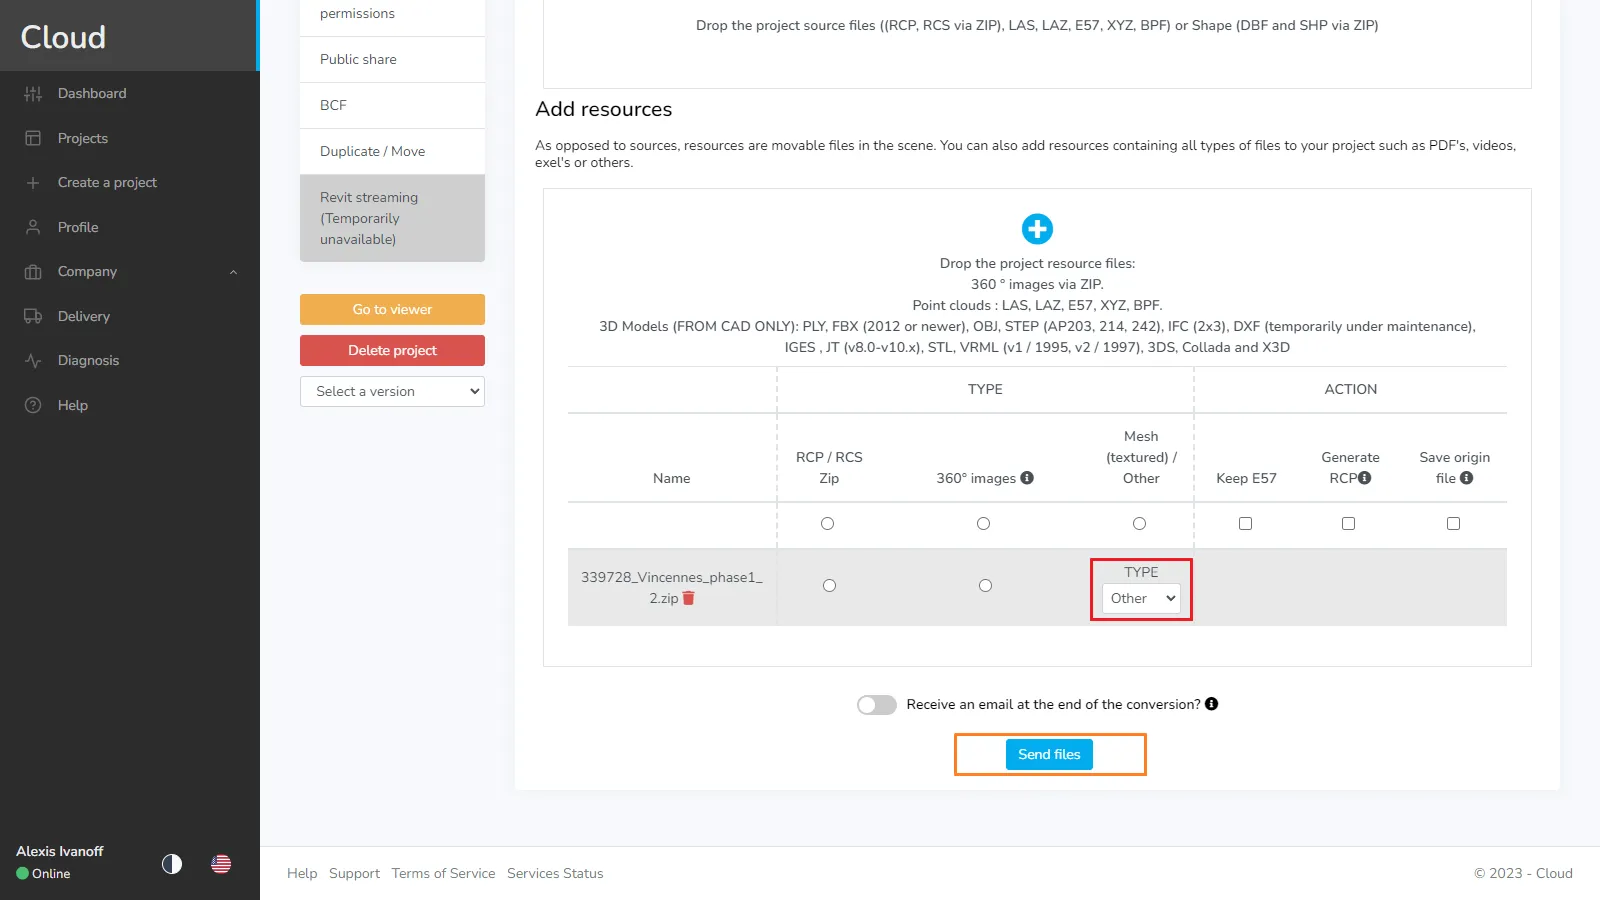
Go to the Add files tab and drop your file into the resource zone.

Once your file has appeared in the zone, click the “Mesh (textured) / Other” checkbox and select the mesh type.
Then click Send files to start the upload process.
⚠️ Remember to stay on this page while the file has not been sent. ⚠️
Loading in the viewer
When the processing is done (check the files tab to verify the status), you can load the 3D model in the viewer just like any other model. Check out the article Objects / Scene modification for more information.
If you are using the V4 viewer, see this article.
It can happen that the imported object is not oriented correctly. As a reminder, you can modify this by selecting the object from the scene menu (right menu) then by changing the parameters of this object from the table located at the bottom of the menu after clicking the object.
You can also make the change by activating the rotation mode by pressing R then selecting the object from the tree view, or by pressing CTRL while targeting the object. See the article Interact with resources.
In case of problem or difficulty, do not hesitate to contact the platform team.