
Cyclone Register 360 is a point cloud processing and analysis software for 3D laser scanning professionals where you have automated tools and point cloud specific workflows which allow users to import point cloud data, then quickly process, analyze and create high-quality customer deliverables.
General Information
The .e57 format can store point cloud data from laser scanners and other 3D imaging systems, as well as associated 2D imagery and core meta-data. To better understand the e57 format, please make sure to read the article "Better understand E57 files".
With Cyclone Register 360 you will be able to export :
- a structured e57 with all the stations inside (recommended for the platform)
- structured e57 for each station (not recommended for the platform)
- unified e57 (not recommended, you will lose the structure, no bubble view possible)
Please note that if you have the latest Cyclone REGISTER 360 PLUS (version > 2023.0), you can no longer export “TruView local”. In this case we recommend using older versions of Cyclone or contact support for more information.
In this article, we are going to see how to export a BLK2Go e57 file and how to export 360 images in order to upload them on the platform. Note that BLK2Go is a mobile scanner, which means that the e57 it is not structured (no stations).
Exporting BLK2Go e57 and 360 images
1. Upload the BLK2Go project on Cyclone Register 360 like you usually do.
2. After import, go to "Review and Optimize"
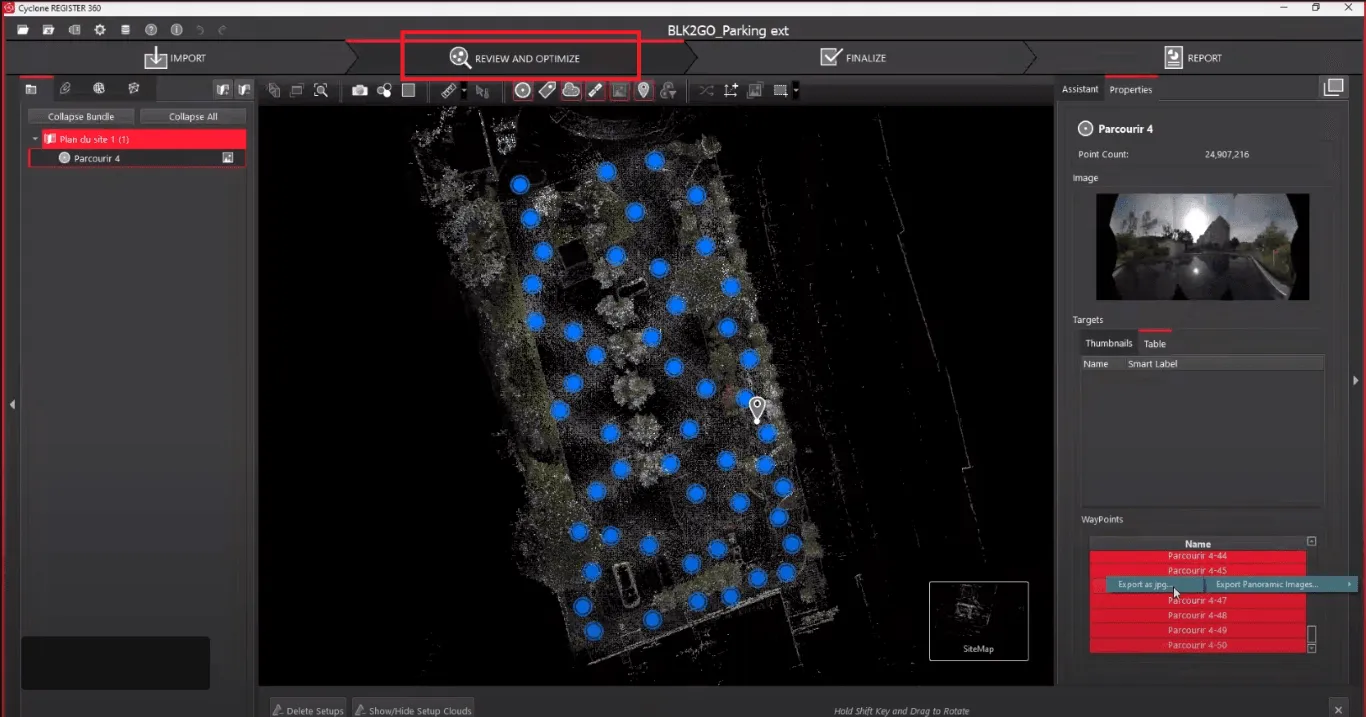
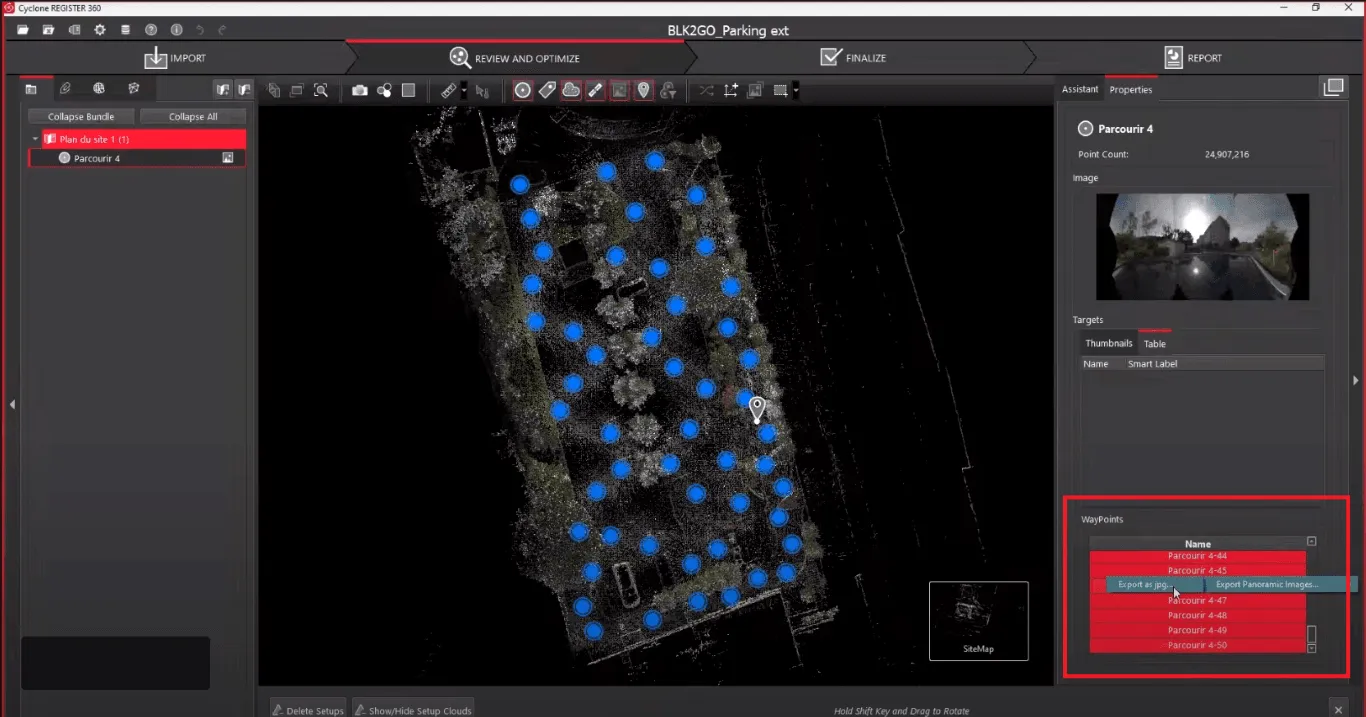
3. Once you are in "Review and Optimize", on your left panel, select the root of the project and from the "Properties" of your project on the right side panel, select all the images. While all the images are selected, right click -> "export panoramic images" -> "export as jpg" and select the folder where you want to save them.
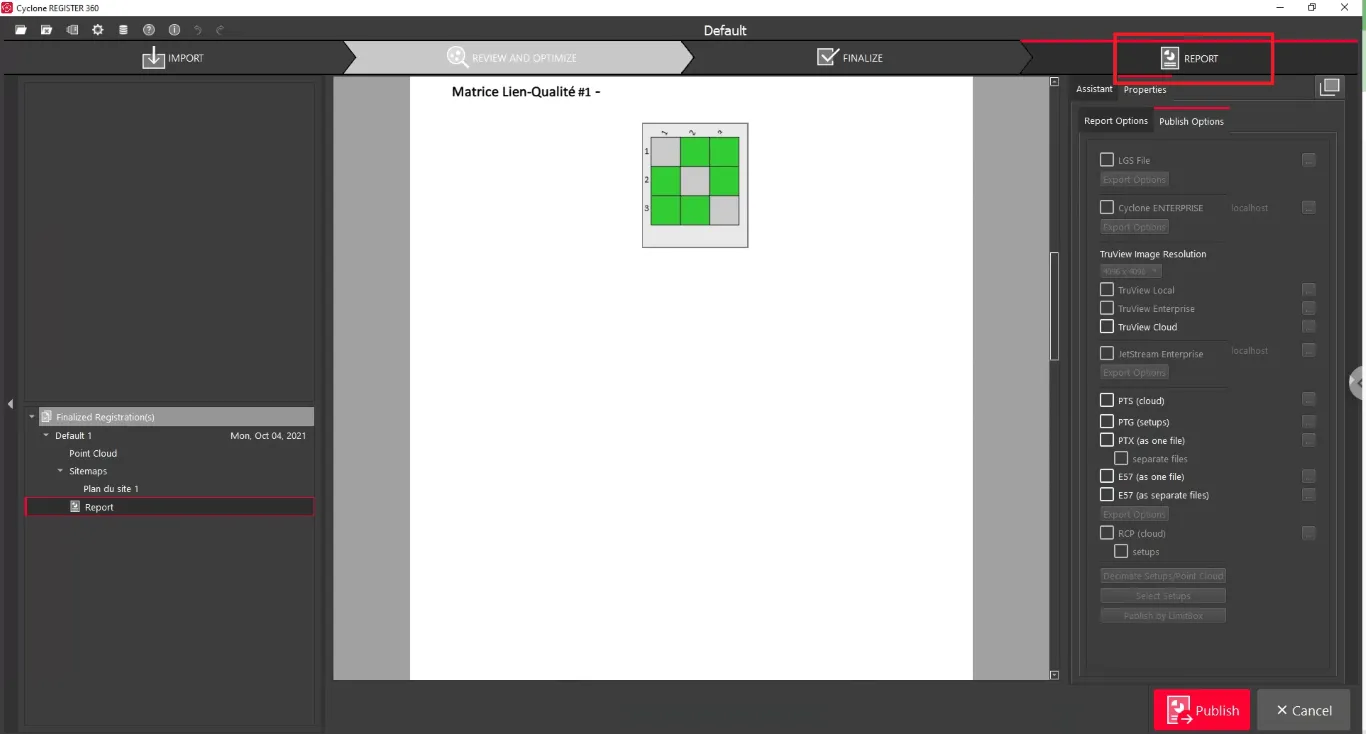
4. Now that we exported the 360 images, we need to export the point cloud and the coordinates of the images in order to be able to link them correctly with the point cloud. Open the "Report" by using the icon in the toolbar at the top right of the window.
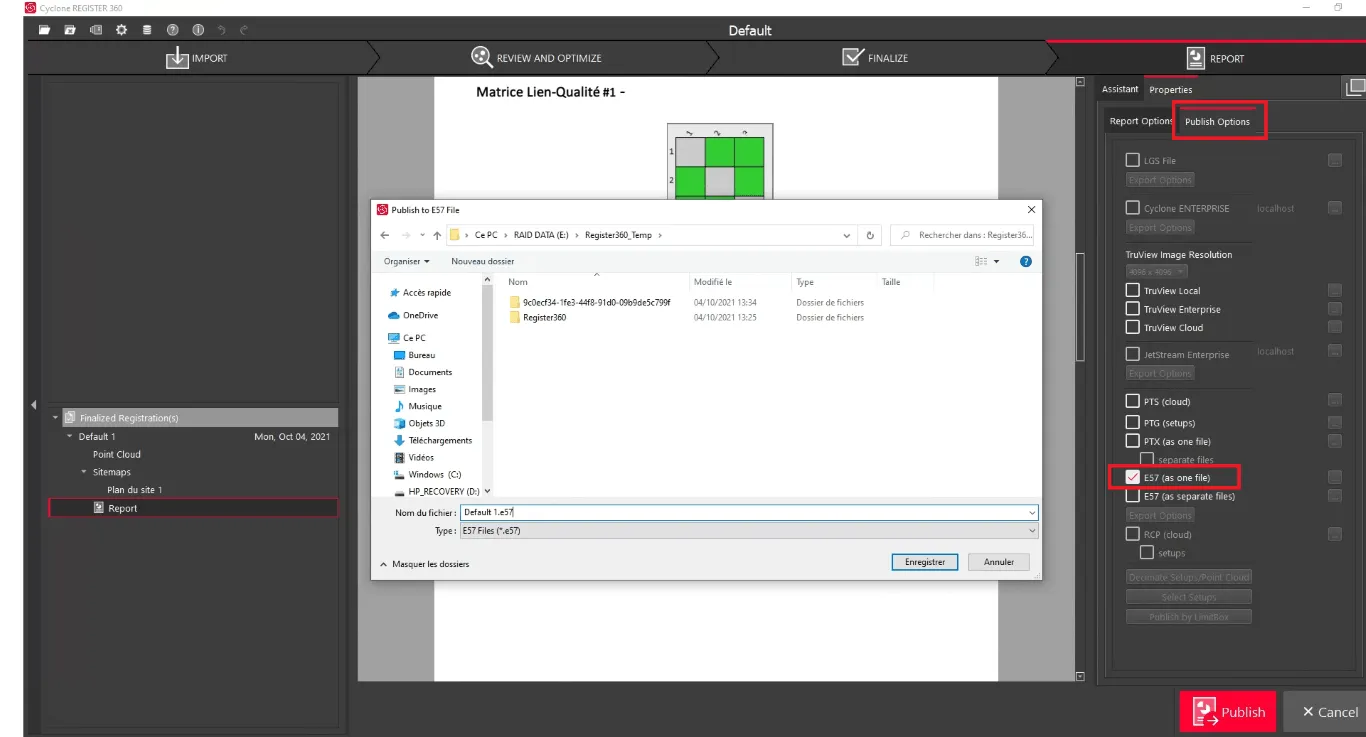
5. From the window "Report" switch to the "Properties" of the project and from the "Publish Options" tick "E57 (as one file)". A new window will open where you choose the location of the export.
6. Before launching the export, tick the "TruView Local" and select the location to store it. Thanks to this, you will have the coordinates of the images exported in a XML file, named "SWLocation.xml".
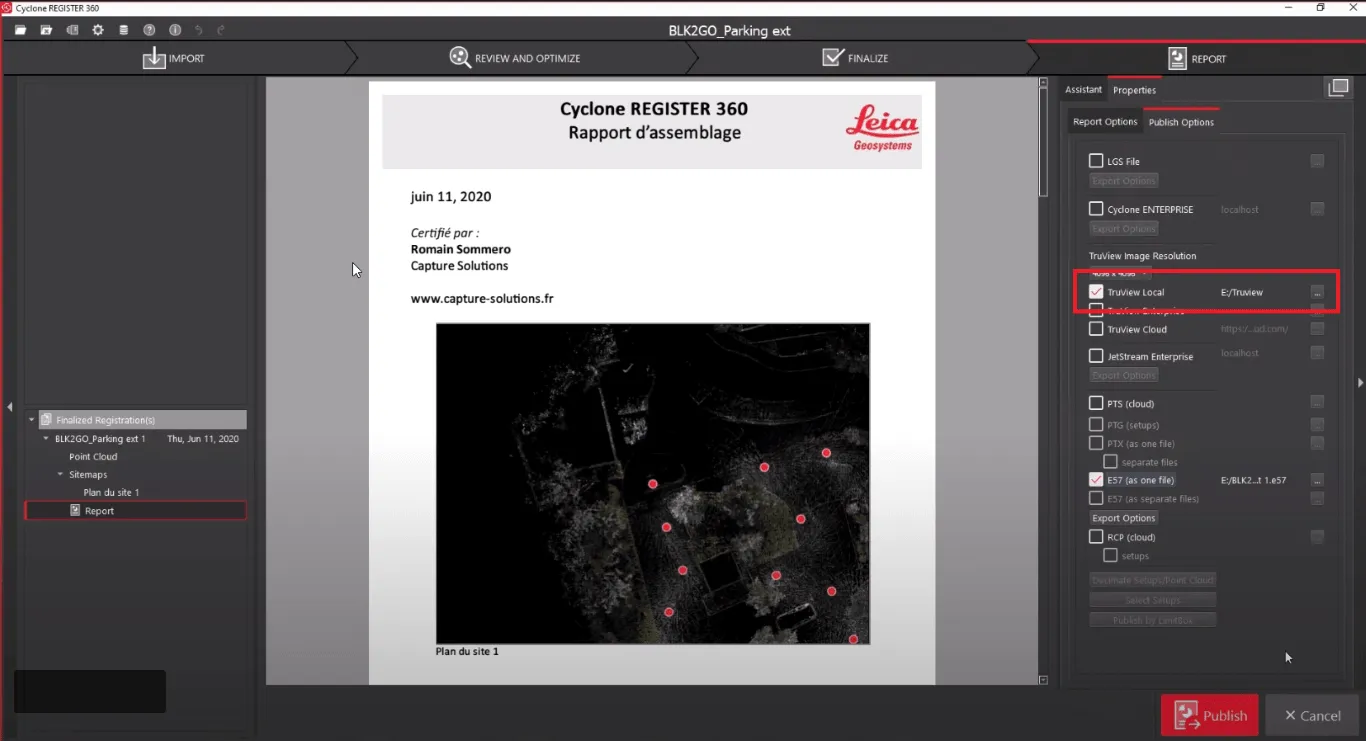
7. With the "E57 as one file" and "TruView Local" ticked, click "Publish" to start the export.
This process might take some time depending on the project size and the number of images. Once this process is finished, you can share the e57 file via our platform by adding it to a project.
To find out how to upload a file to a project, please read this article.
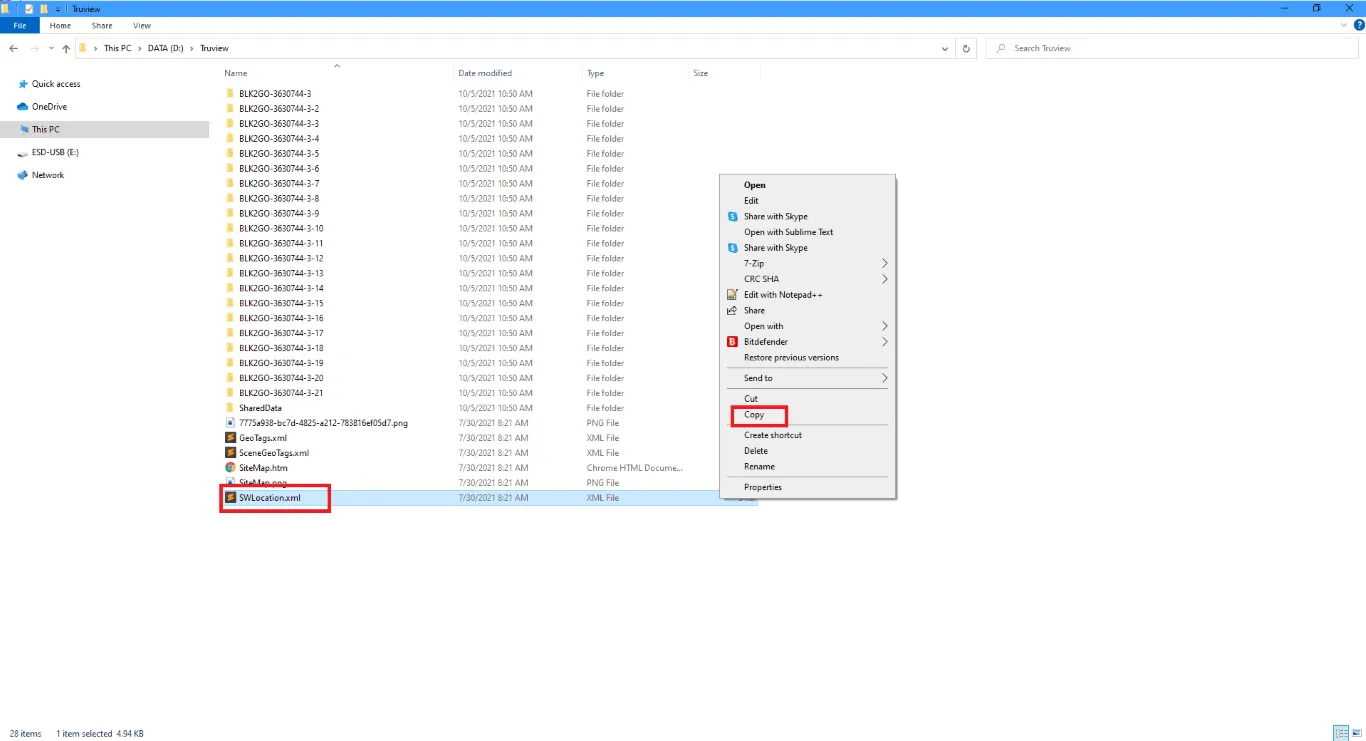
Regarding the images, when the export is finished, find the location selected for TruView and copy "SWLocation.xml".
Paste the "SWLocation.xml" in the folder where you exported the images (step 3).
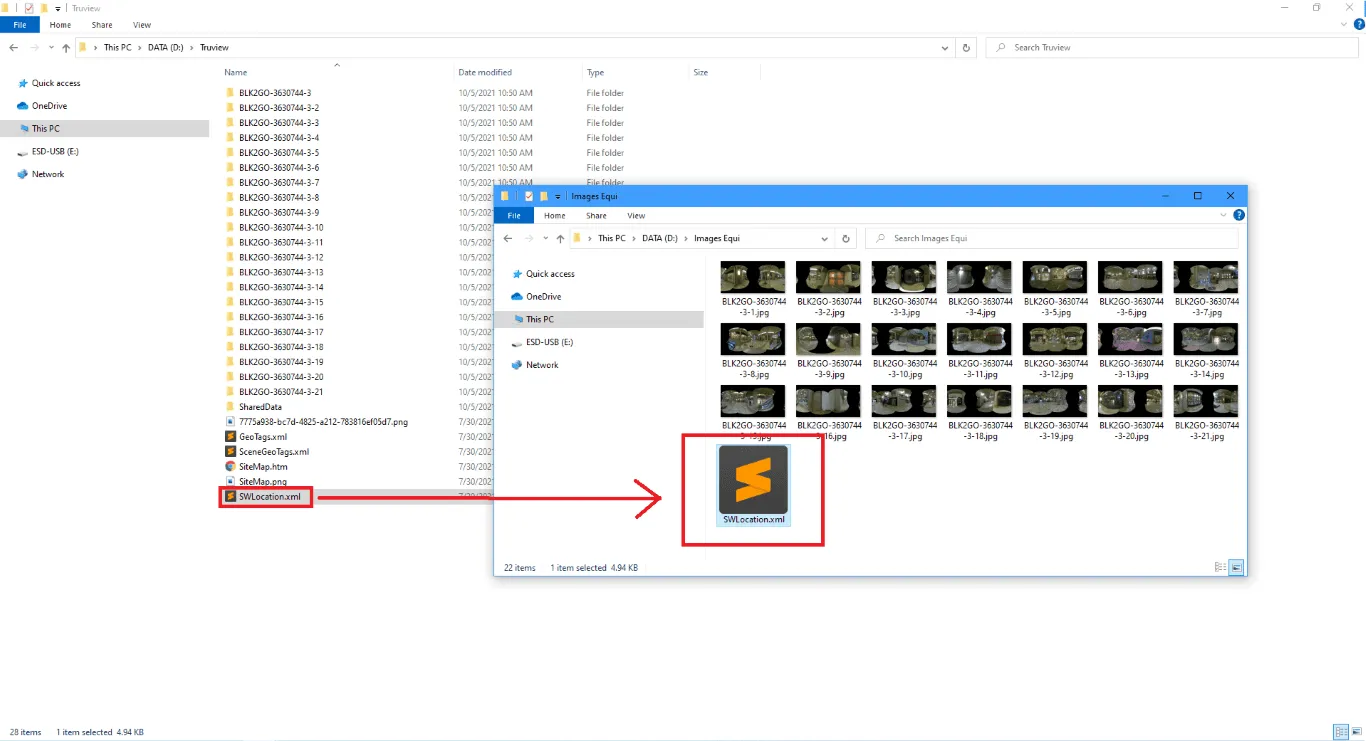
You can zip this folder (with the 360 images and the "SWLocation.xml" inside) and upload it to the platform. For more information on how to upload 360 images on the platform, please read this article.
If you have any question or need any further information, please contact the technical team.